Purpose/End Goal
- To ensure the PayCompass Support Team has authorized access to the merchant account in order to contact Square Support on the merchant’s behalf.
Applies to
- Sales agents on behalf of their merchants
Before beginning this process:
- This section is utilized exclusively by merchants to add staff to their existing Square accounts.
- In this particular instance, the sales agent will be adding PayCompass support as a 'staff member' to the merchant's Square portal.
- There will be times during this particular process where the sales agent will enter fictitious information in order to move on to the next section.
- When it comes time for merchants to add their own staff to their Square portal, they can follow the same steps outlined and add the correct information as it pertains to their employees.
Addressing Prompts for Square Plus
- Throughout this process, the sales agent may be prompted to try "Square Plus" for 30 days. Click "Start Free Trial." No credit card information is required.
Procedure
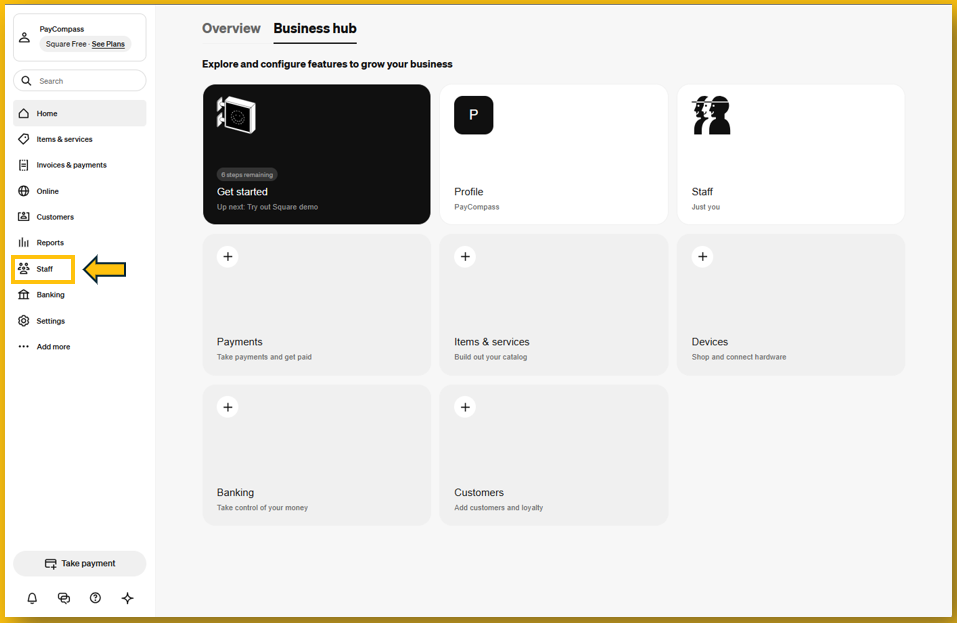
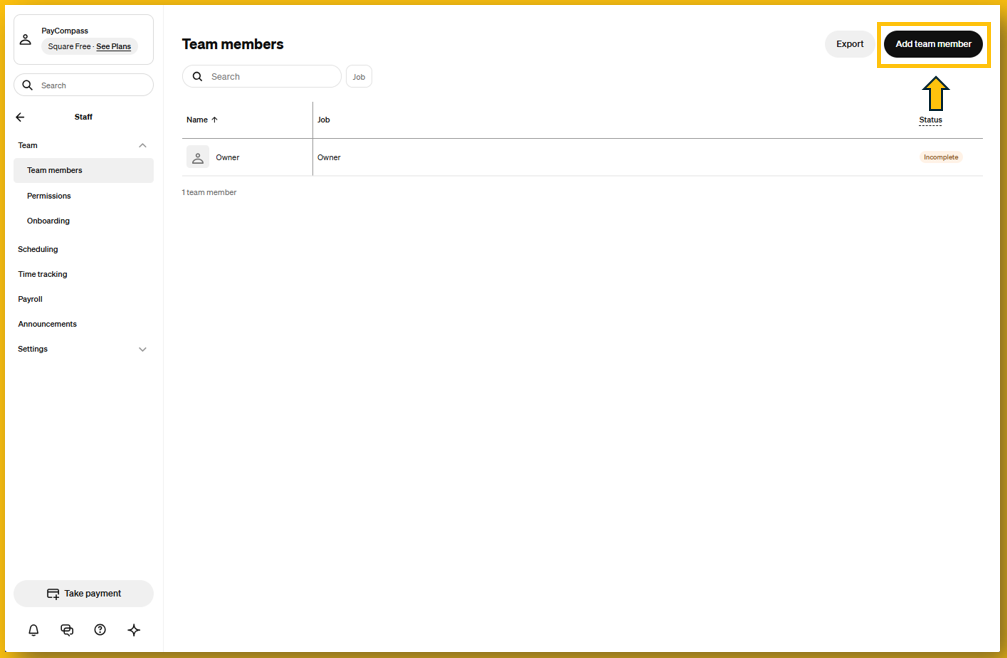
1. Log into Square and click "Staff" to the left of the screen. See image below.
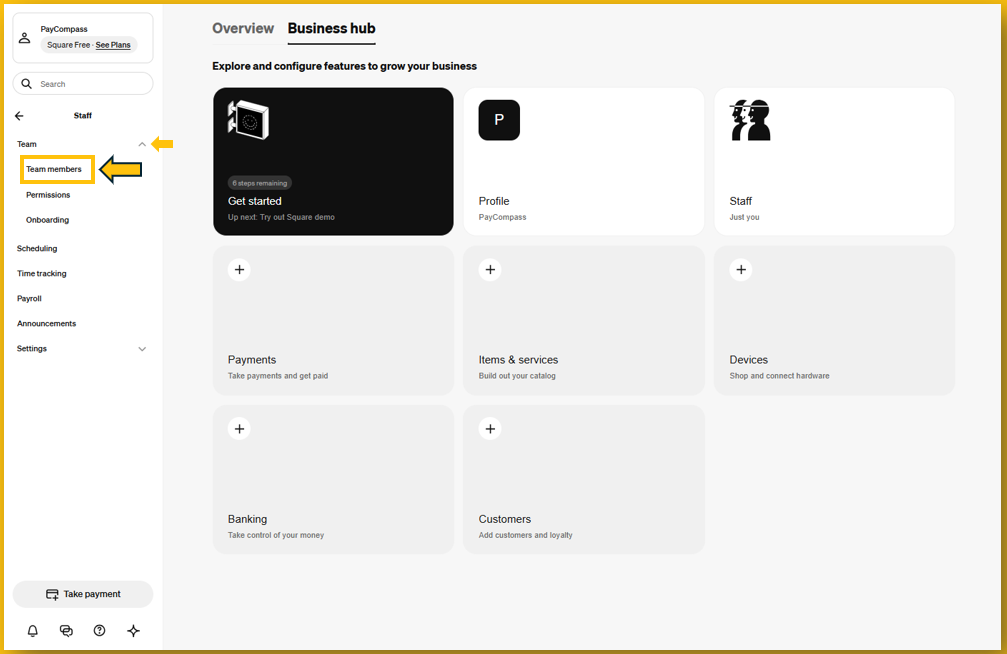
2. Tap the dropdown to the right of the word "Team." Click "Team Members." See image below.
3. On the following screen, navigate to the top right and click "Add Team Member." See image below.
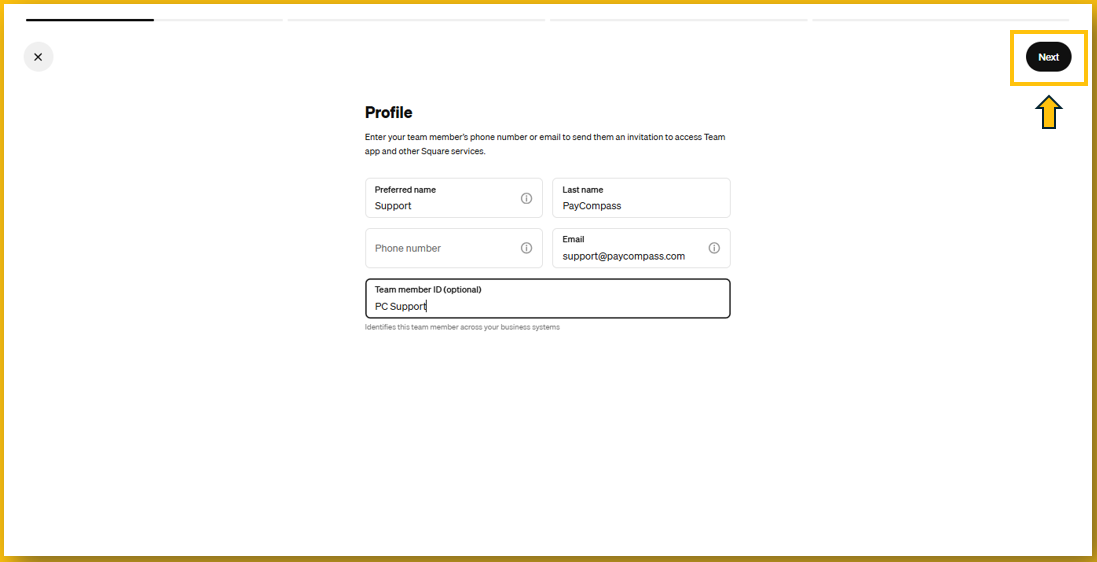
4. The following screen will have the "Profile" section. Enter the following information:
- Enter "Support" in the "Preferred Name" field
- Enter "PayCompass" in the "Last Name" field
- Forgo the "Phone Number" field
- Enter "support@paycompass.com" in the "Email" field
- Enter "PC Support" in the "Team Member ID (optional)" field
Once all fields have been completed, navigate to the top right and click "Next." See image below.
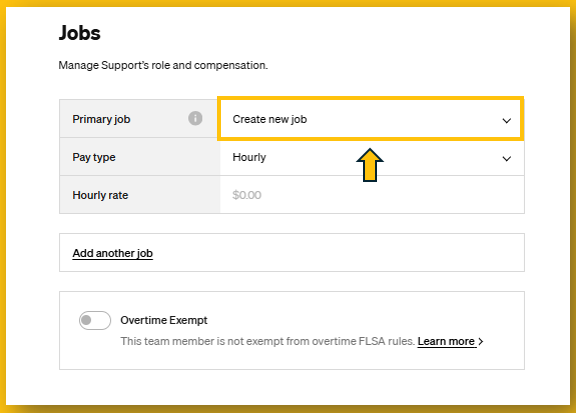
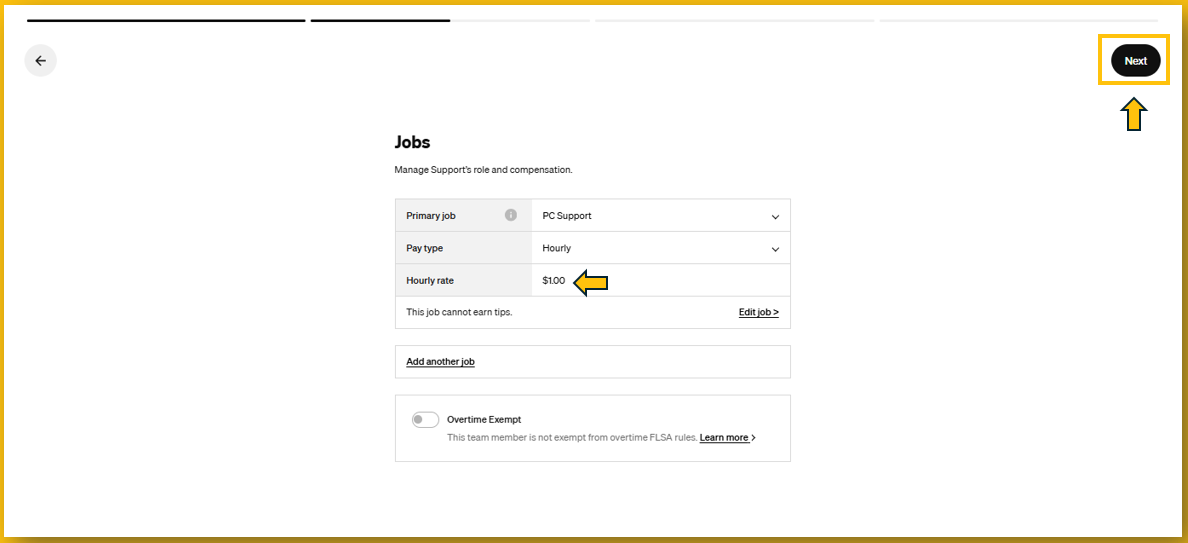
5. The following screen is the "Jobs" section. This is where fictitious information will be entered in order to move to the next screen. Click "Create New Job." See image below.
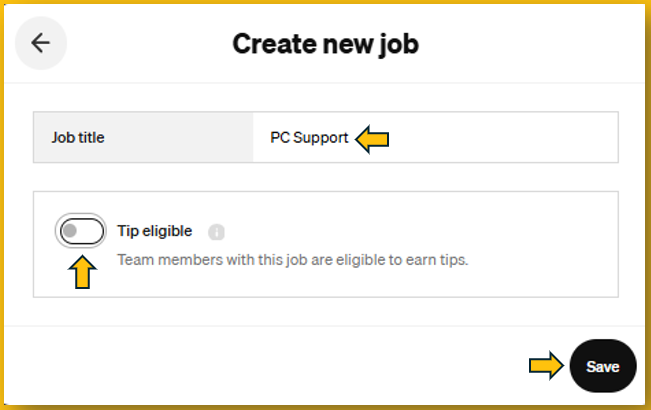
6. Enter "PC Support" in the blank field next to "Job Title," toggle "Tip Eligible" off, and click "Save." See image below.
7. Enter $1.00 in the "Hourly rate" field. Navigate to the top right and click "Next." See image below.
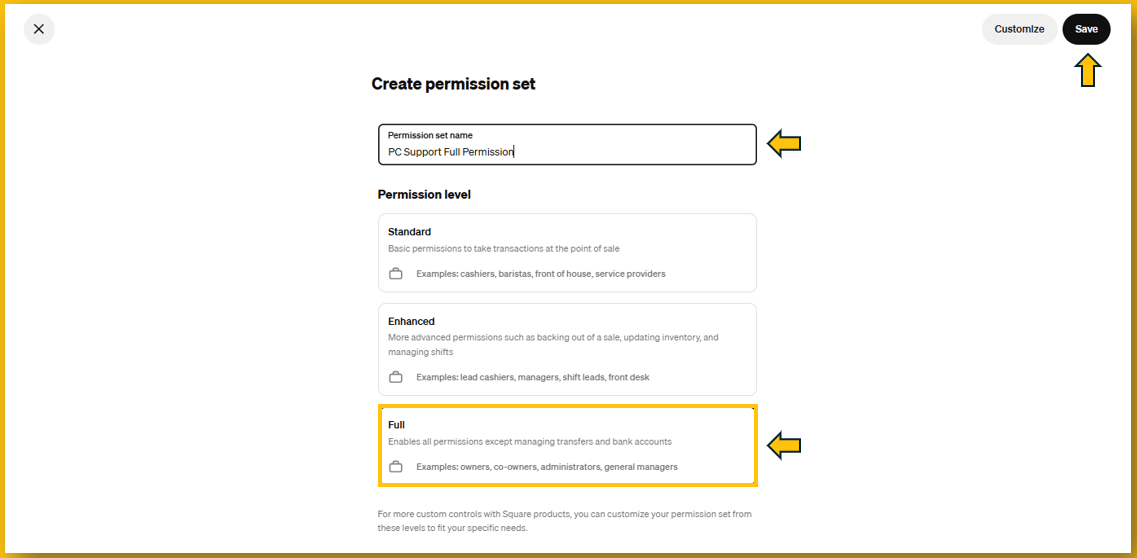
8. The following screen is the "Access" section. Tap the dropdown to the right of "Permission Set" and click "Create Permission Set." See image below.

9. In the "Permission Set Name" field, enter "PC Support Full Permission." The "Permission Level" section beneath it has three levels: Standard, Enhanced, and Full. Select "Full", navigate to the top right, and click "Save." See image below.
10. Clicking "Save" from the previous screen will take the user back to the original "Access" screen. Toggle the "Authorized Representative" button. In the "Create a Passcode for Support" section, clear out any prepopulated numbers and enter the following numbers as they appear here: 8950. Navigate to the top right and click "Save." See image below.

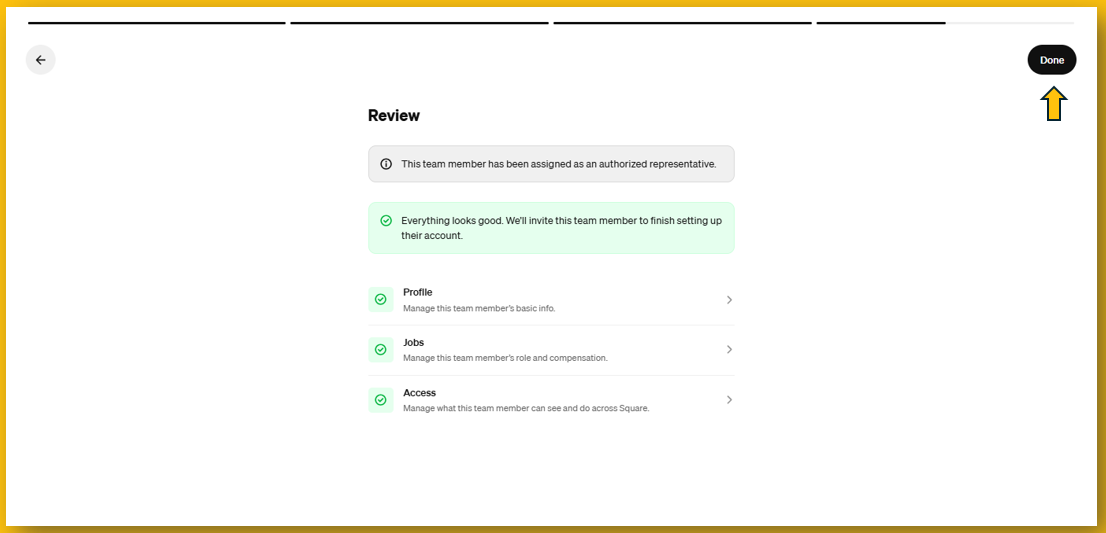
11. The next screen will be the "Review" screen. If everything was entered correctly, there will be green checkmarks to the left of "Profiles" "Jobs" and "Access." If not, there will be prompts to fix any errors. If everything looks good, navigate to the top right and click "Done." See image below.