PART 1: Confirming if a Transaction was Authorized in MX Connect
Step 1: Visit https://mxconnect.com/#/login
Step 2: Sign Into Mx Connect with your username and password.
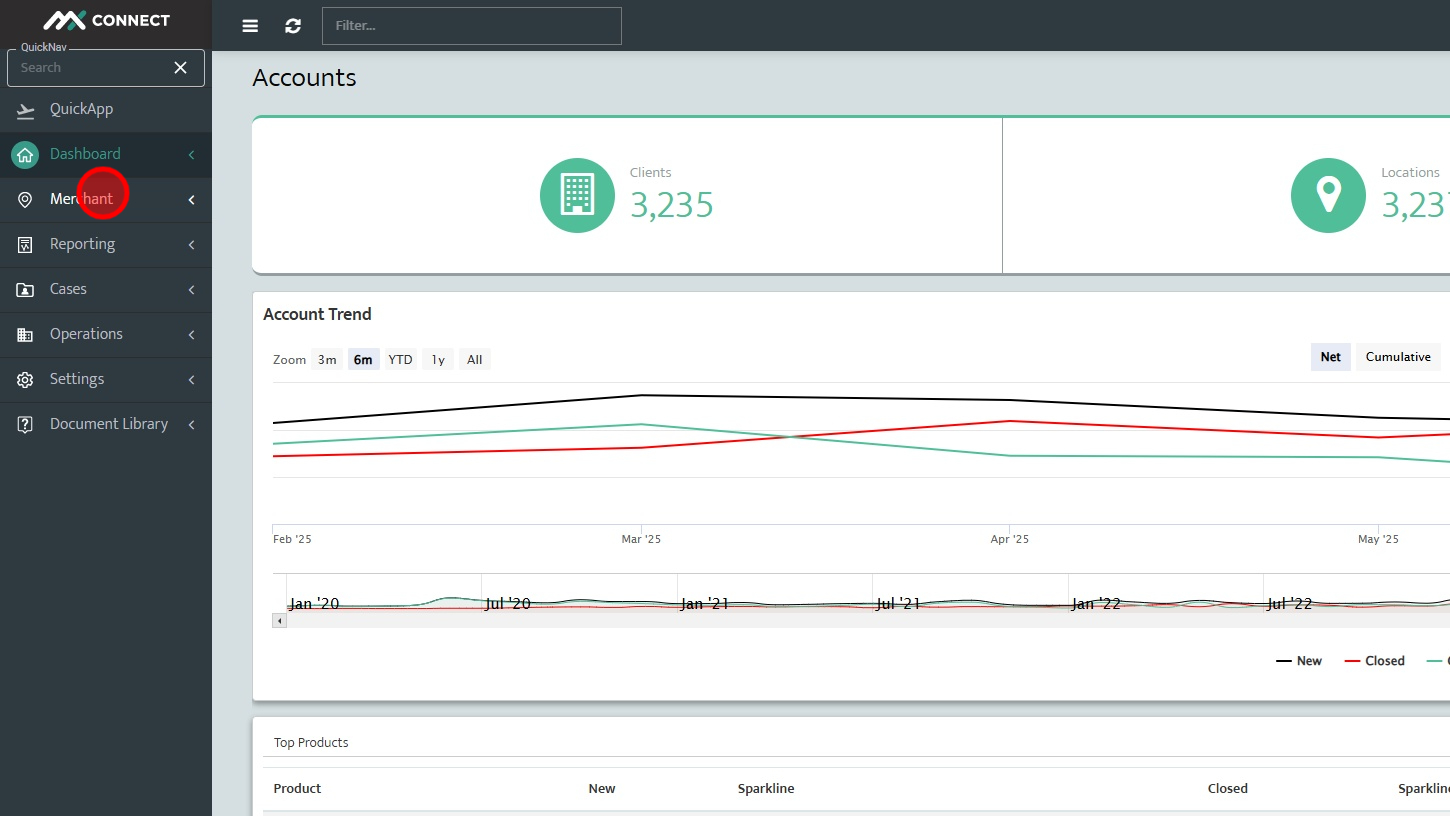
Step 3: Click "Merchant"
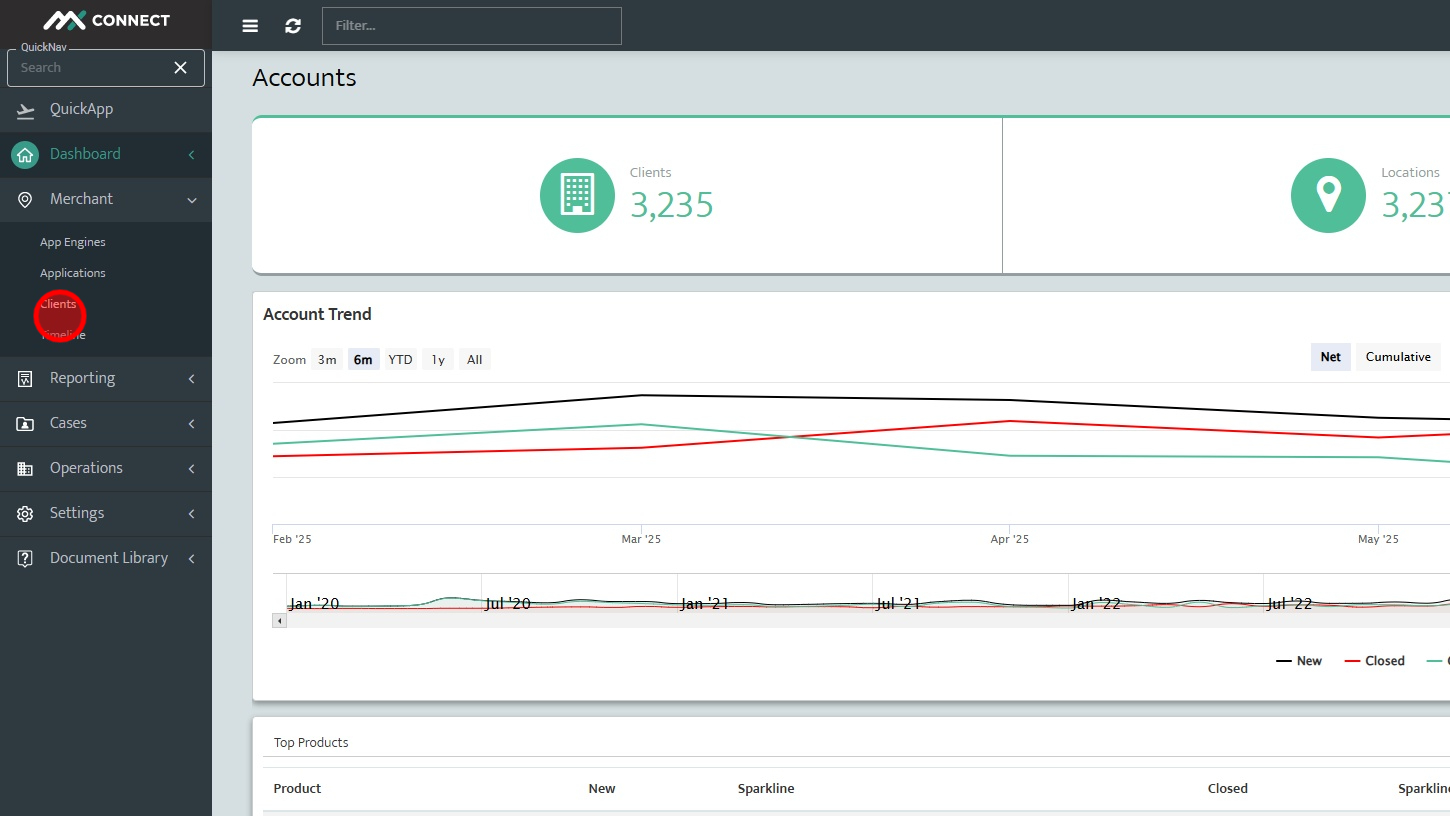
Step 4: Click "Clients"
Step 5: Use search bar to search by MID # or DBA
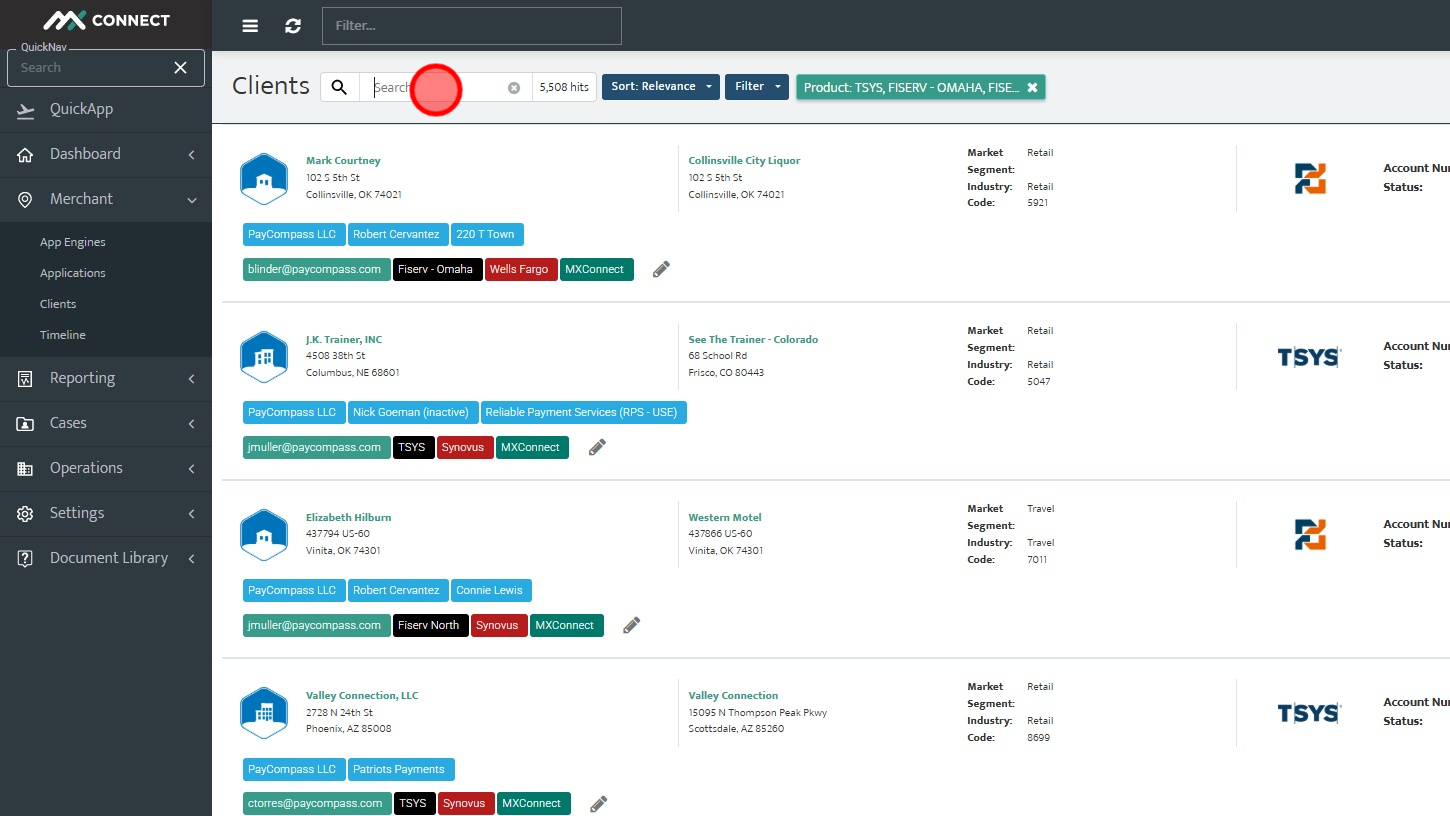
Step 6: Click on the account number of the MID you are looking for.
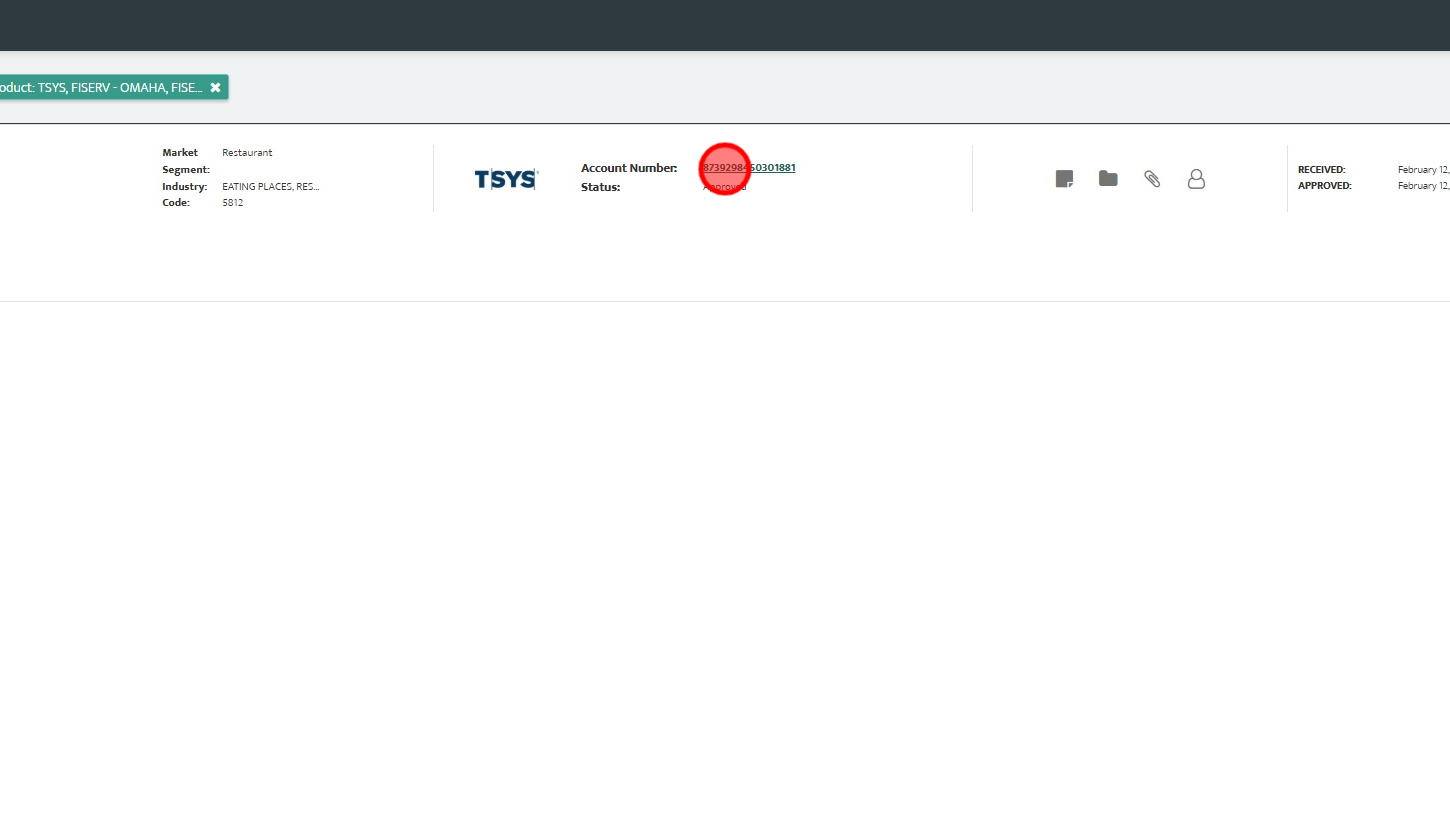
Step 7: Click "Reports"
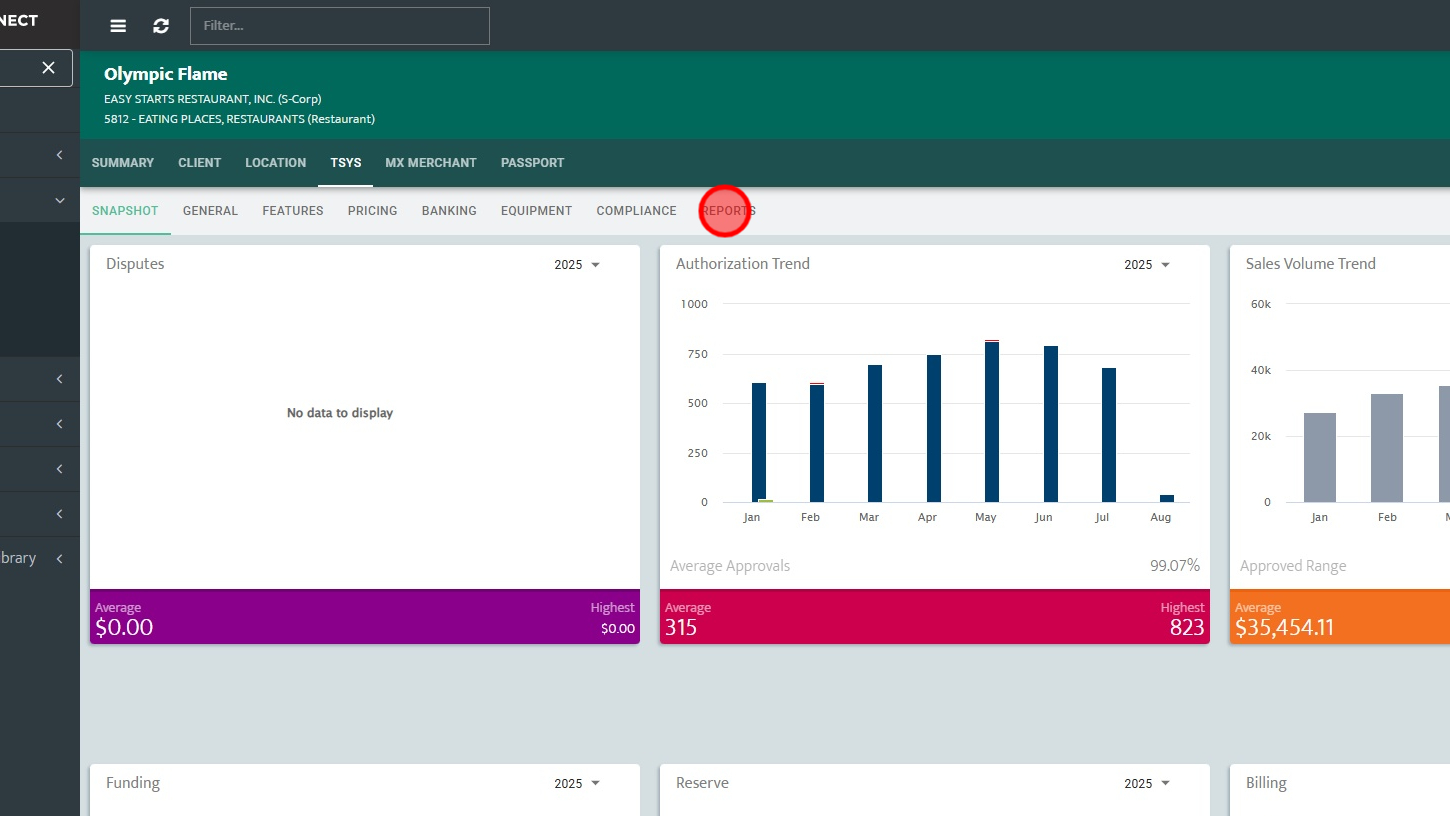
Step 8: Click "Authorizations"
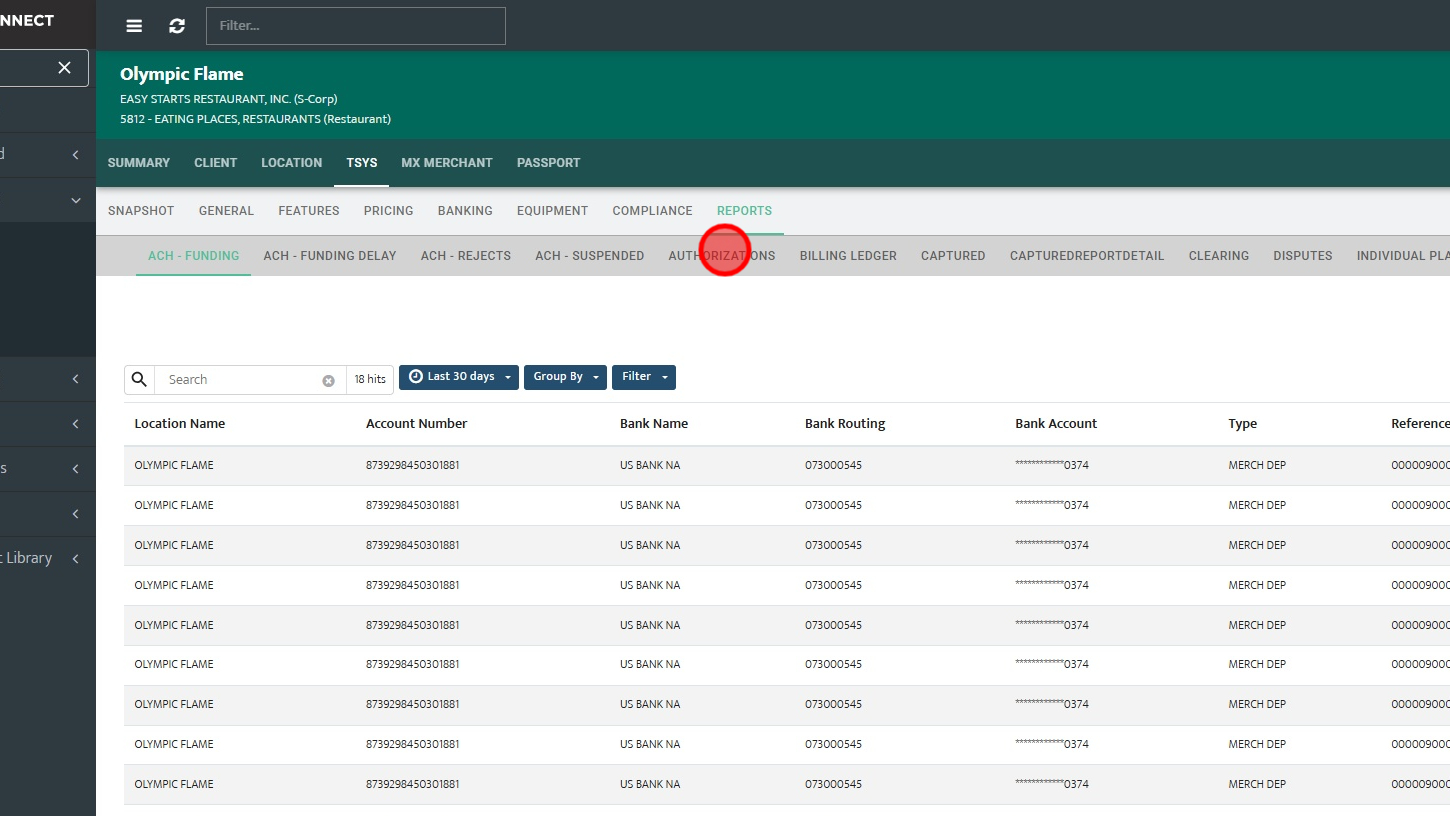
Step 9: Click "Filter"
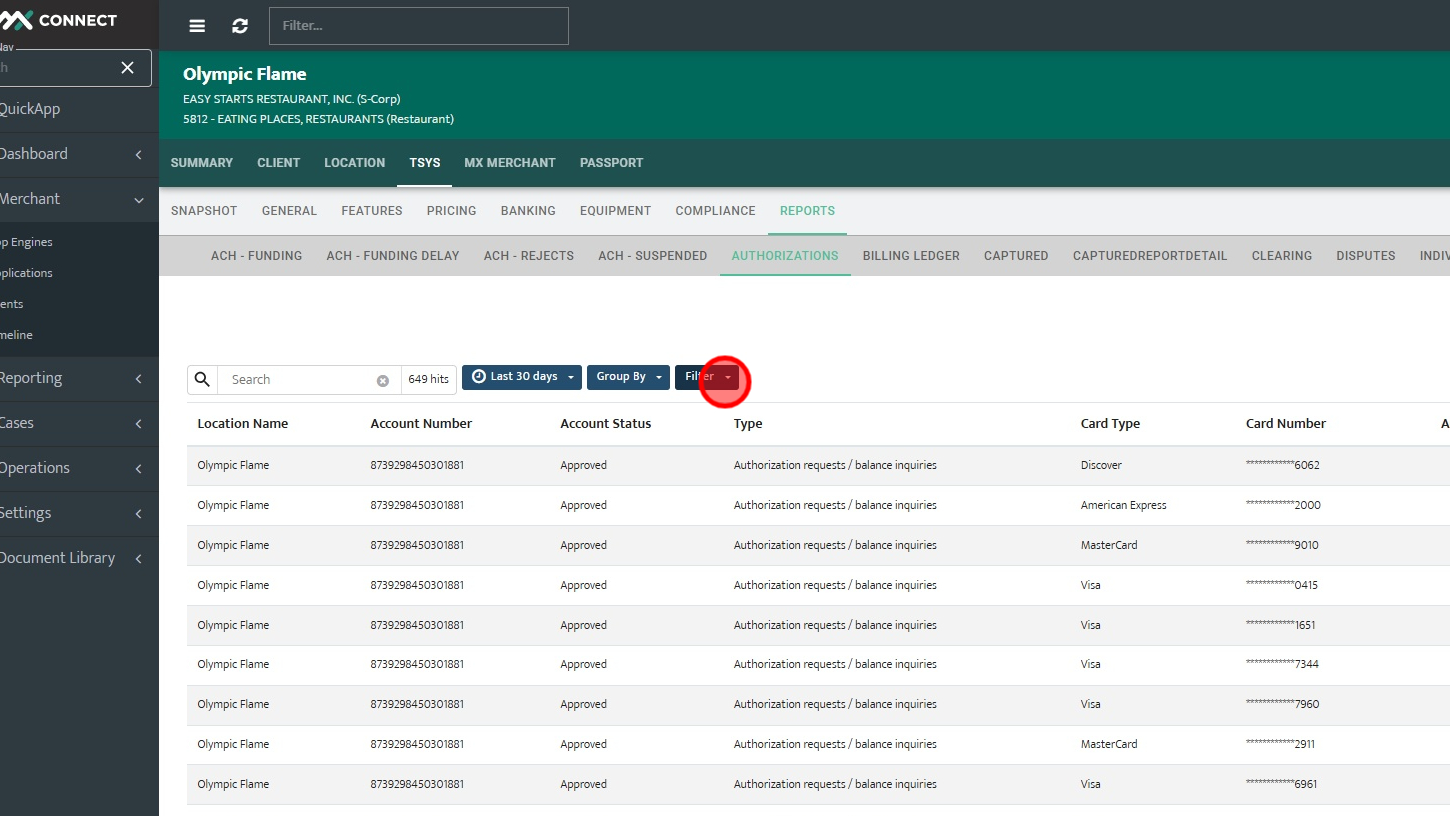
Step 10: Click "Card Number" and enter the last 4 of the card number for the transaction you are looking for. Then hit Apply.
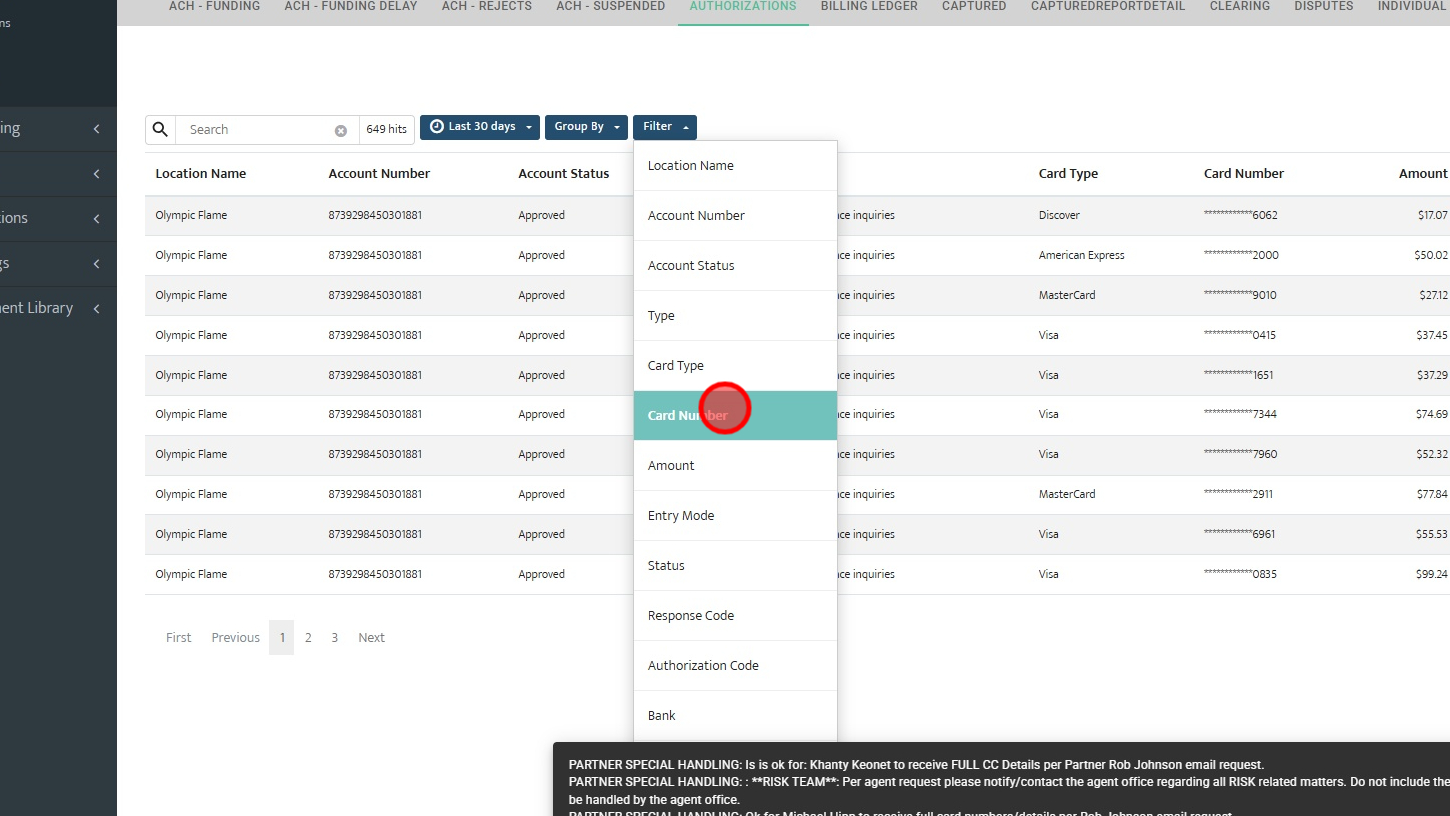
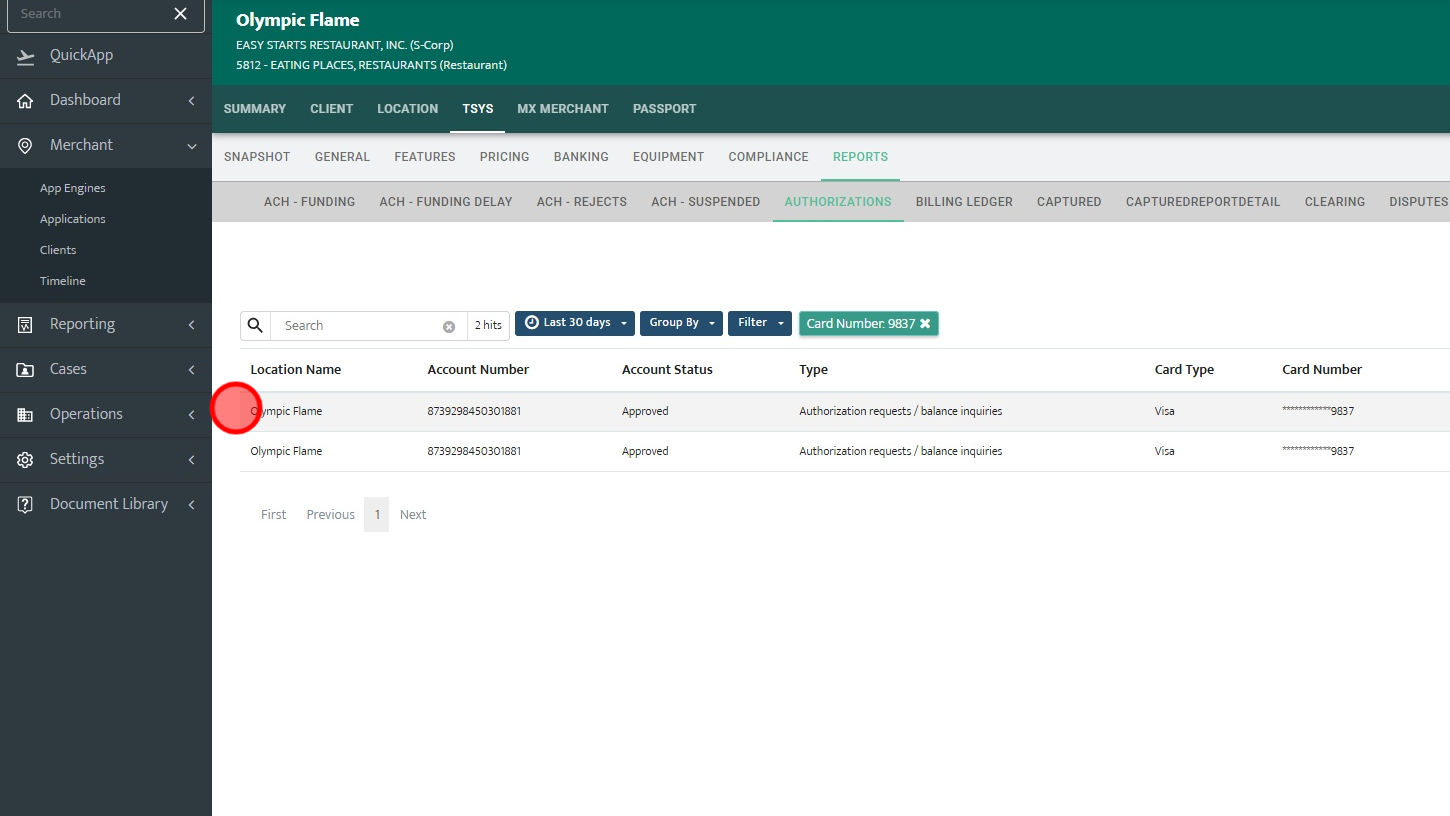
Step 11: Transactions will be shown based on filter criteria. If you see the transaction you are looking for, the transaction has been successfully authorized.
PART II: Checking If a Transaction Was Captured in MX
Step 1: Visit https://mxconnect.com/#/dashboard/accounts
Step 2: Login to MxConnect. Once logged in click "Merchant". In the instance below, we are going to confirm if a transaction for $0.01 on a card ending in 4782 was captured.
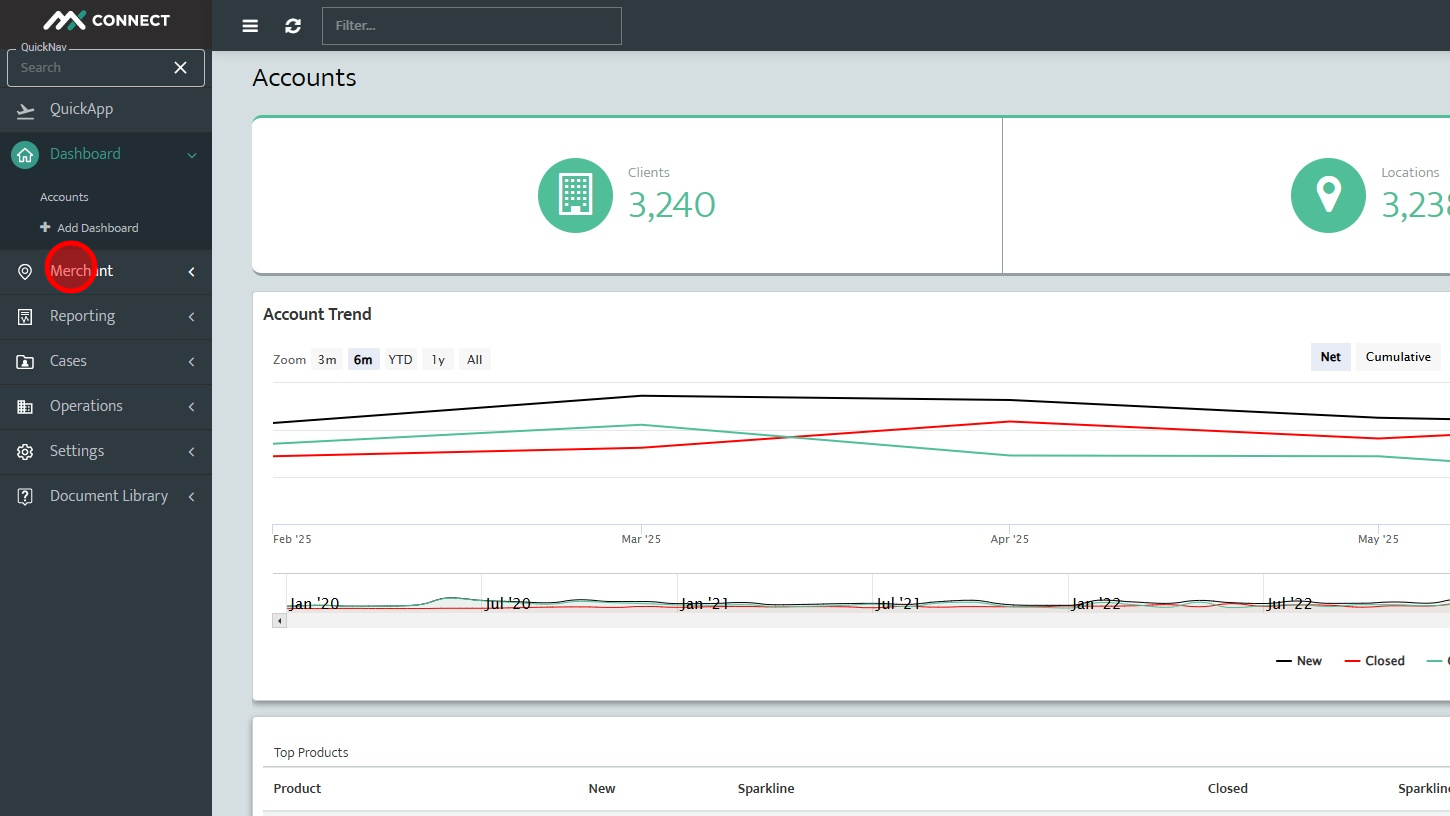
Step 3: Click "Clients"
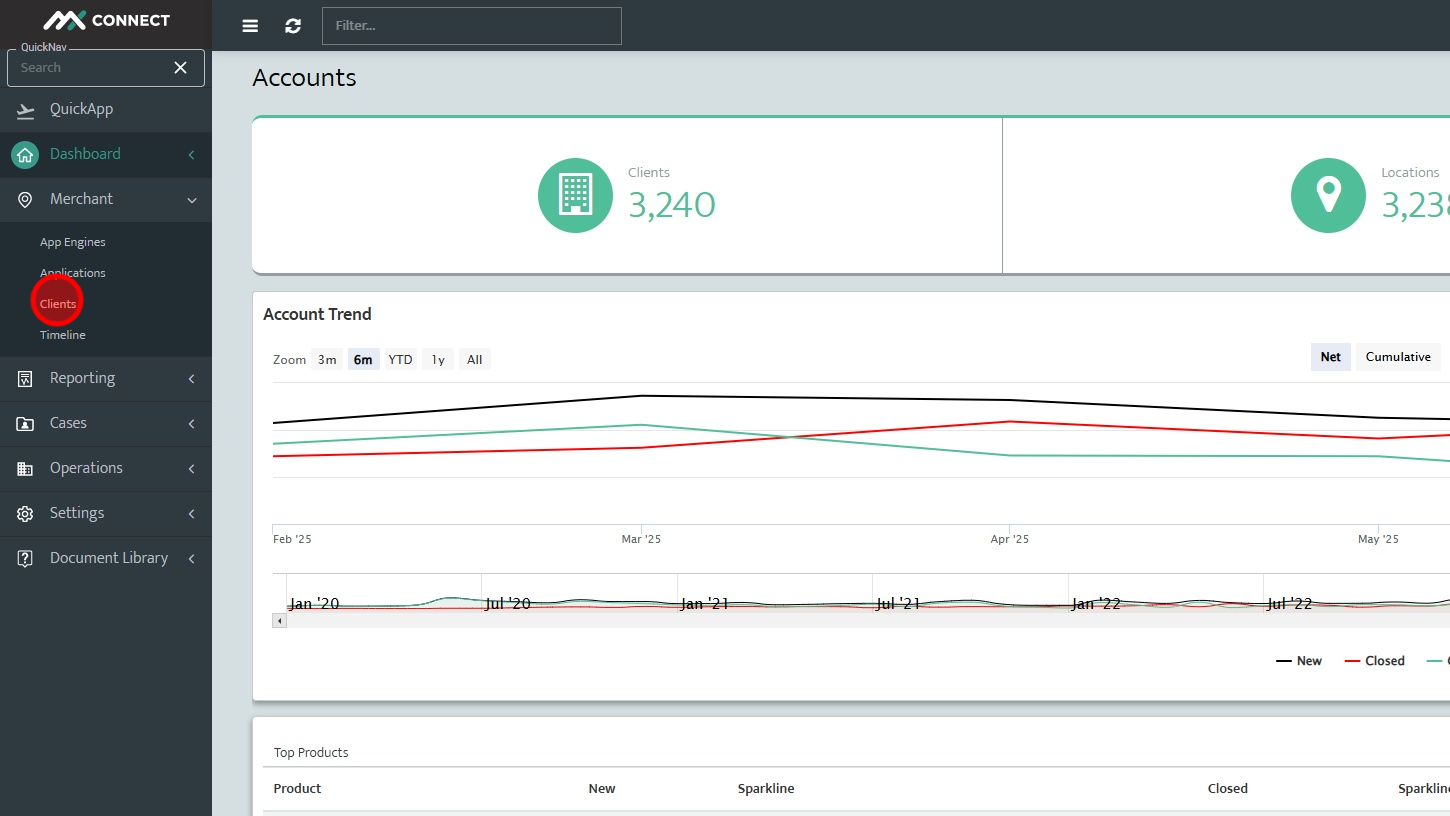
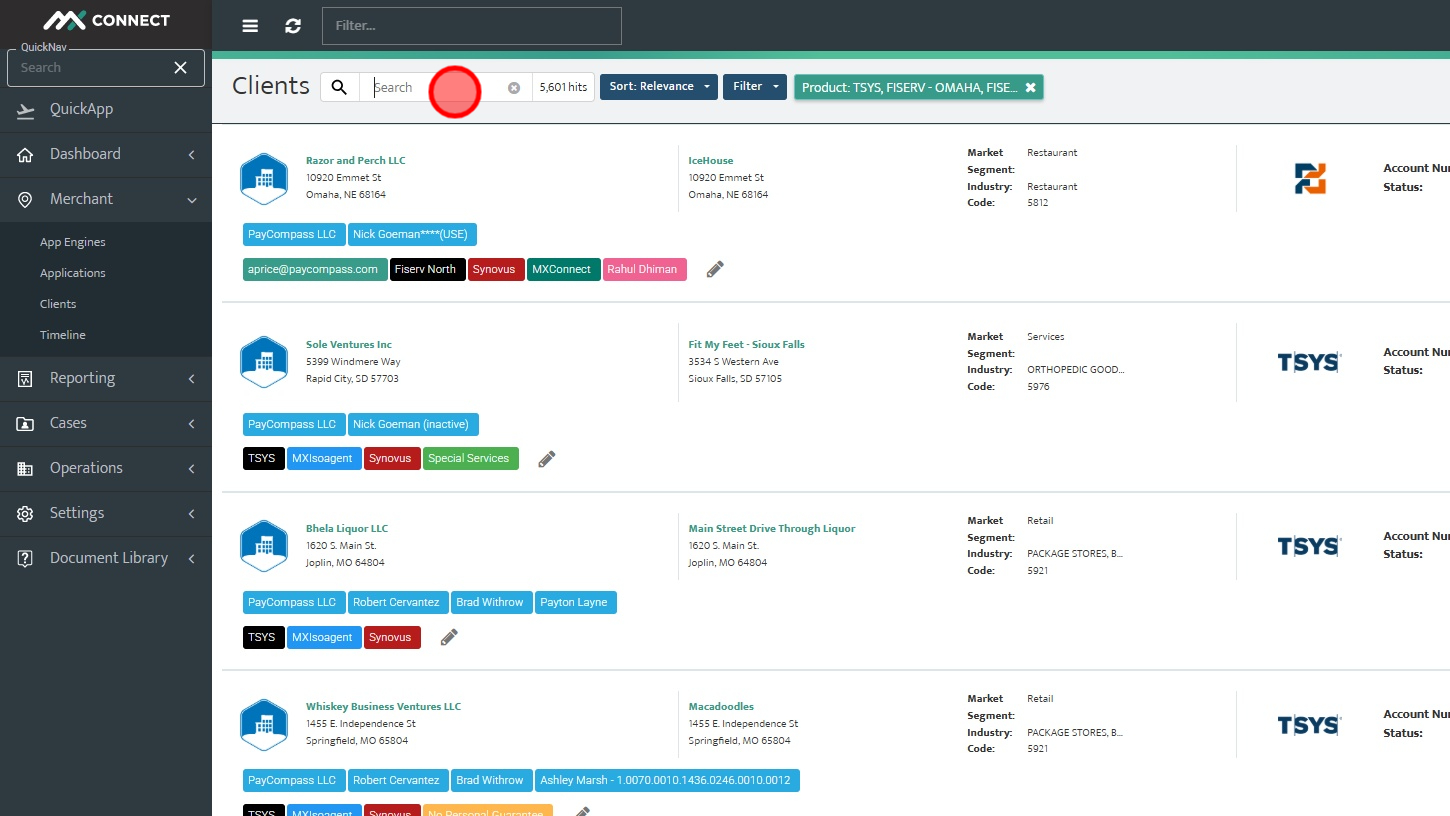
Step 4: Search for the MID you need to check if a transaction was captured on.
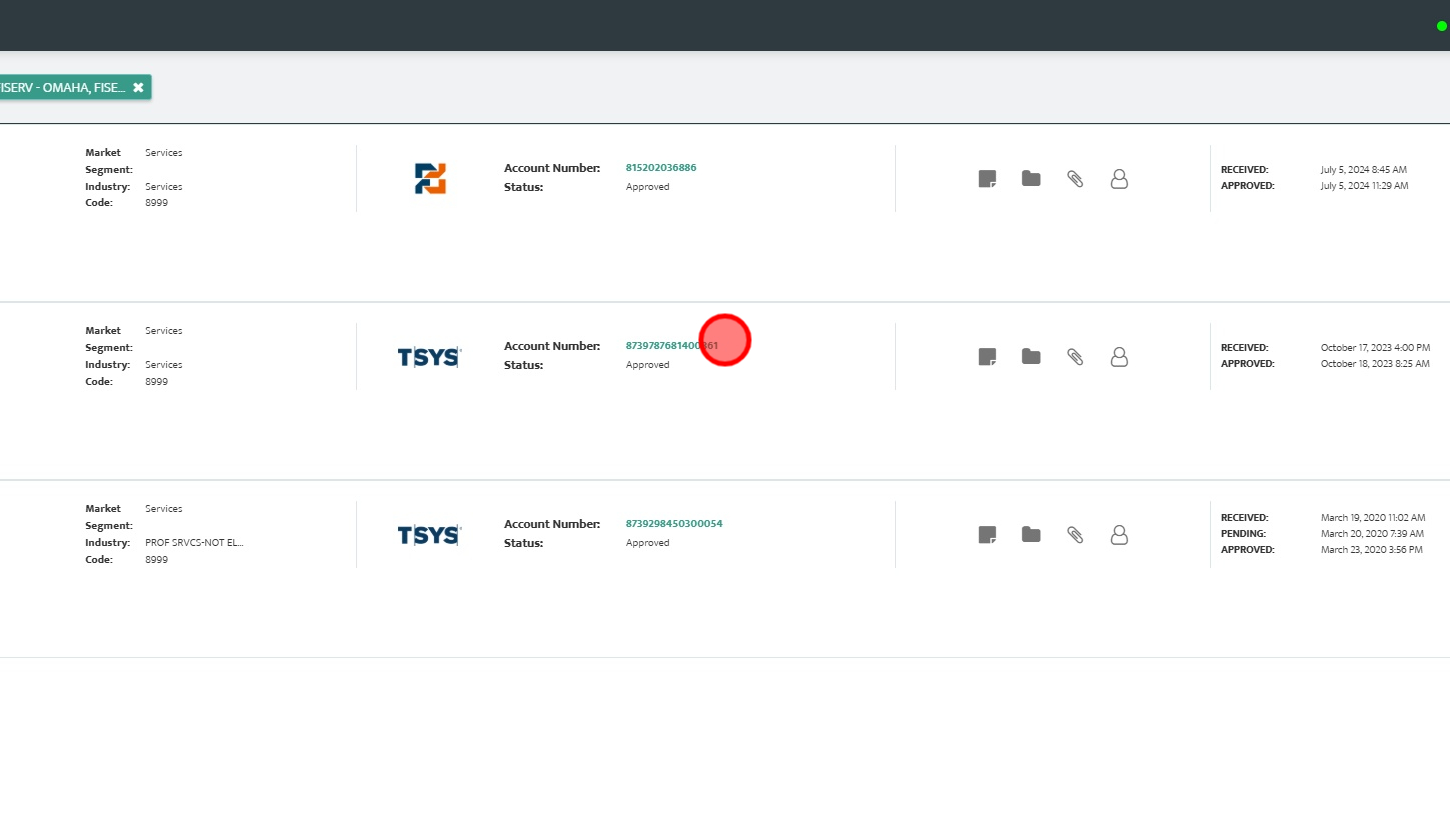
Step 5: Click the MID of the account you are looking for. This will take you directly to the sponsor bank tab of the account.
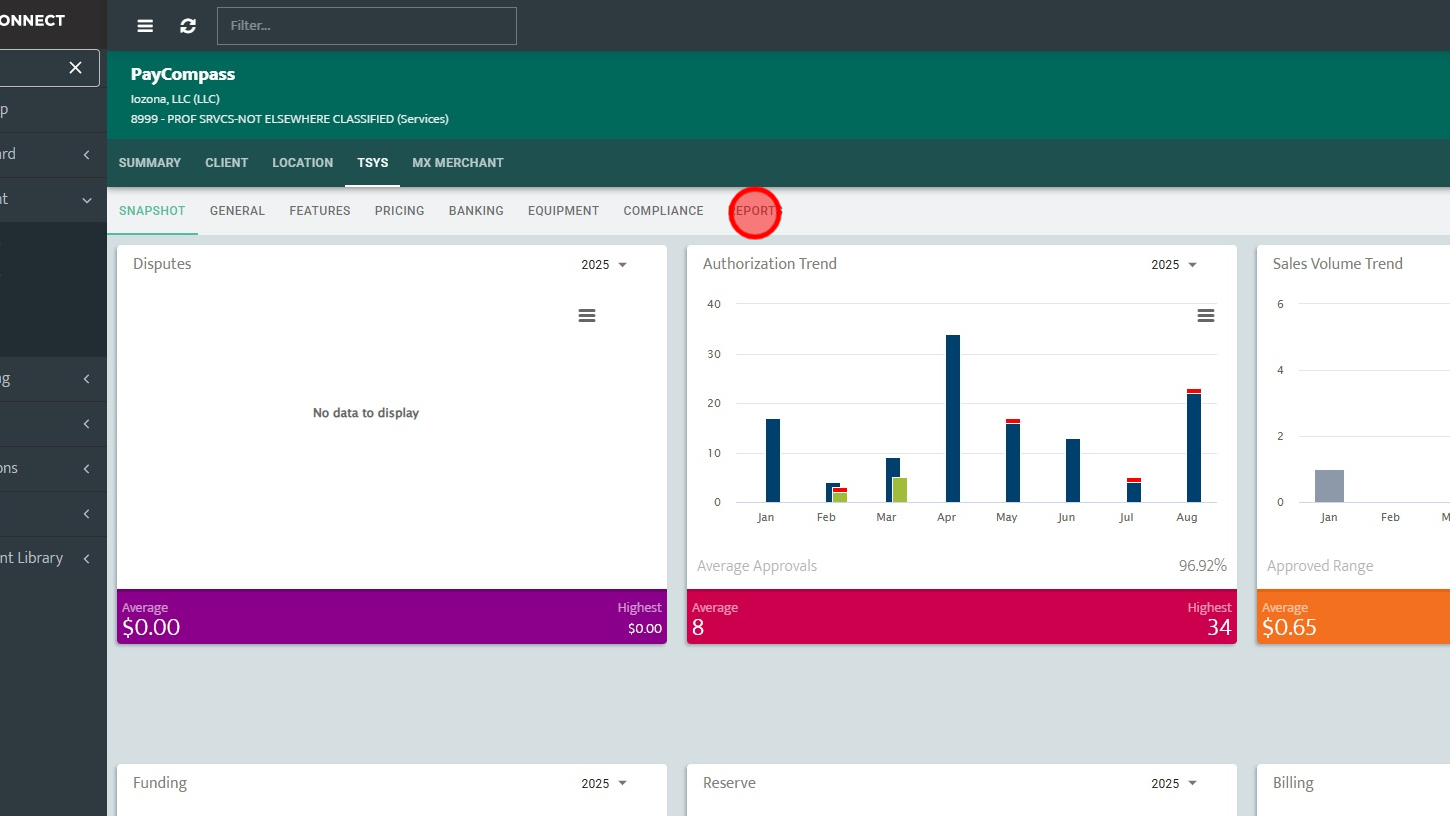
Step 6: Click "Reports"
Step 7: Click "Captured"
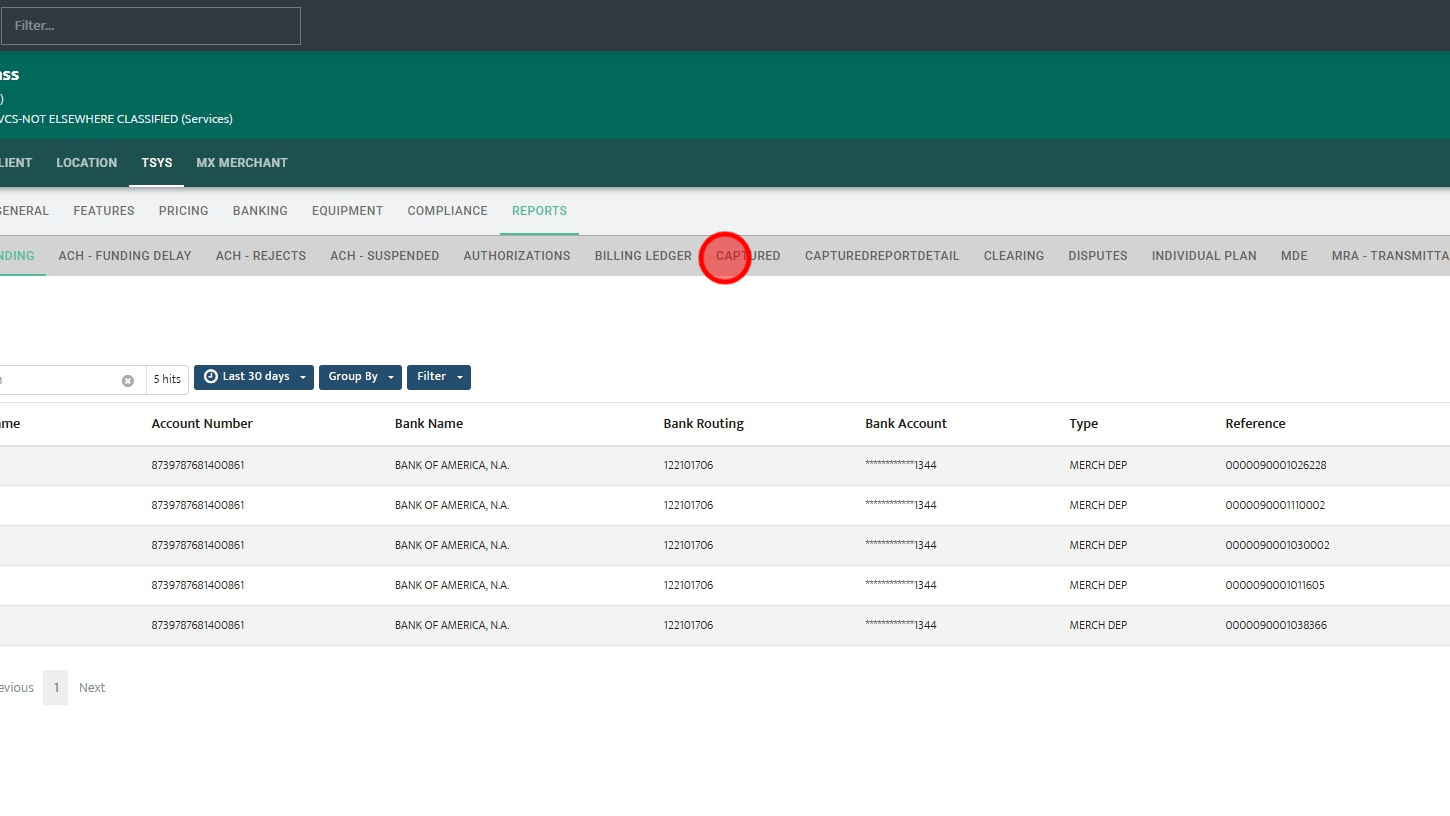
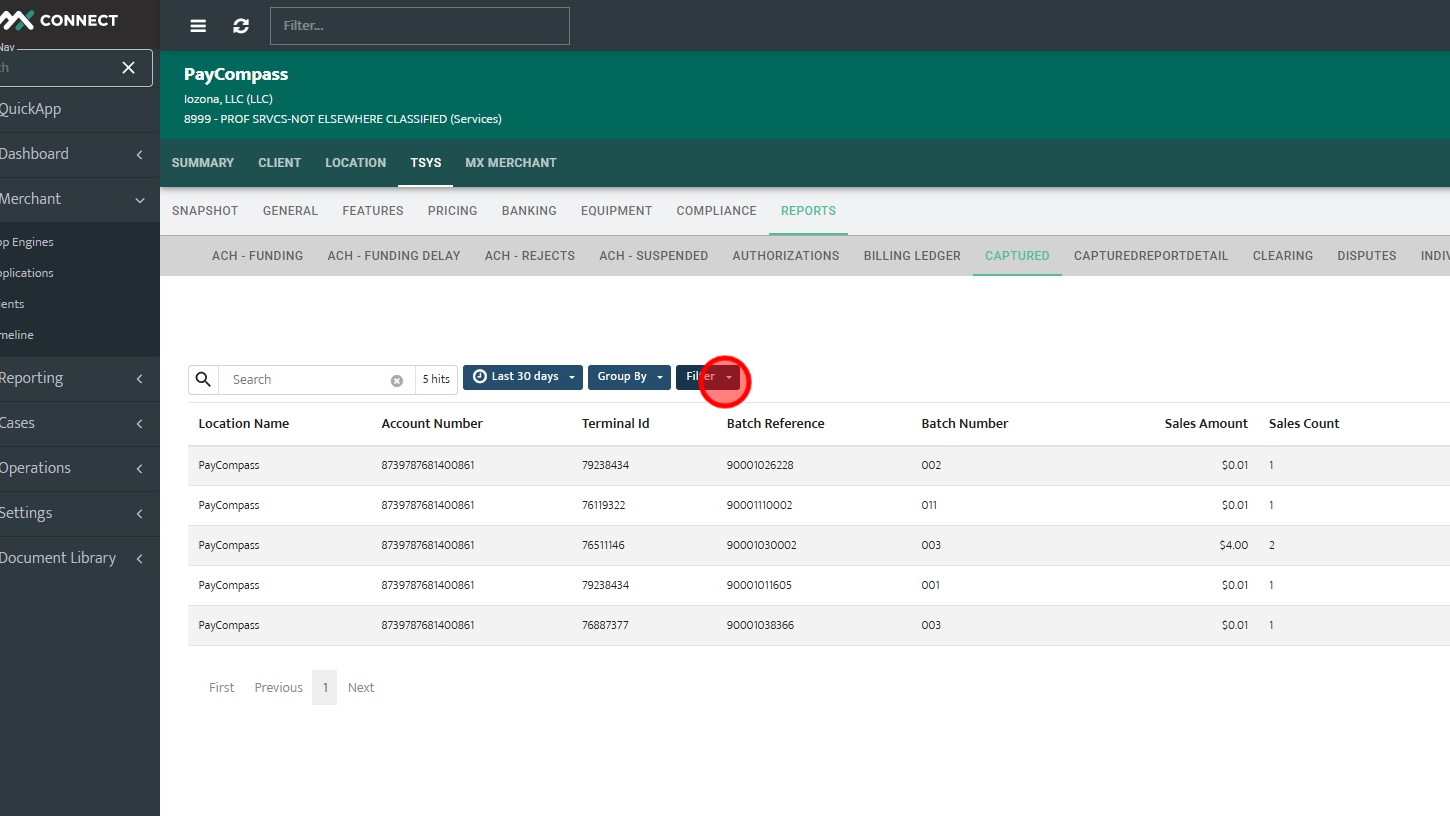
Step 8: Click "Filter" to filter by different transaction identifiers. The main ones I typically use is Last 4 of Card, Amount, and Date.
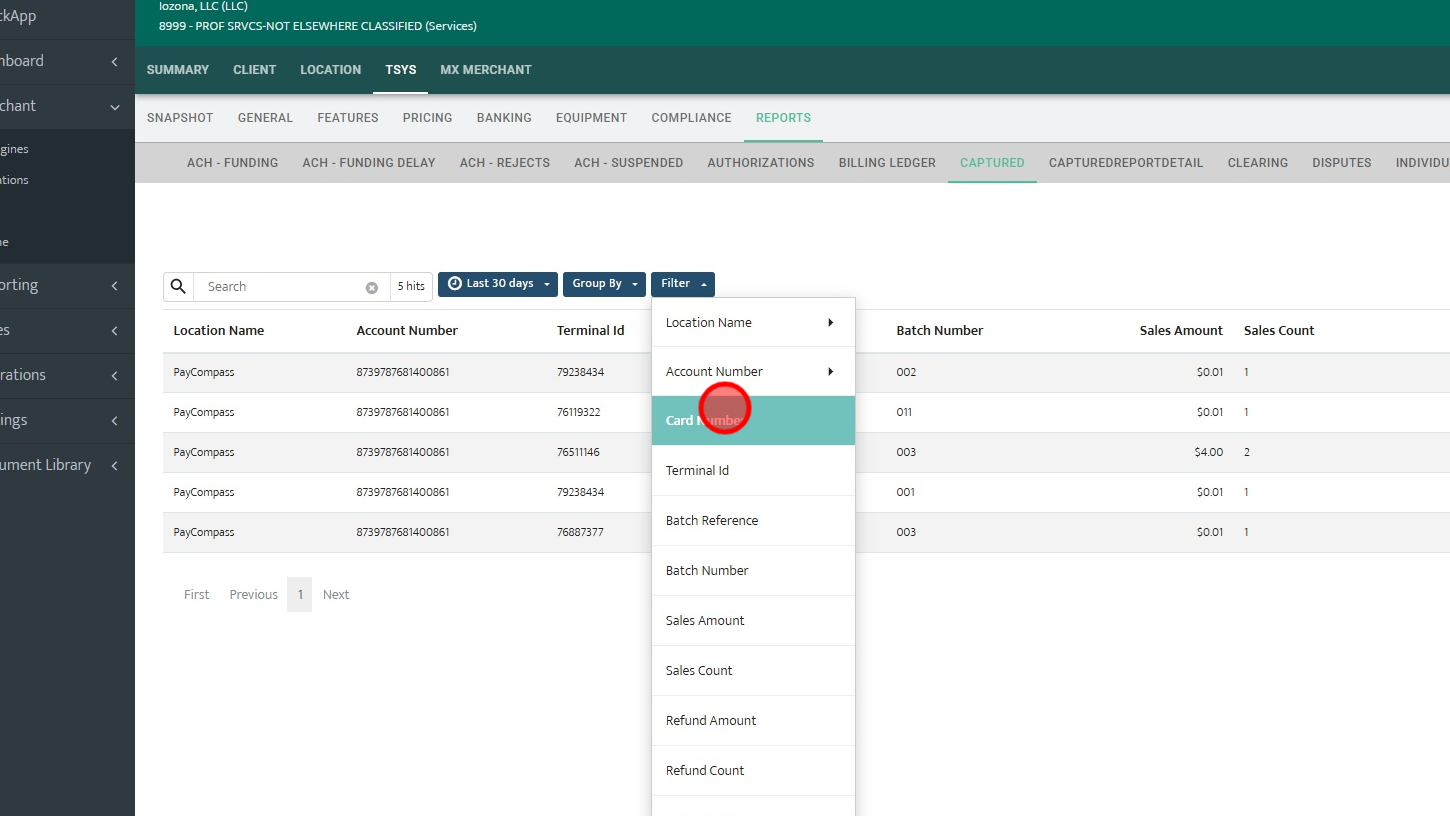
Step 9: For this example I will use "Card Number". This is typically the one I use first and will add additional filters if needed.
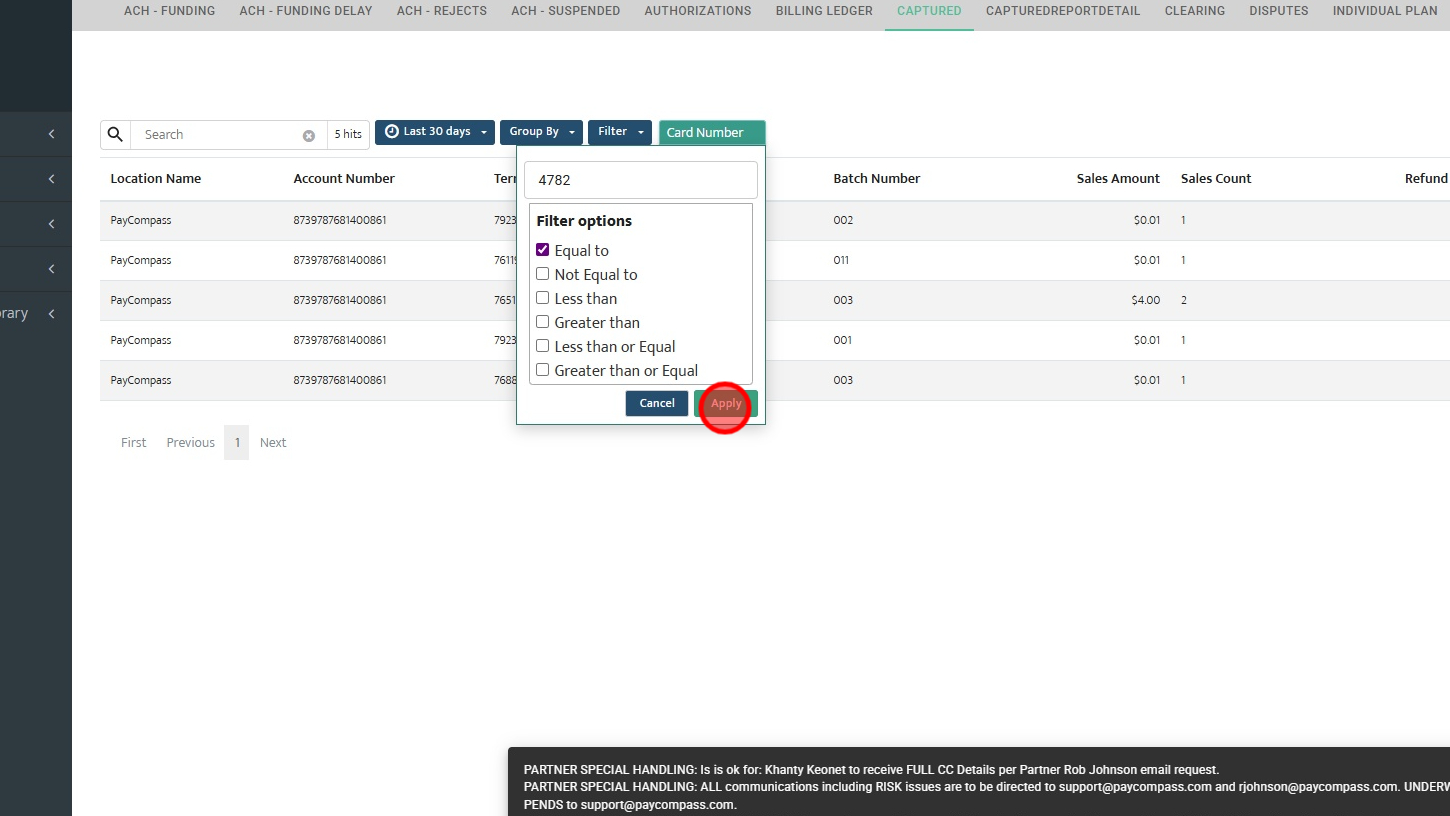
Step 10: Click "Apply" once you have set your filter and the results of the captured report will be filtered based on your filter. In this case I searched by the last four of a card ending in 4782.
Step 11: After filtering you will see all results that match your filter. In this case we have 1 captured batch that matches my filter. Click on the batch to open the batch. The date here is the date the batch was captured, so the batch was captured on 8-5-2025.
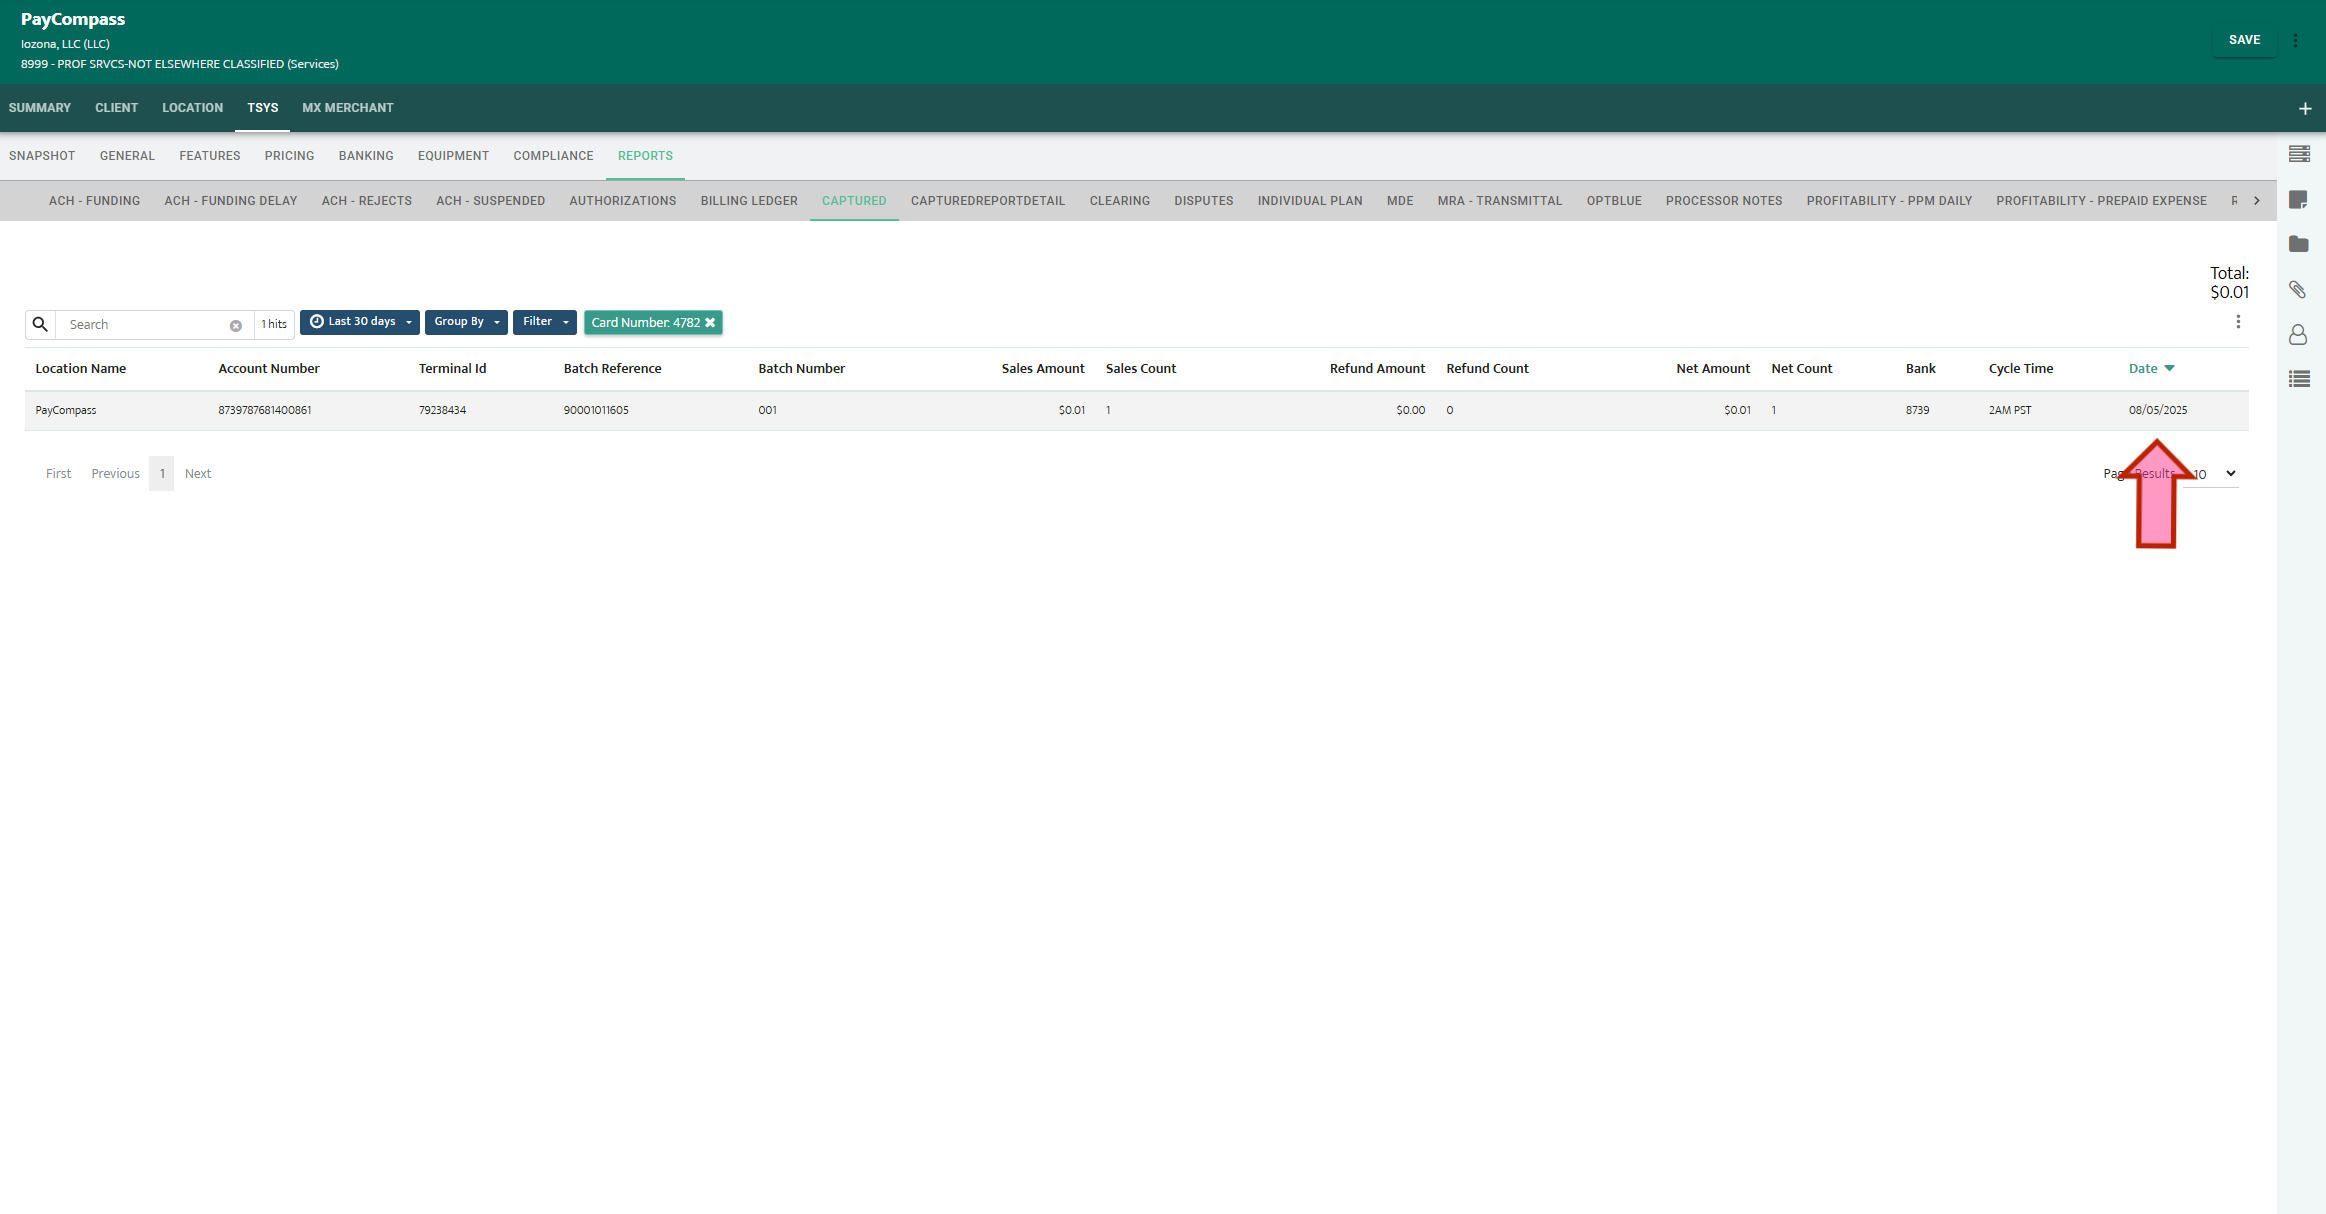
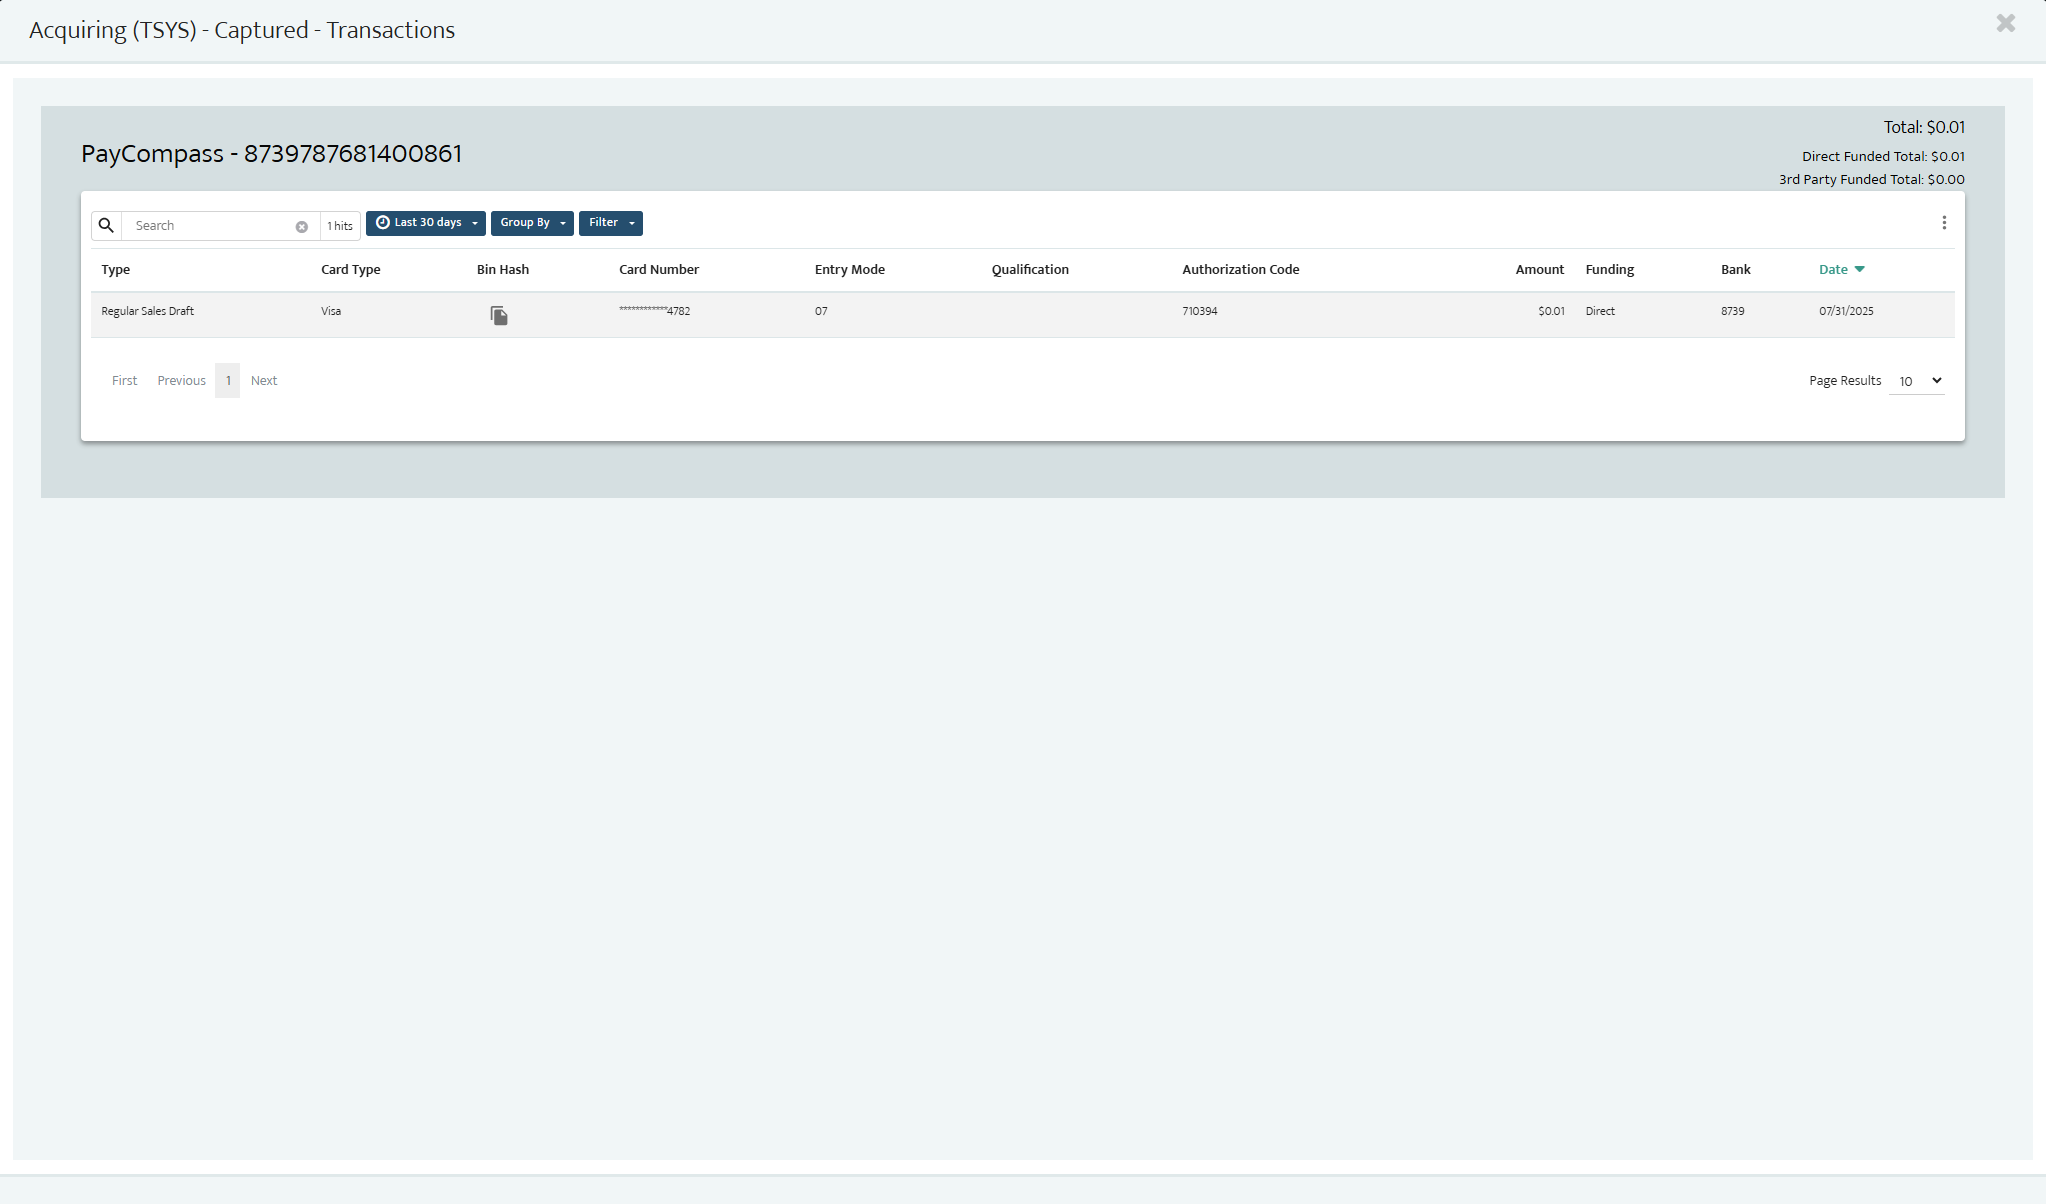
Step 12: Once opened this will open the captured batch and show the transactions. You can use the filters again to filter through the transactions if there are many transactions. In this case, this captured batch only has 1 transaction in it and that is the transaction for $0.01 on a card ending in 4782. This is the transaction we were looking for and we can confirm that this has been captured on 8-5-2025. You can also click on the transaction to view more transaction information.
PART III: Confirming If a Transaction Settled In a Batch within MX
Step 1: Visit https://mxconnect.com/#/dashboard/accounts
Step 2: Login to MxConnect. Once logged in Click "Merchant". We are looking to confirm if a transaction for $0.01 on a card ending in 4782 settled in a batch.
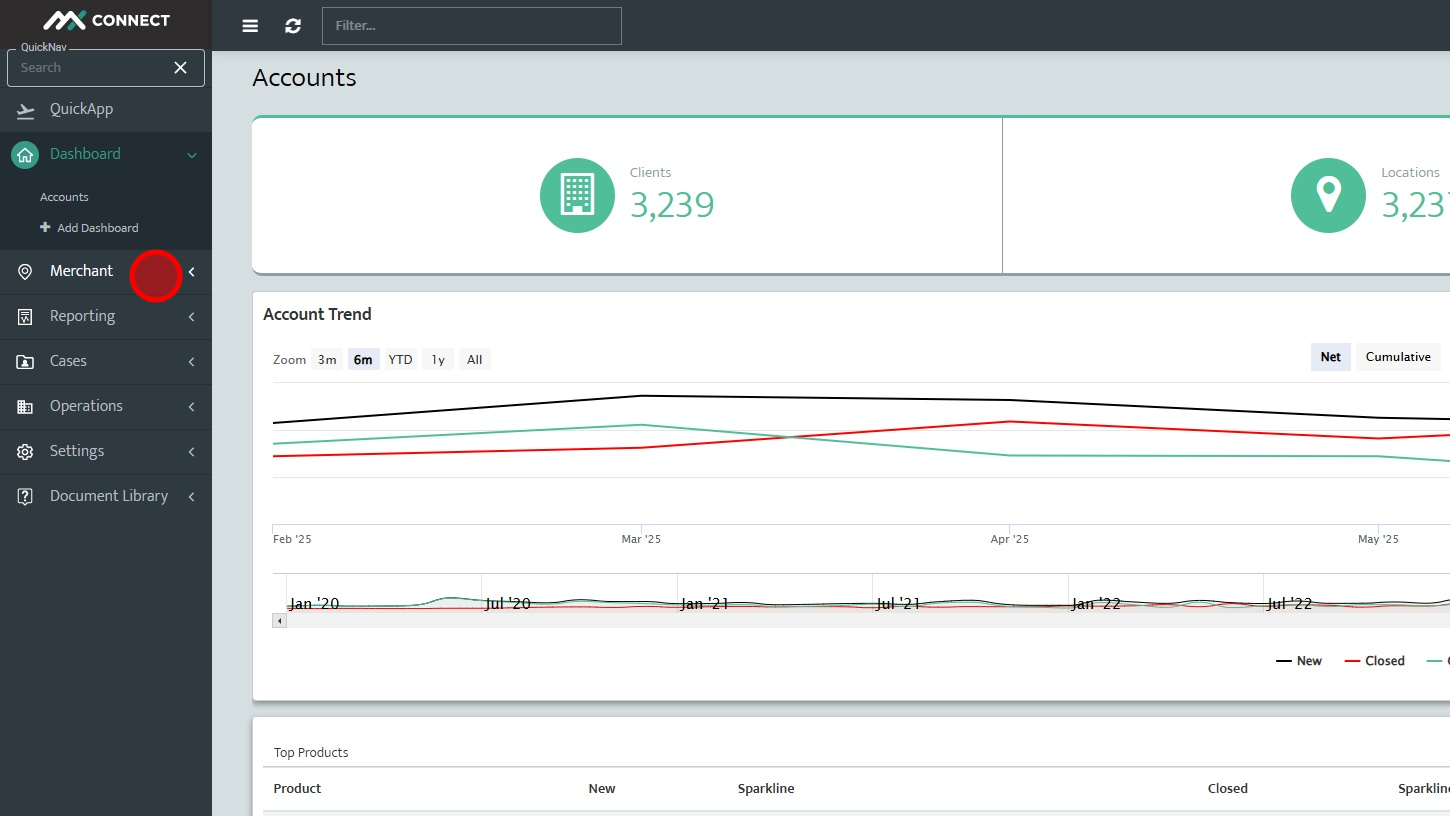
Step 3: Click "Clients"
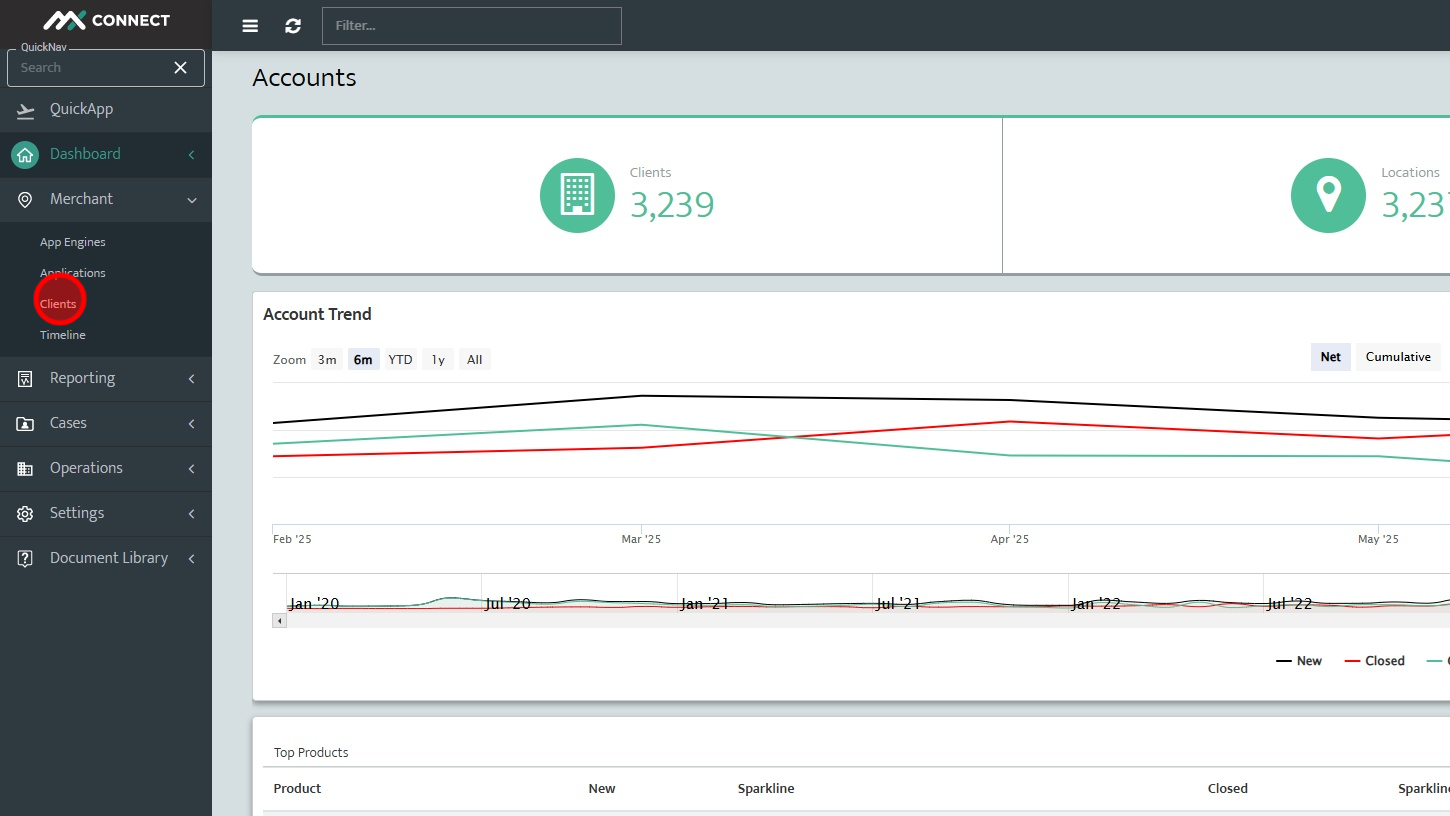
Step 4: Search for the MID the transaction you are looking for was ran on.
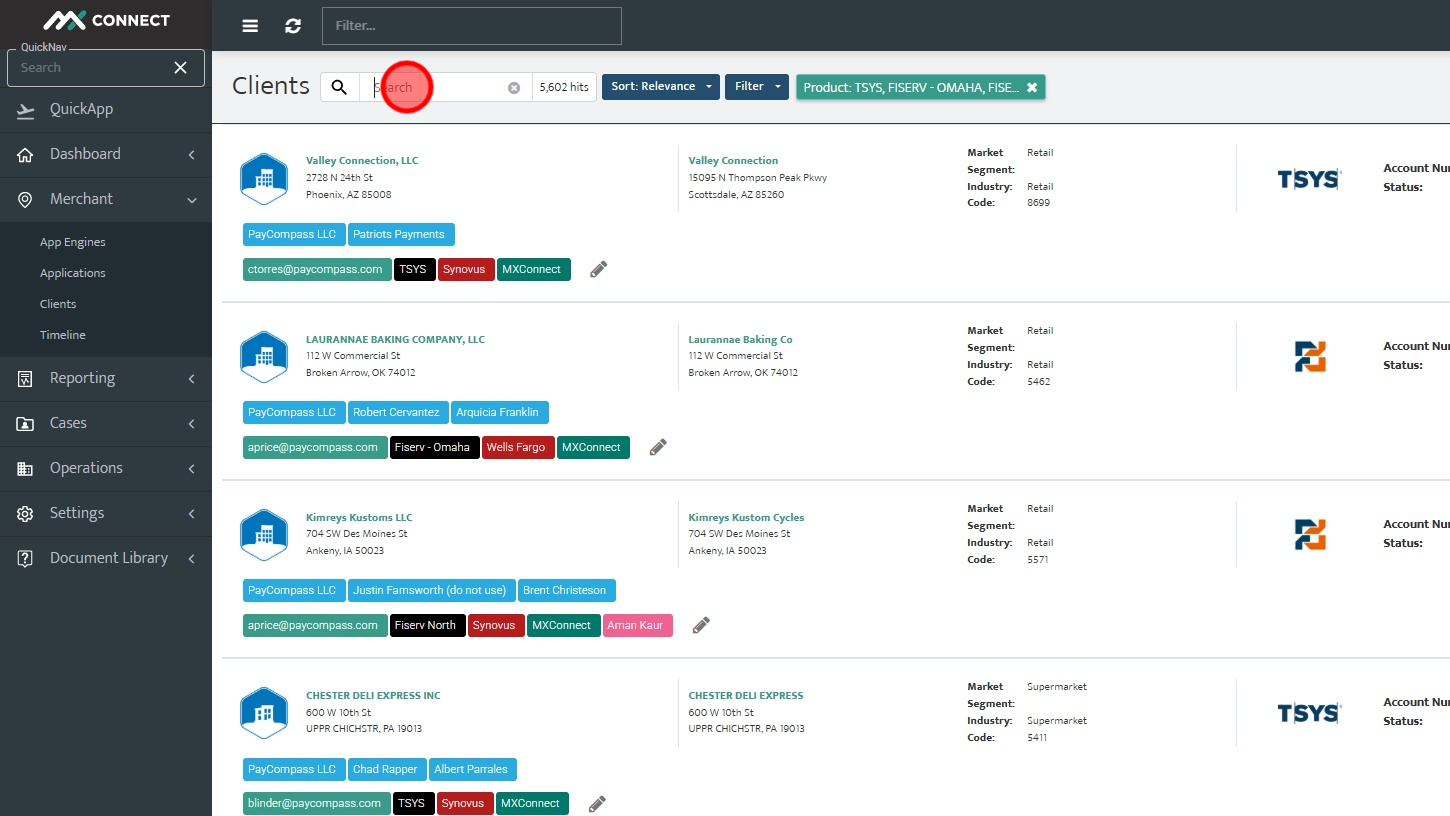
Step 5: Click on the MID of the account you are looking for. this will take you directly to the sponsor bank tab of the account.
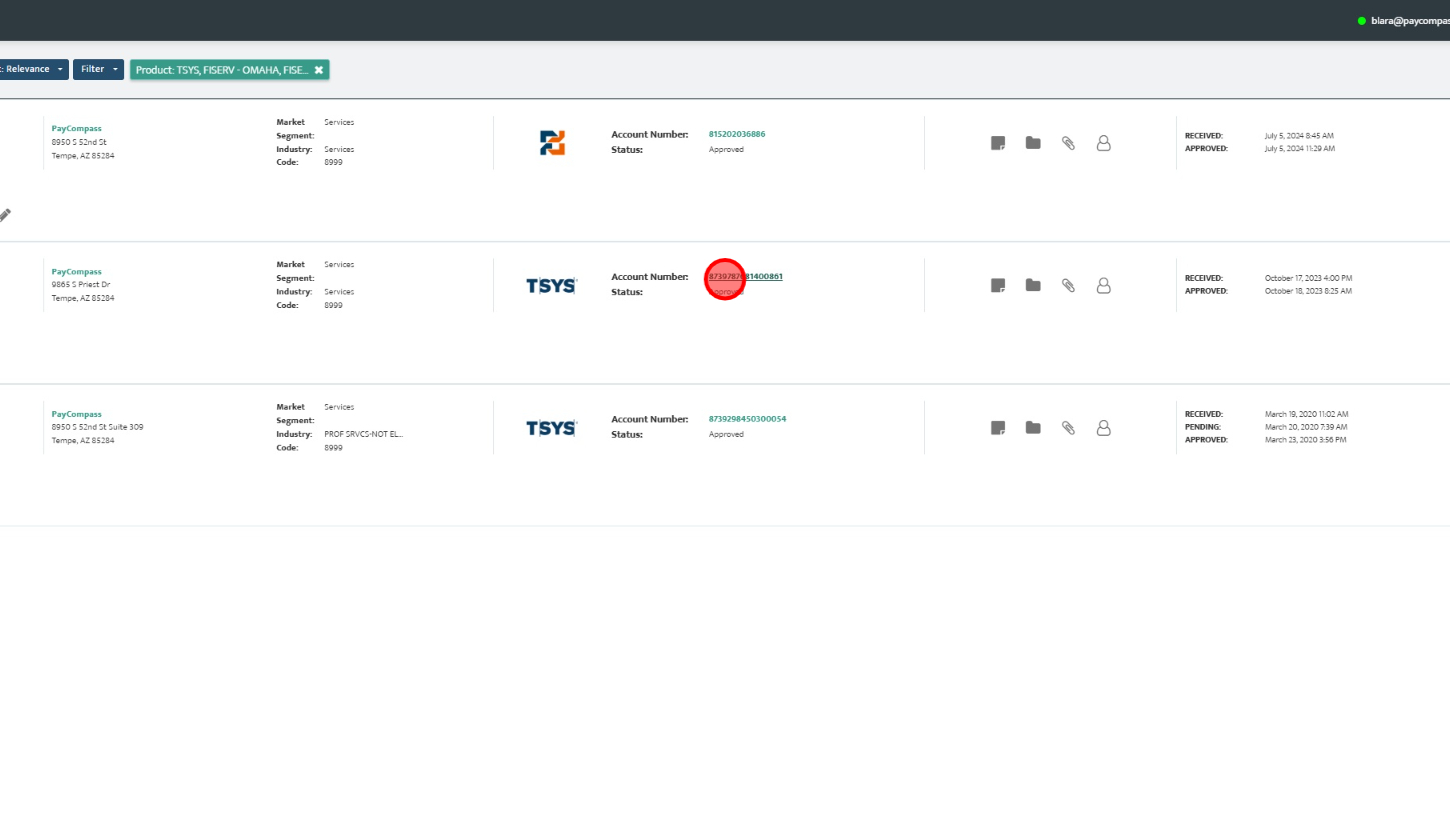
Step 6: Click "Reports"
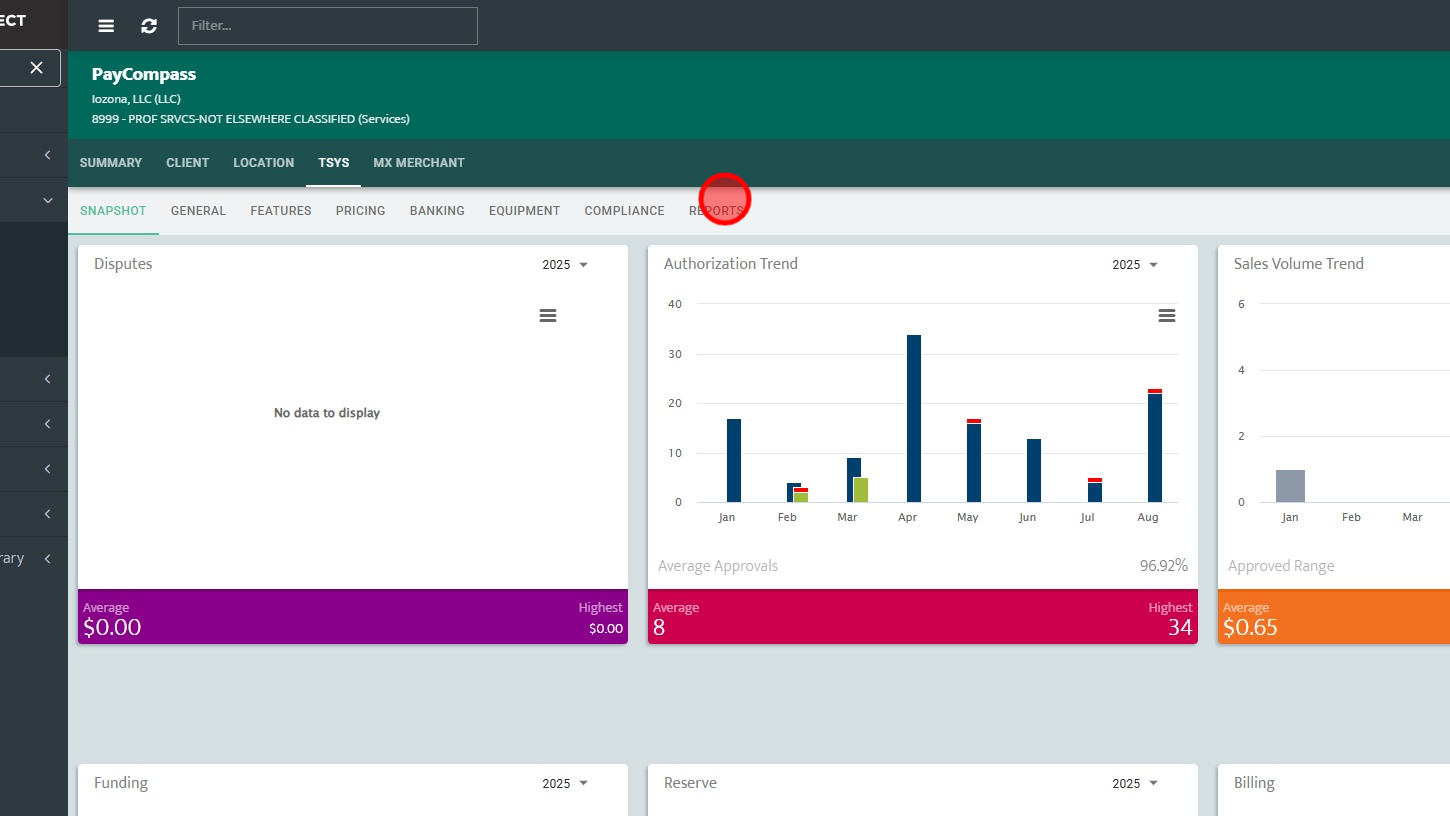
Step 7: Click the right arrow on the top right of the reports to view more reports.
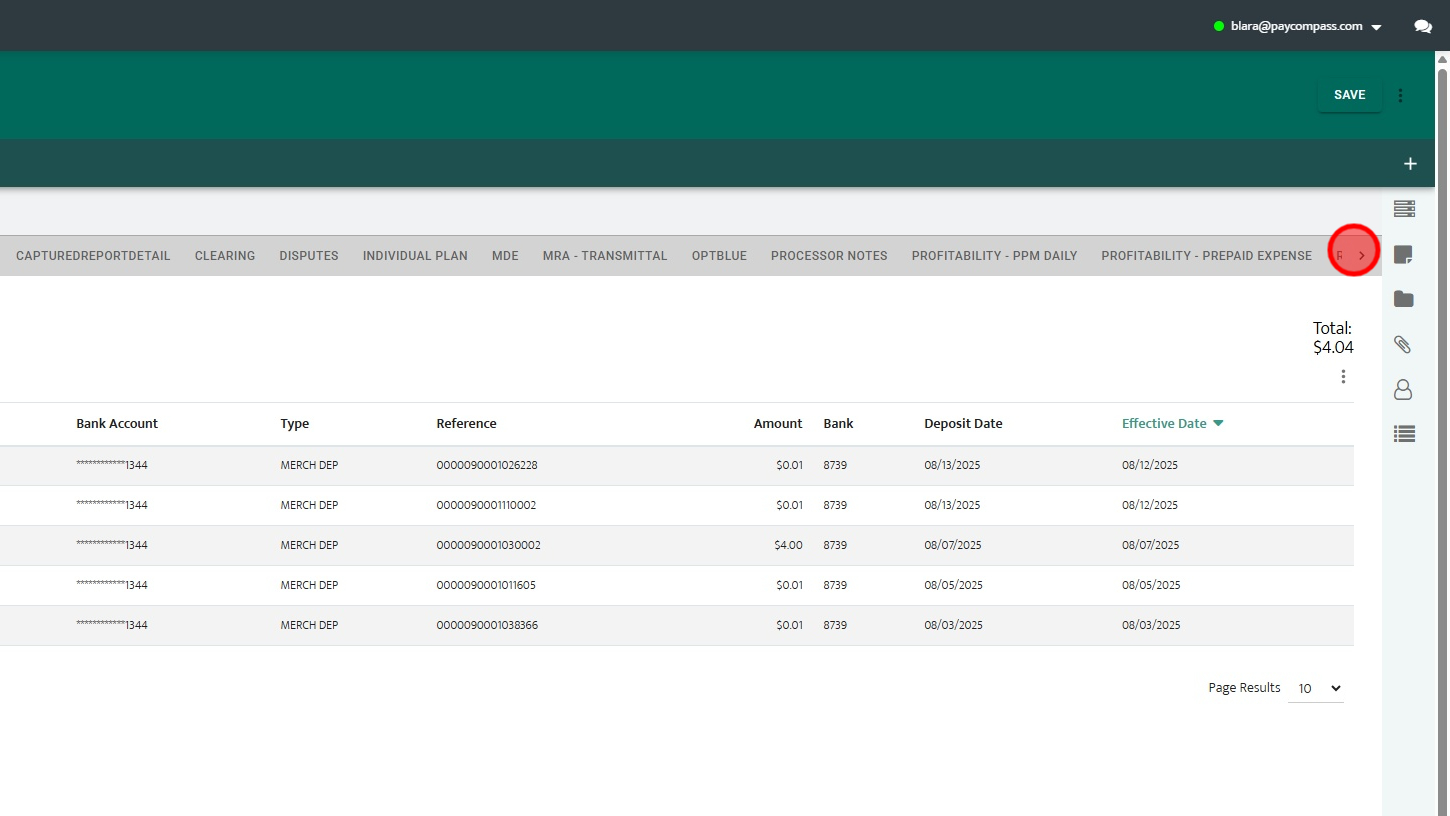
Step 8: Click "Settled"
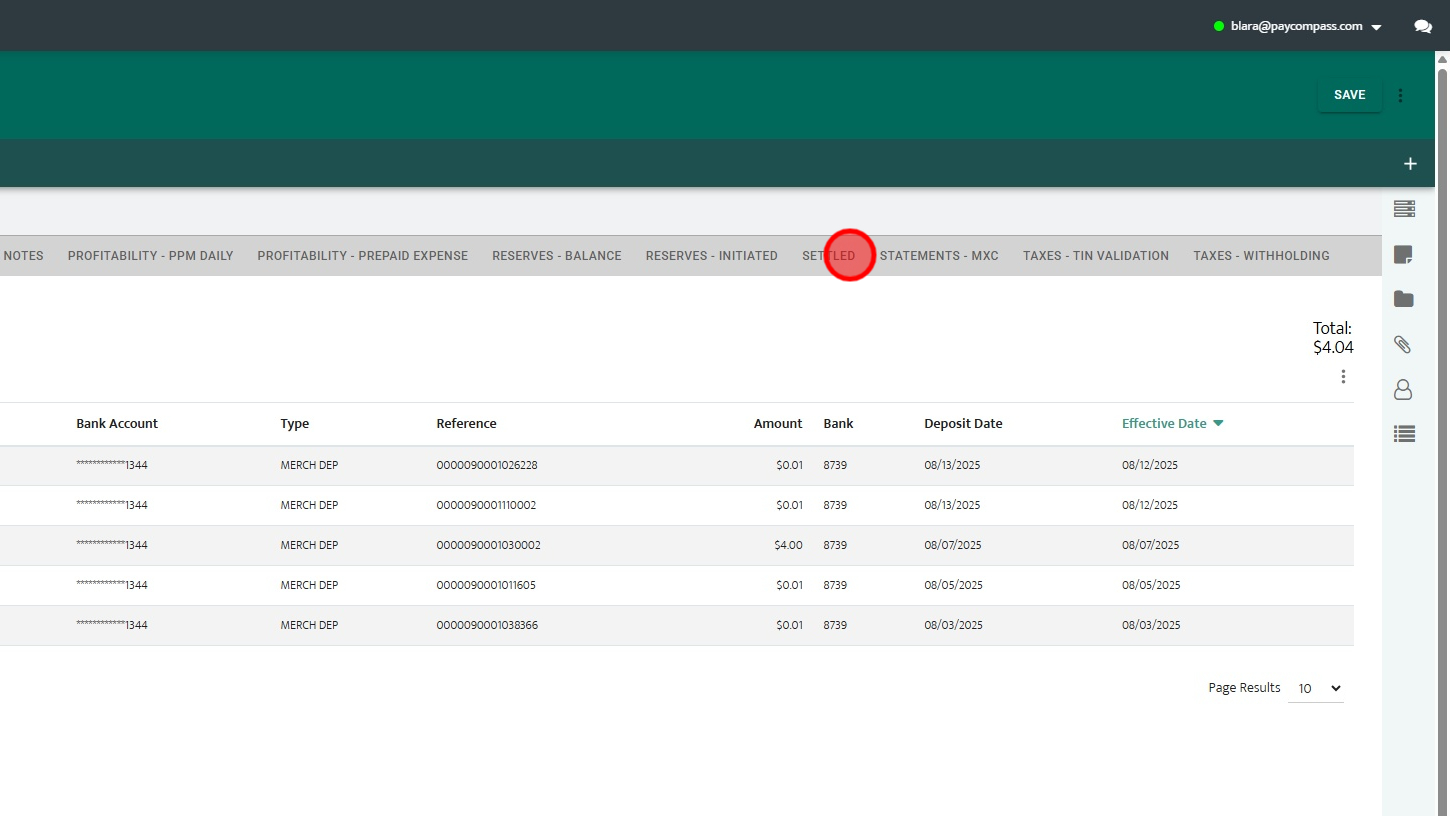
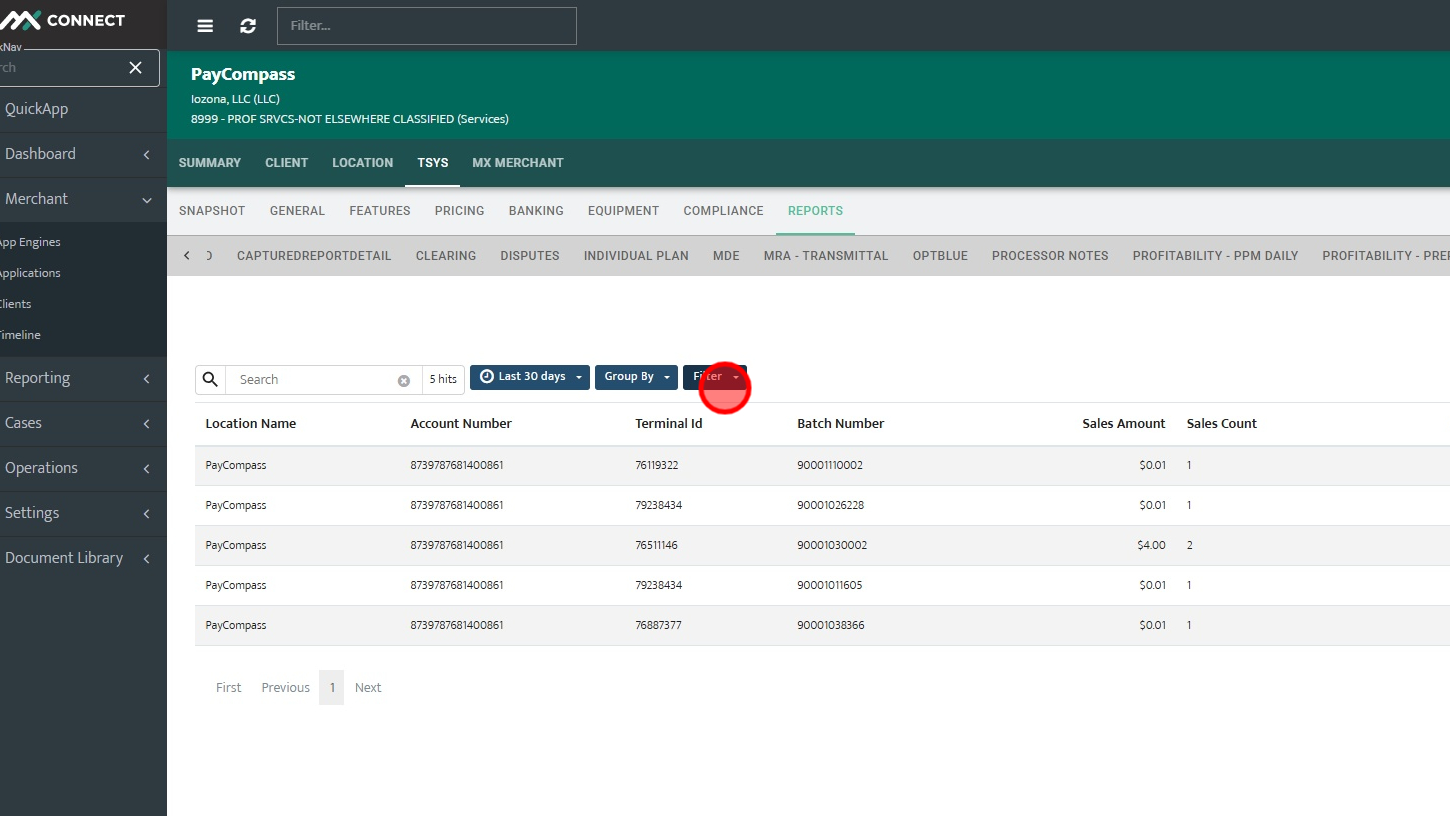
Step 9: Click "Filter" to filter by different transaction identifiers. The main ones I typically use is Last 4 of Card, Amount, and Date.
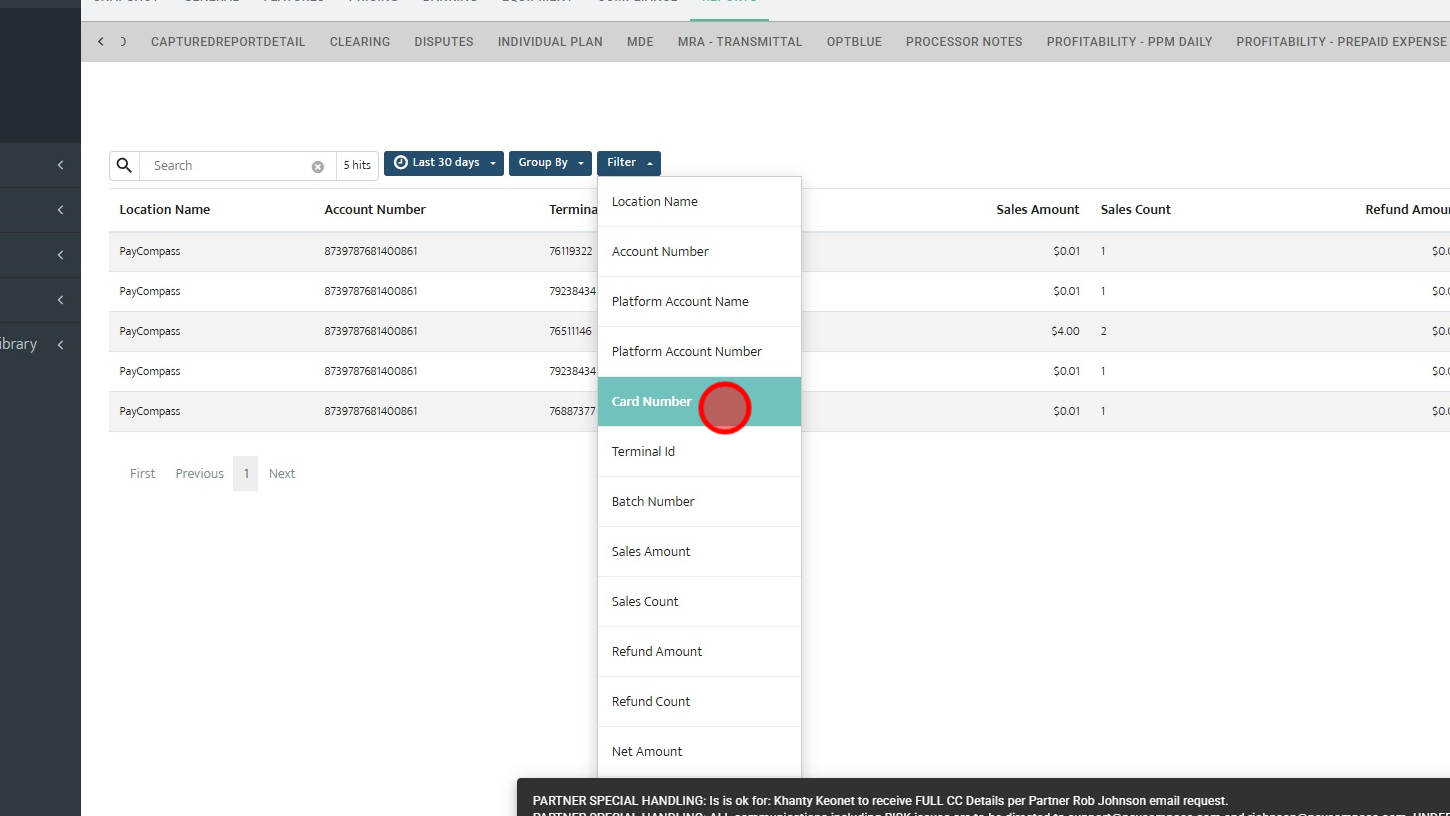
Step 10: For this example I will use "Card Number". This is typically the one I use first and will add additional filters if needed.
Step 11: Click "Apply" once you have set your filter and the results of the captured report will be filtered based on your filter. In this case I searched by the last four of a card ending in 4782.
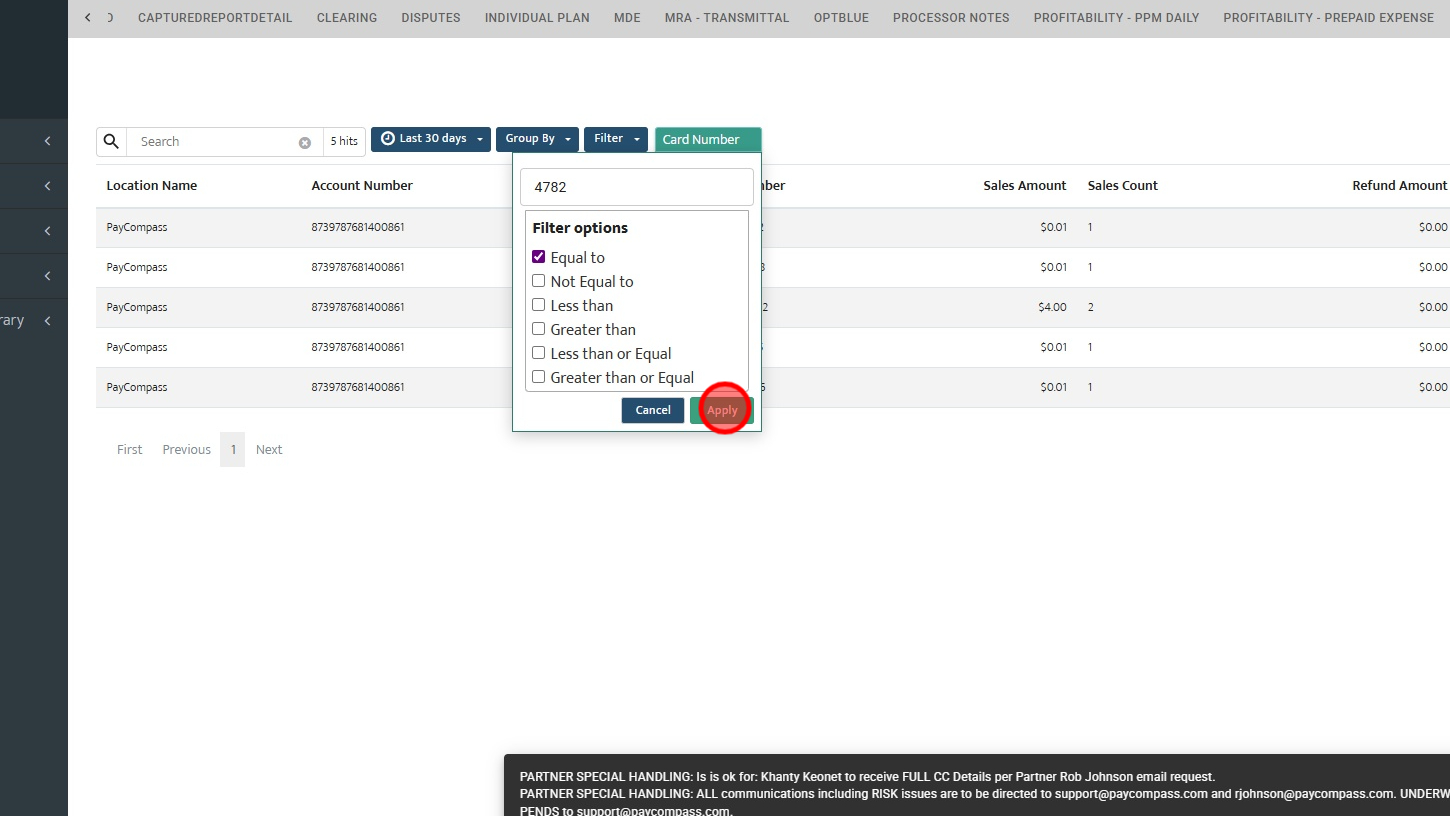
Step 12: You see that this did not generate any results. Click the X next to the filter to remove the filter. In Settled, the filters relating to transactions do not work properly. For the Settled tab, I typically will filter by Batch Number.
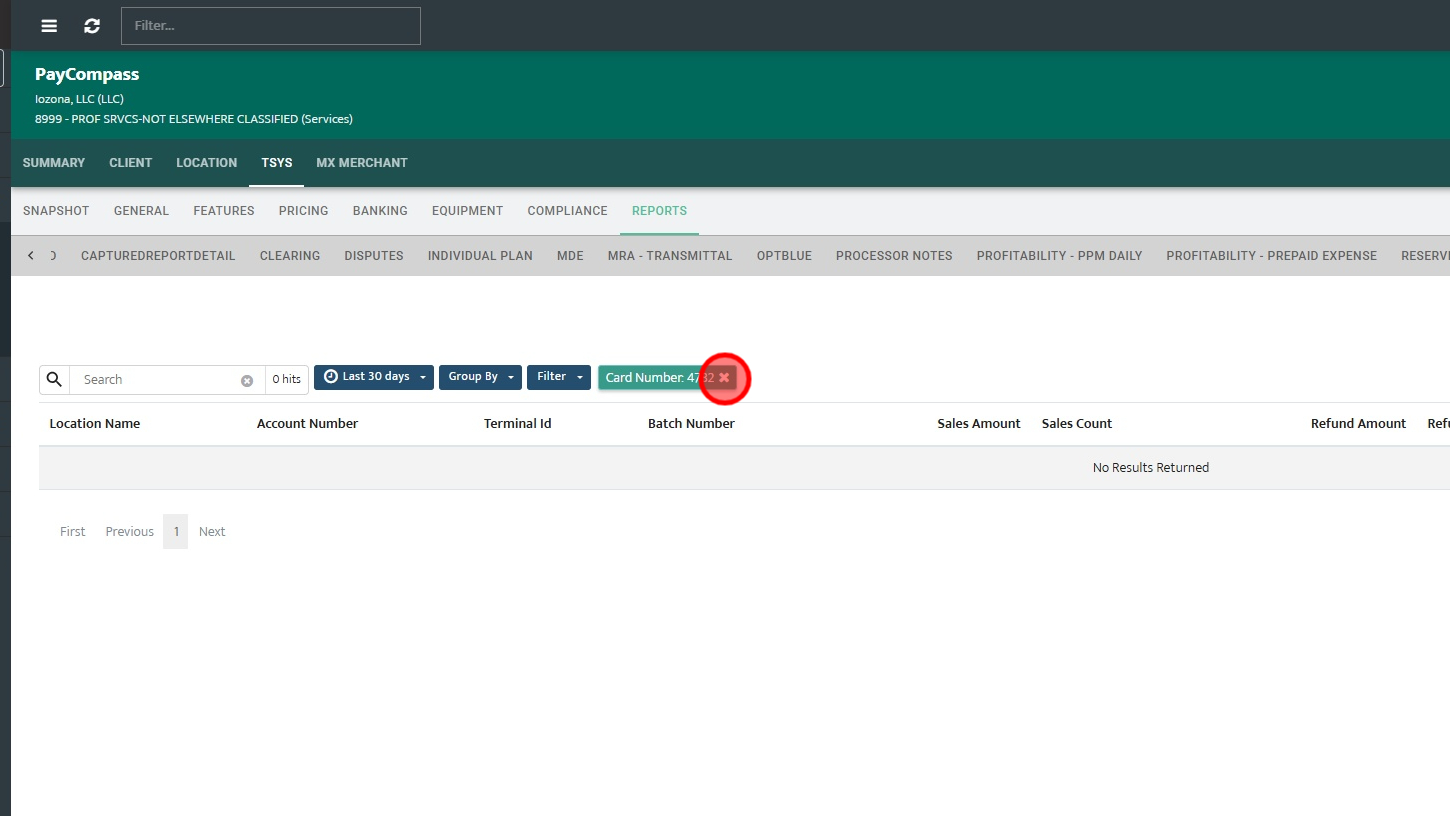
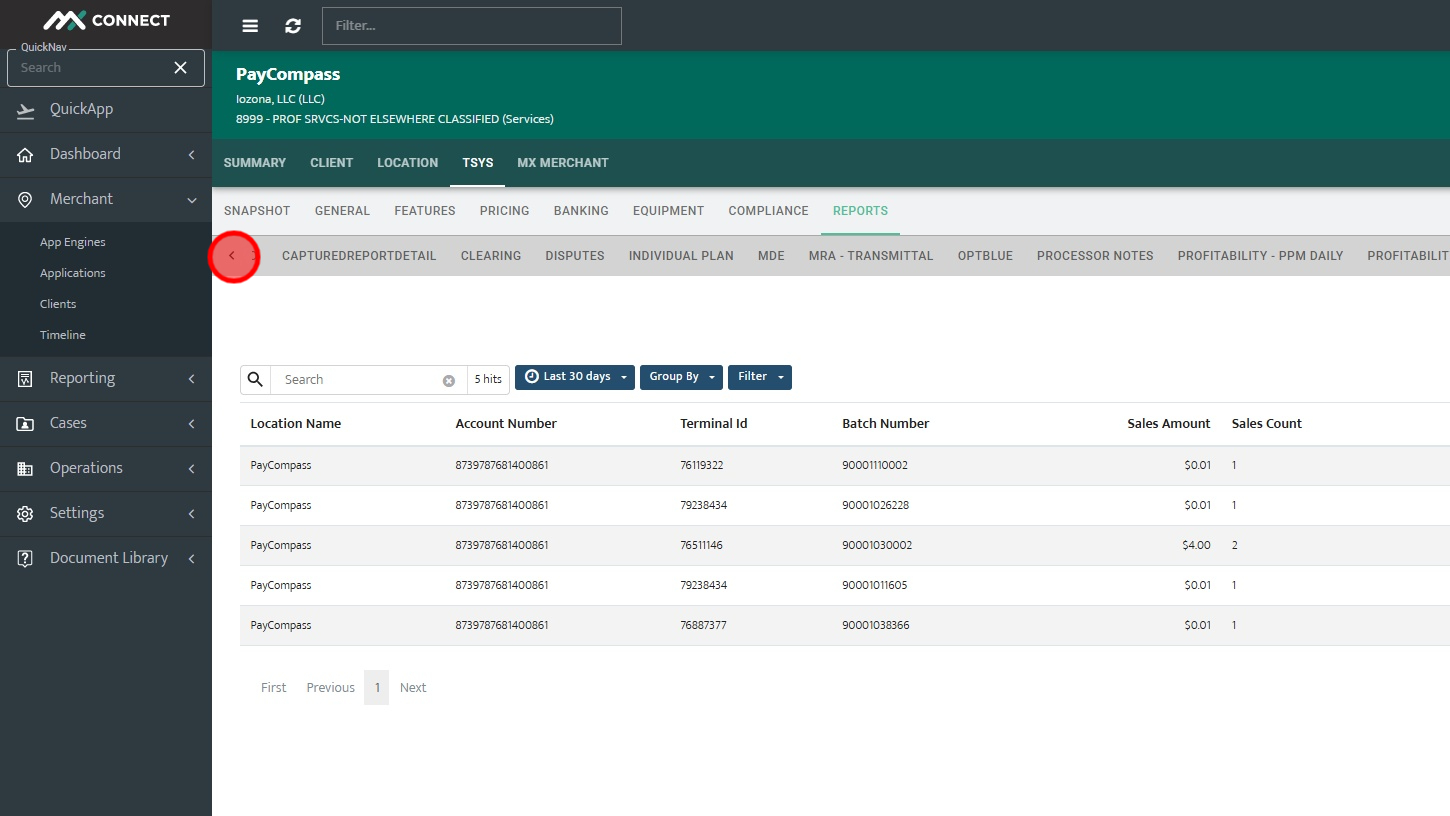
Step 13: In order to find the correct batch number to search for, you will need to confirm if the transaction captured. Click the arrow in the top left to view more reports.
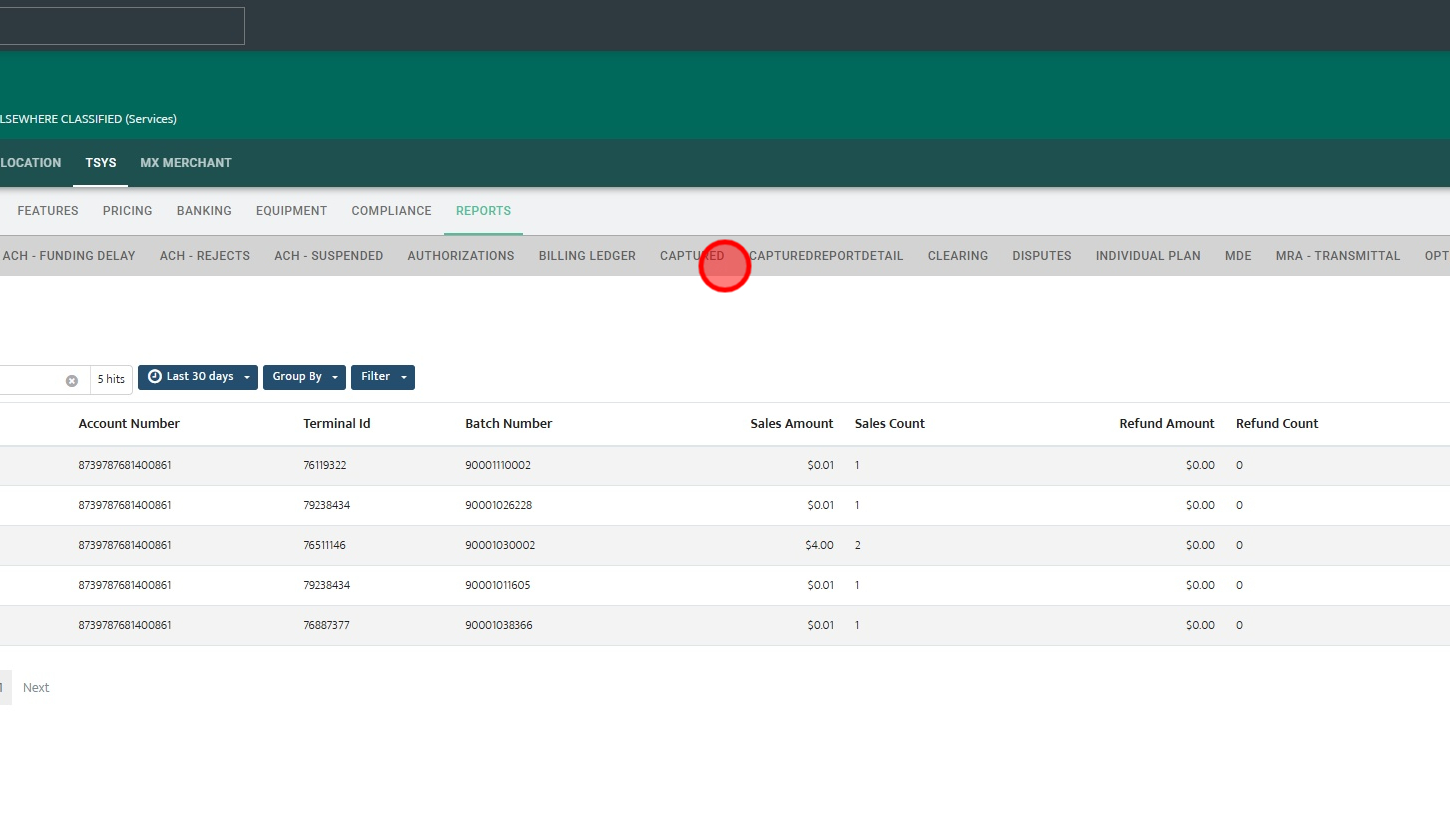
Step 14: Click "Captured"
Step 15: Confirm if the transaction you are looking for was captured. If you are unsure of how to do this please see "Checking If a Transaction Was Captured"
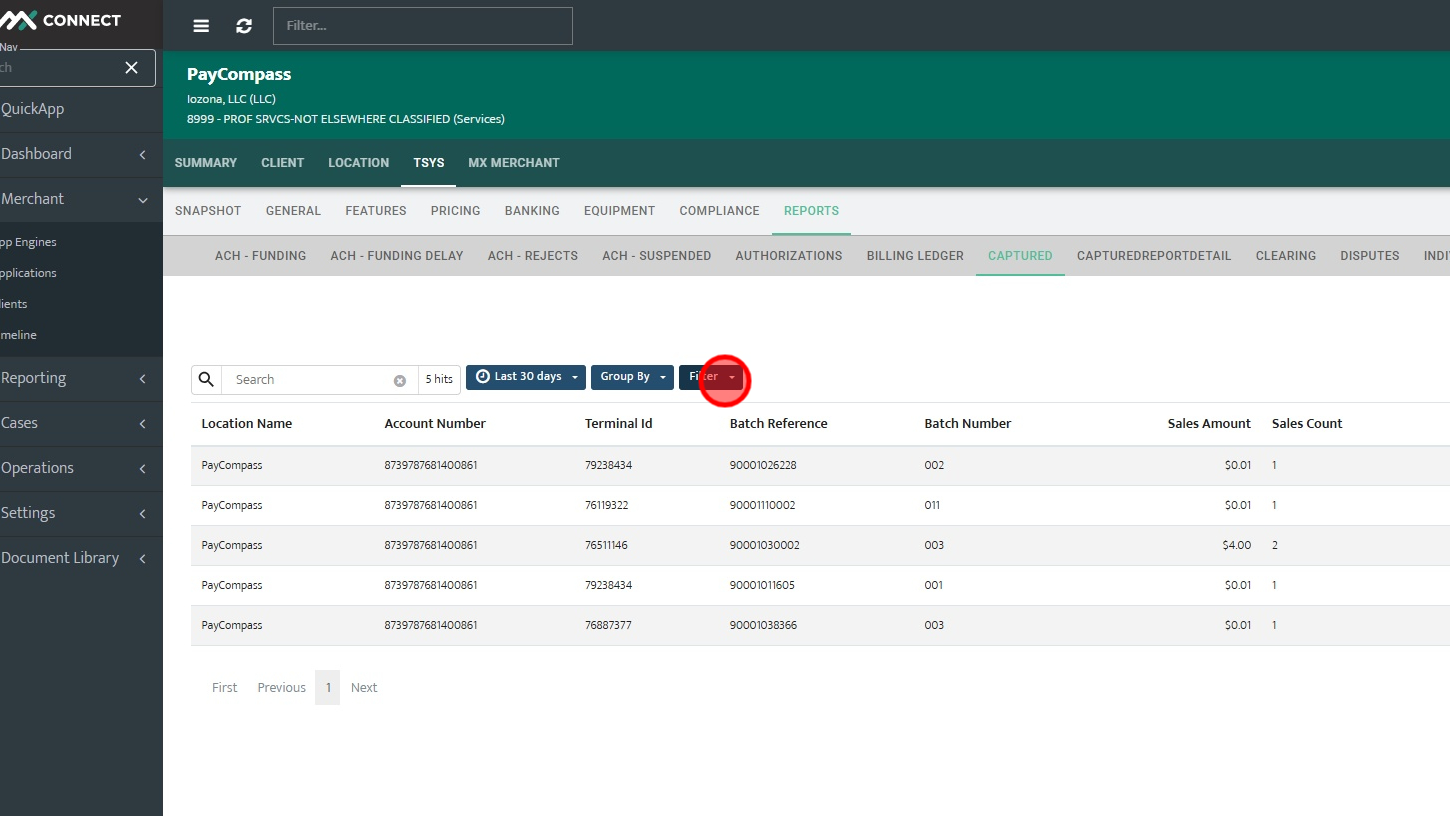
Step 16: Once you have confirmed that the transaction was captured, you will be able to see the Batch Reference number. This is the same as the batch number in Settled.
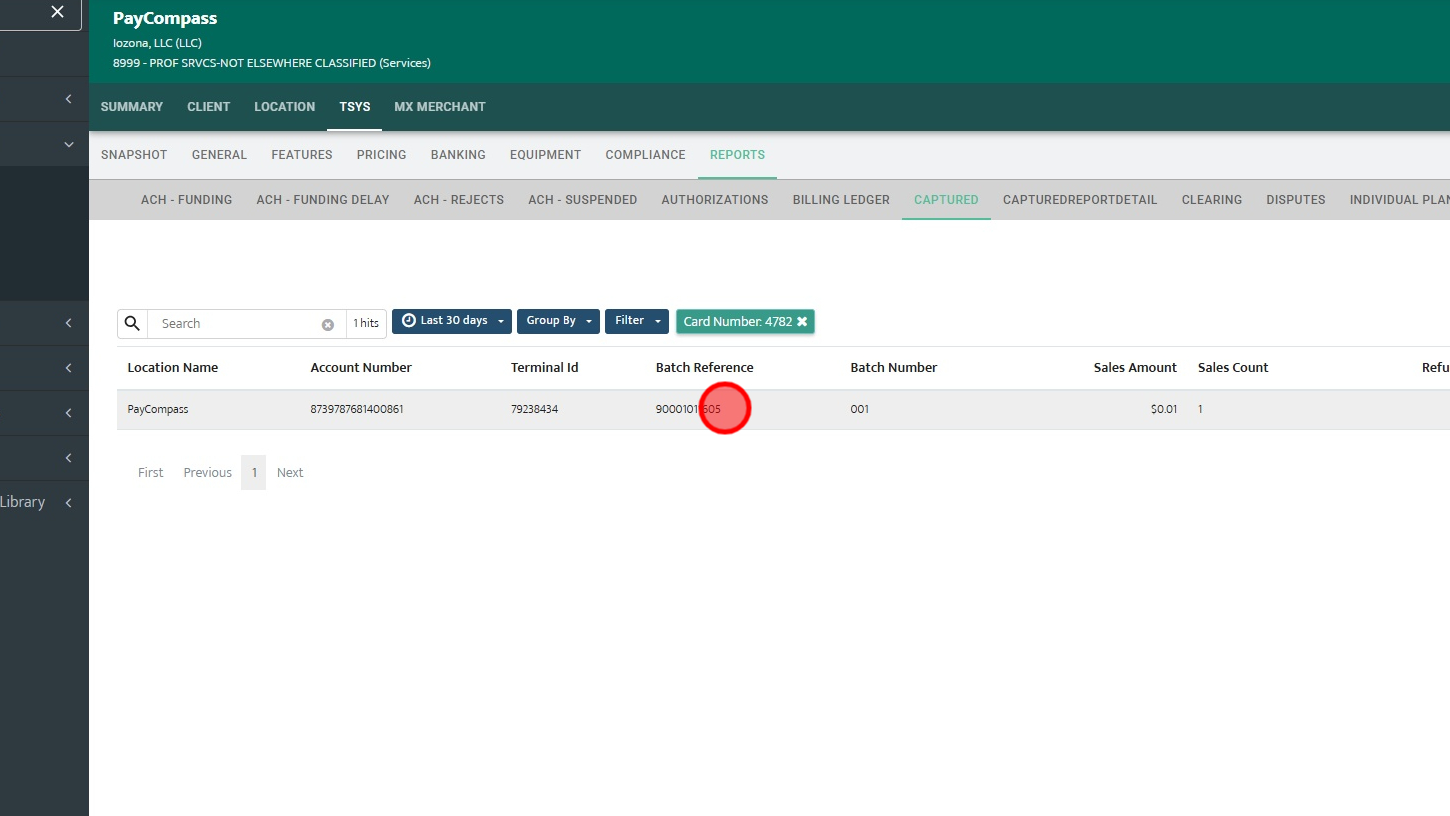
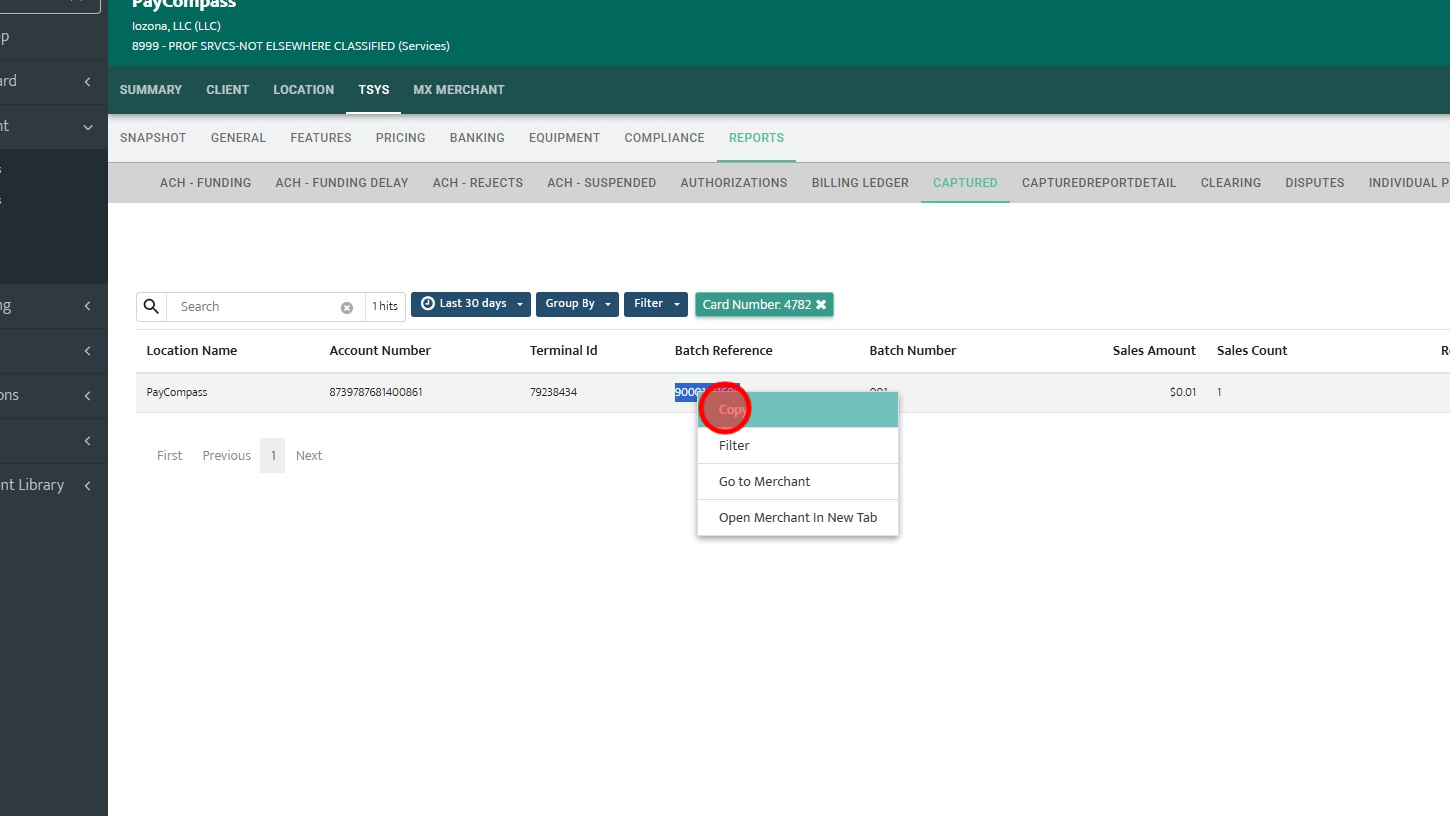
Step 17: Copy the Batch Reference number This is what we will use to find the correct batch.
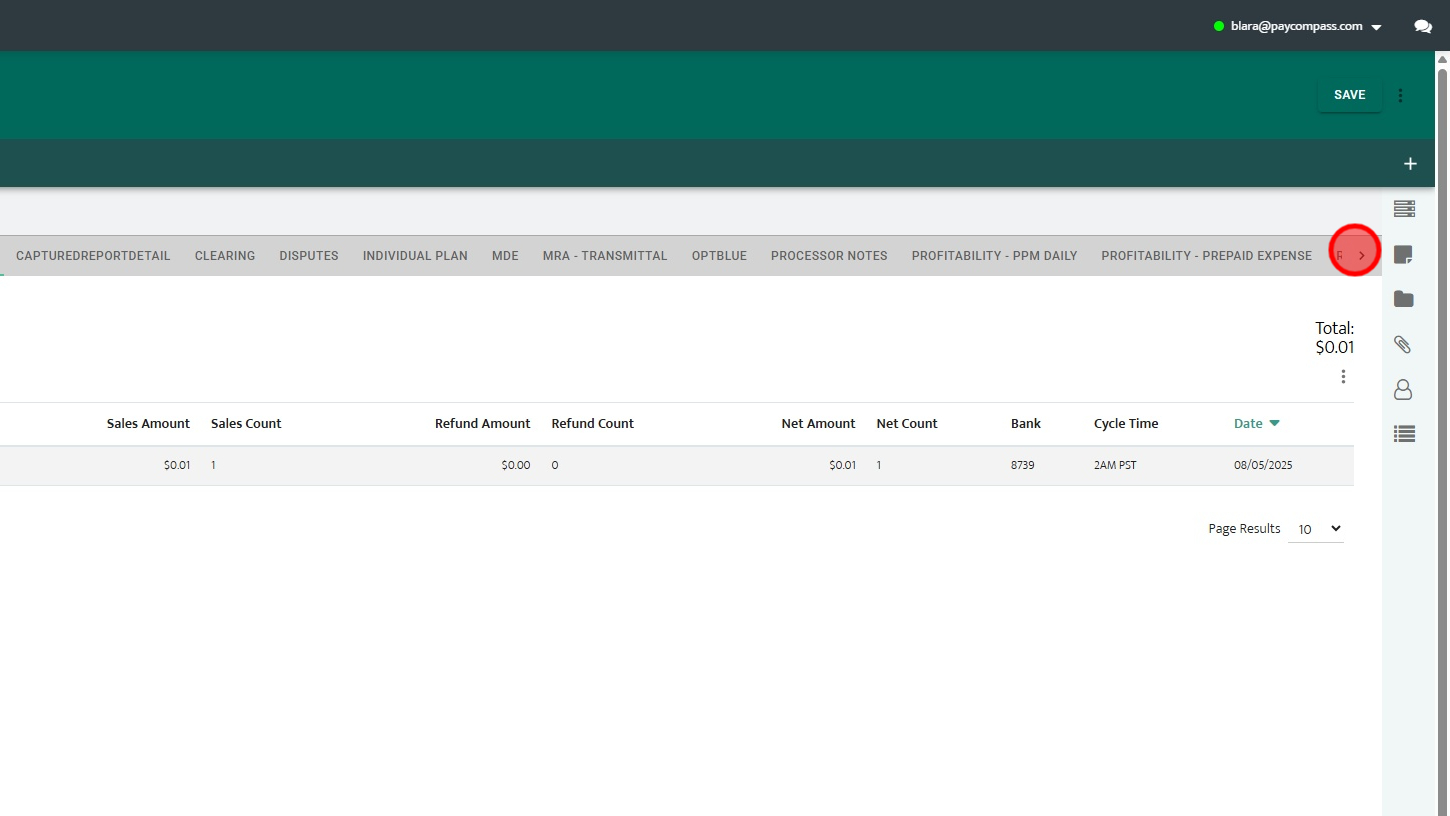
Step 18: Click the arrow in the top right to view more reports.
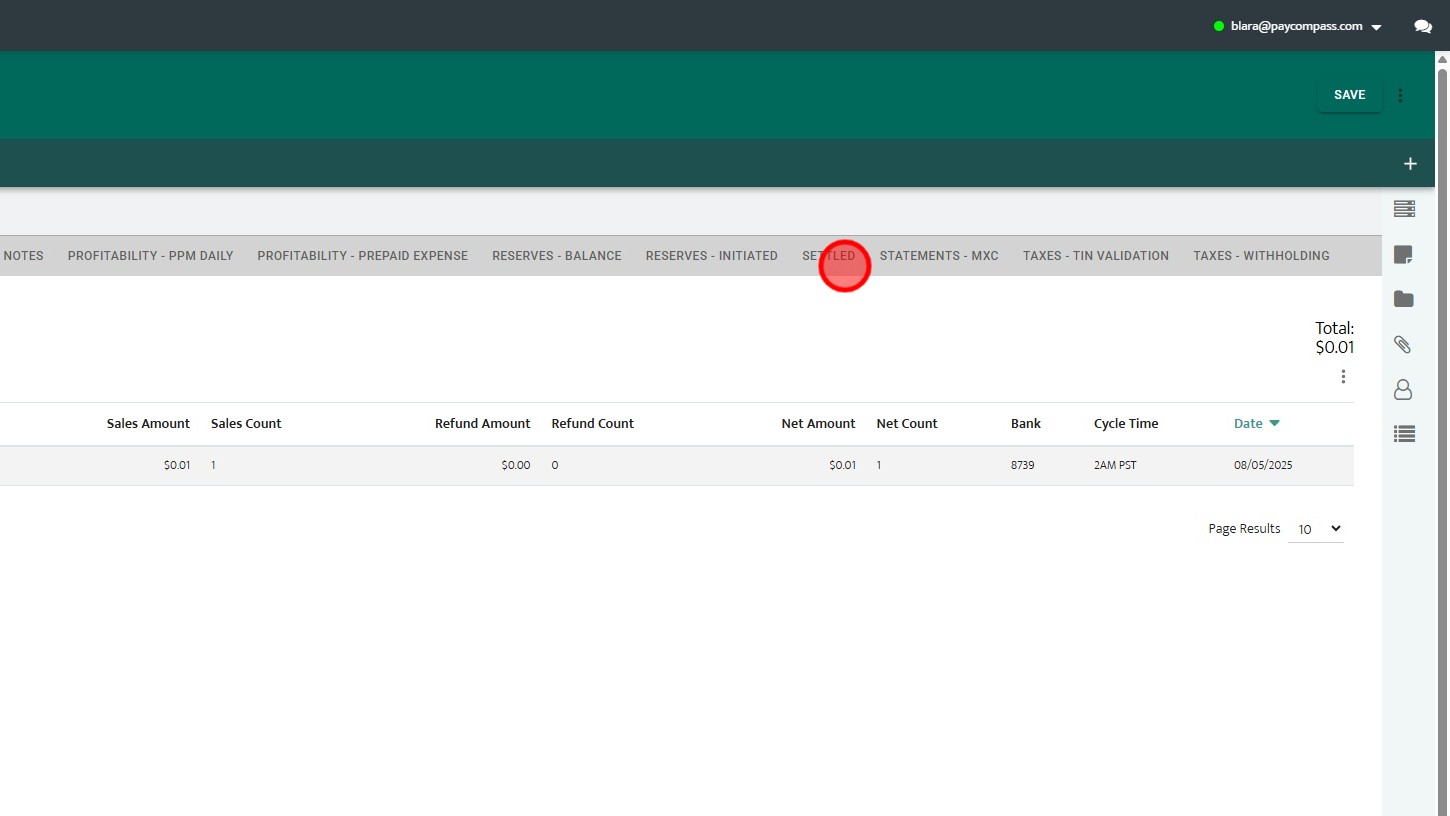
Step 19: Click "Settled"
Step 20: Click "Filter"
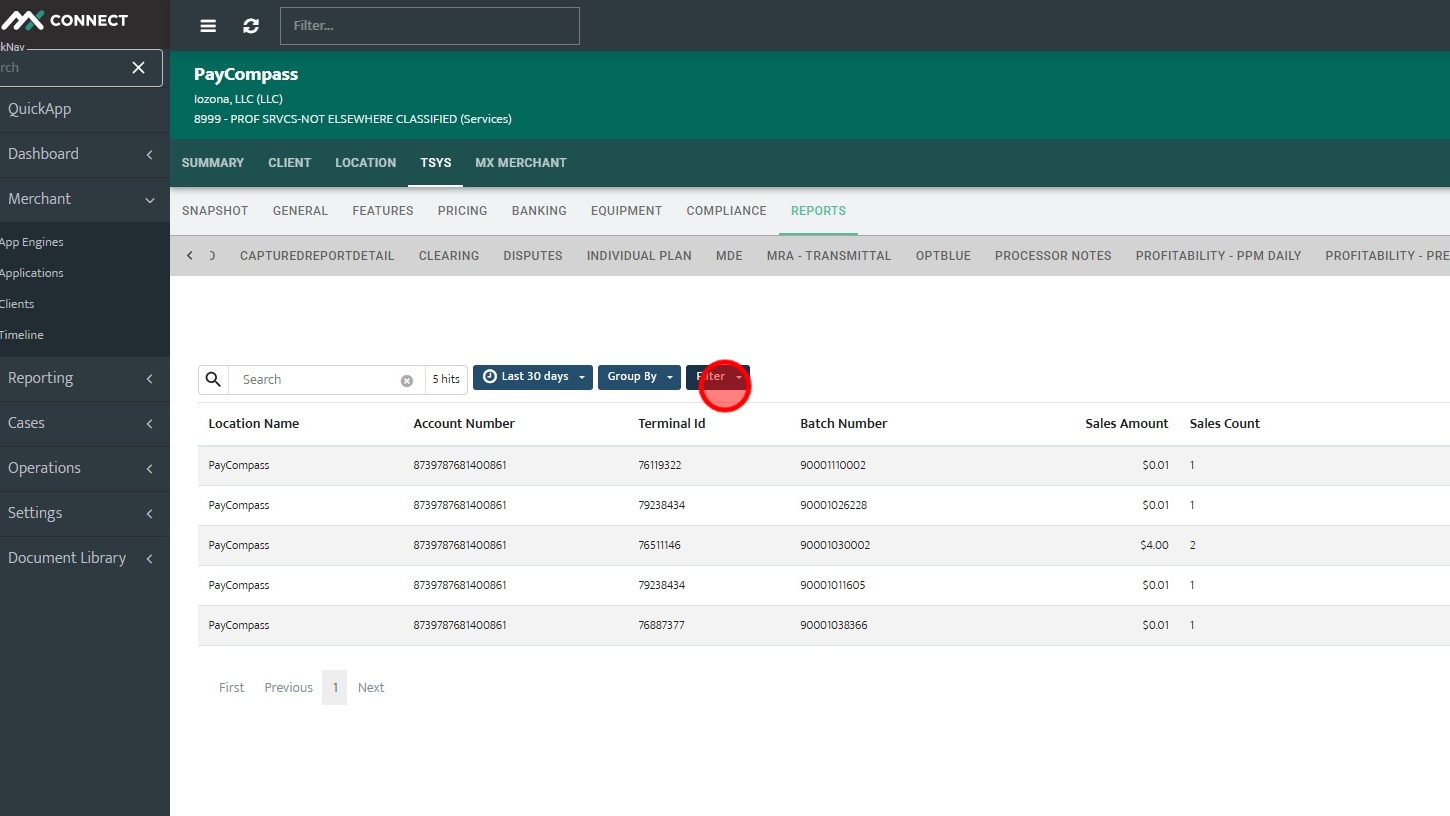
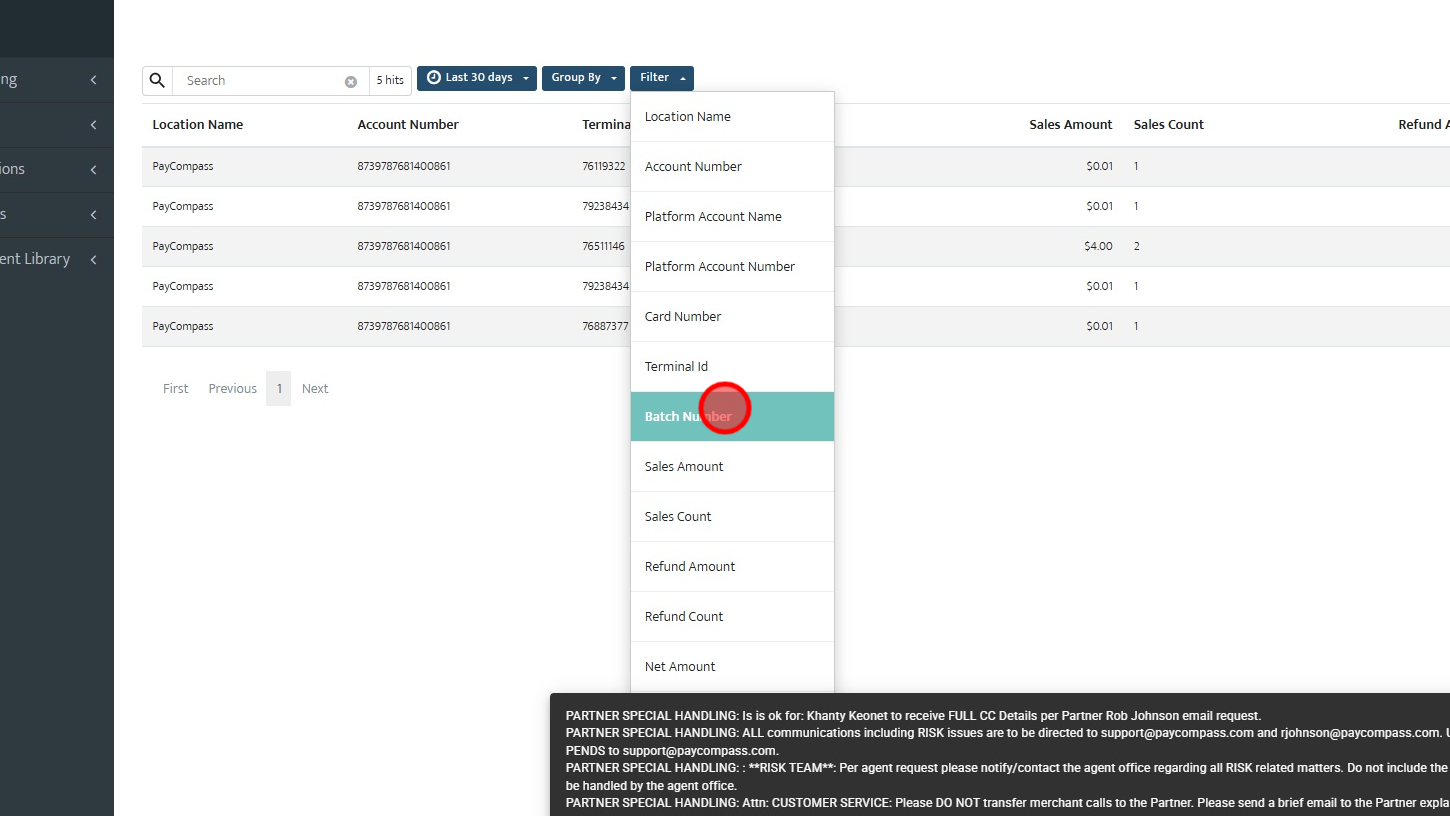
Step 21: Filter by batch number
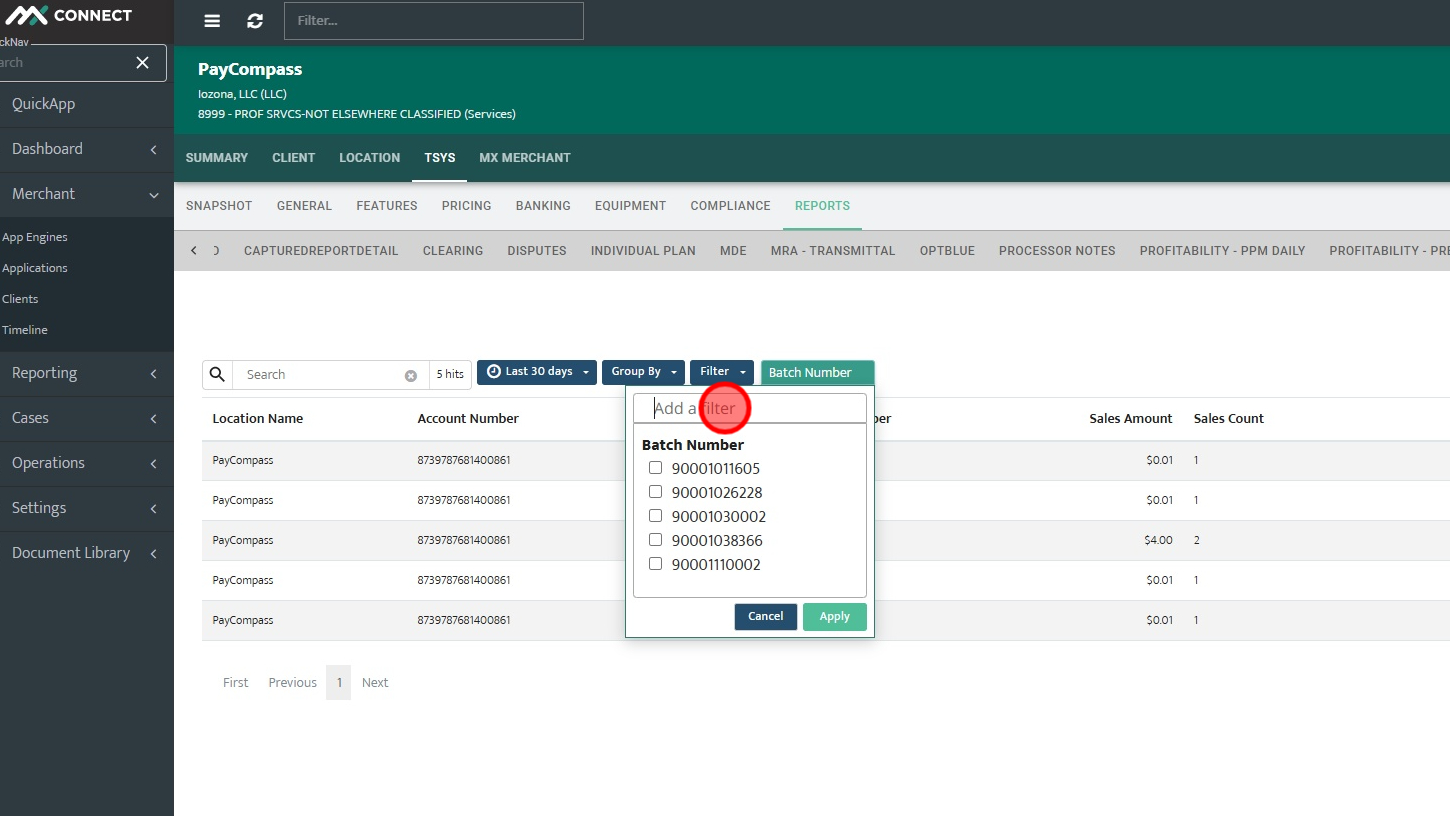
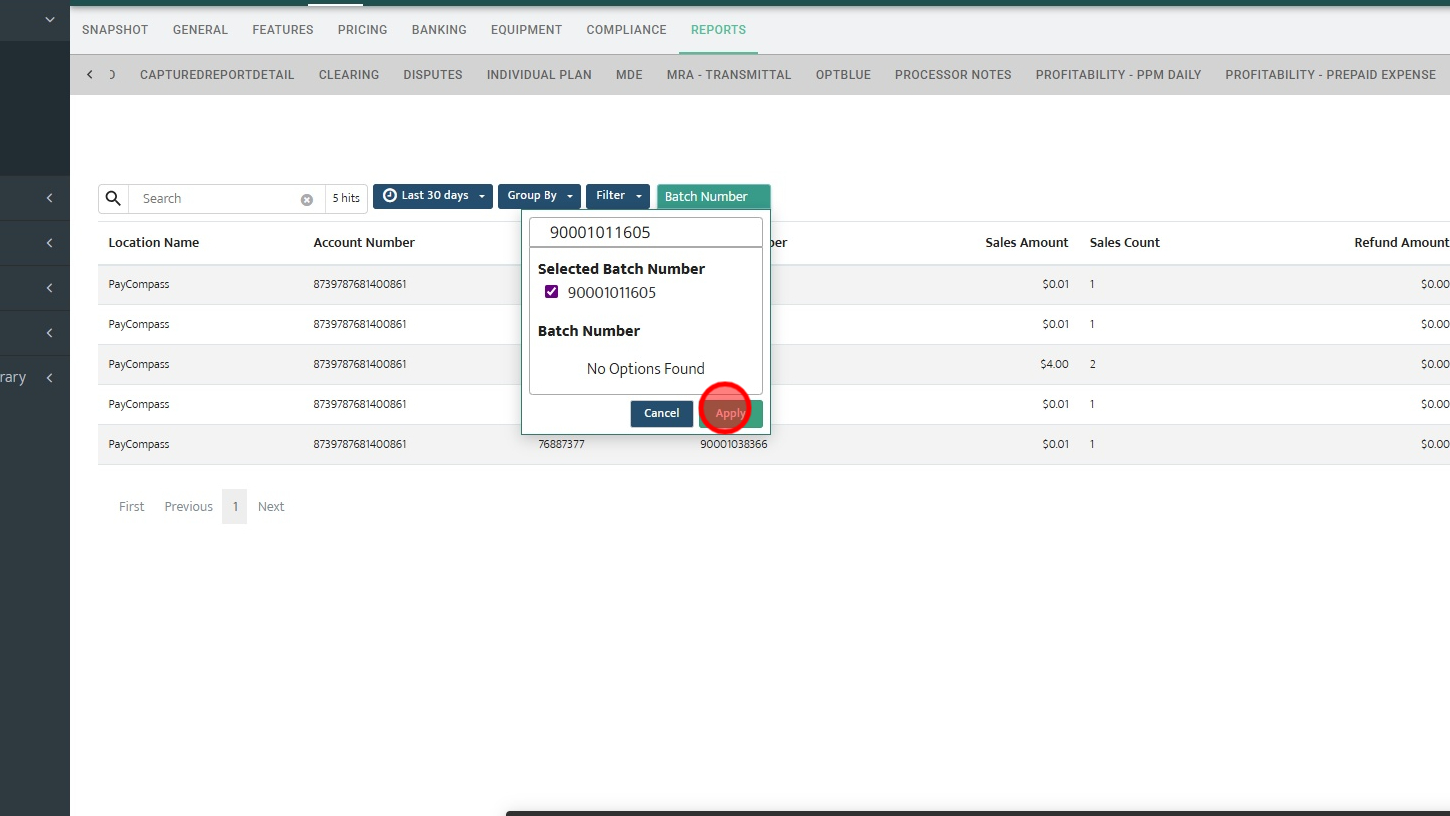
Step 22: Click input field and paste the Batch Reference number from Captured into the filter field.
Step 23: After pasting this will give a check box for the batch number. Click this box to filter by the Batch number.
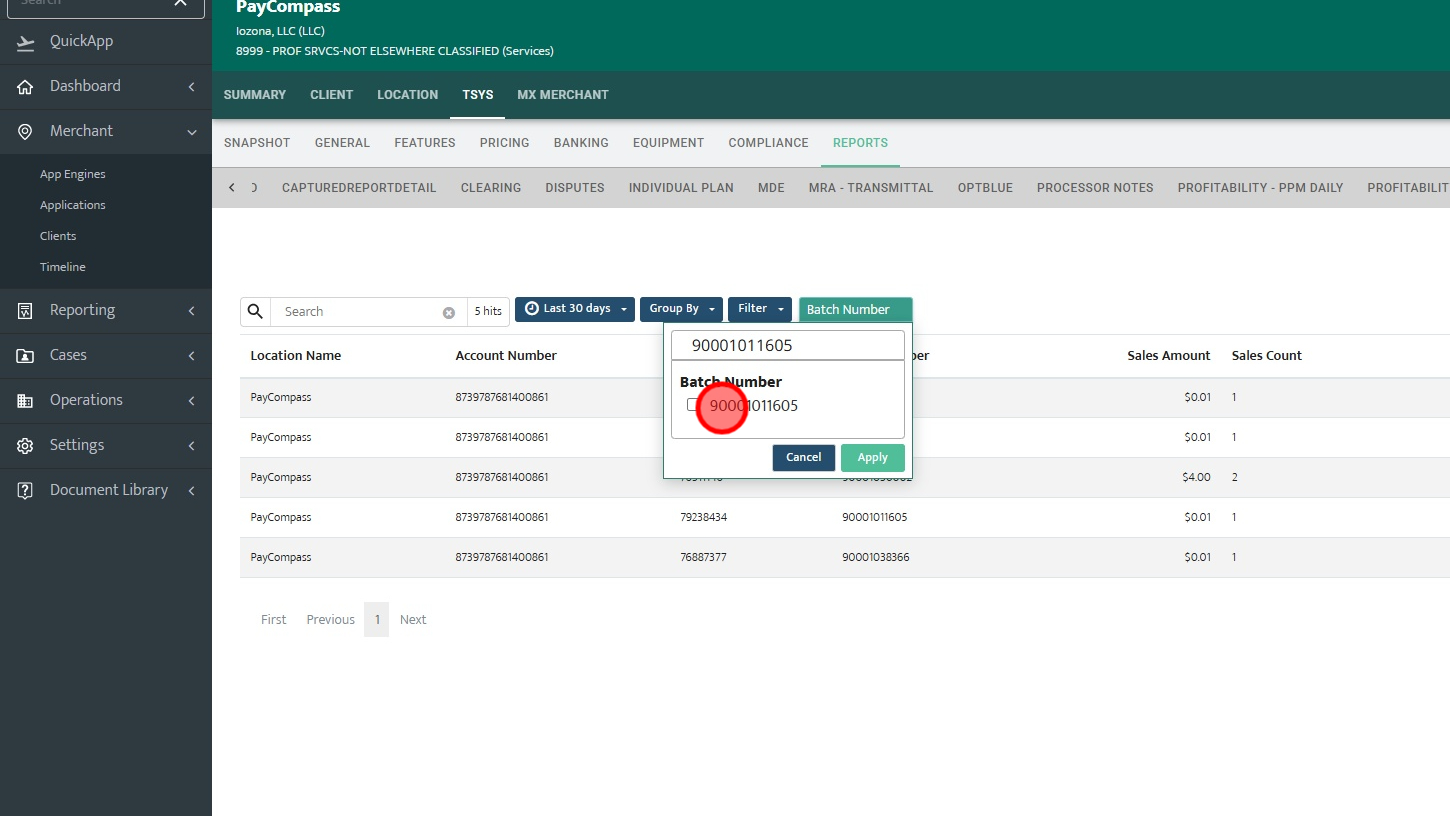
Step 24: Click "Apply"
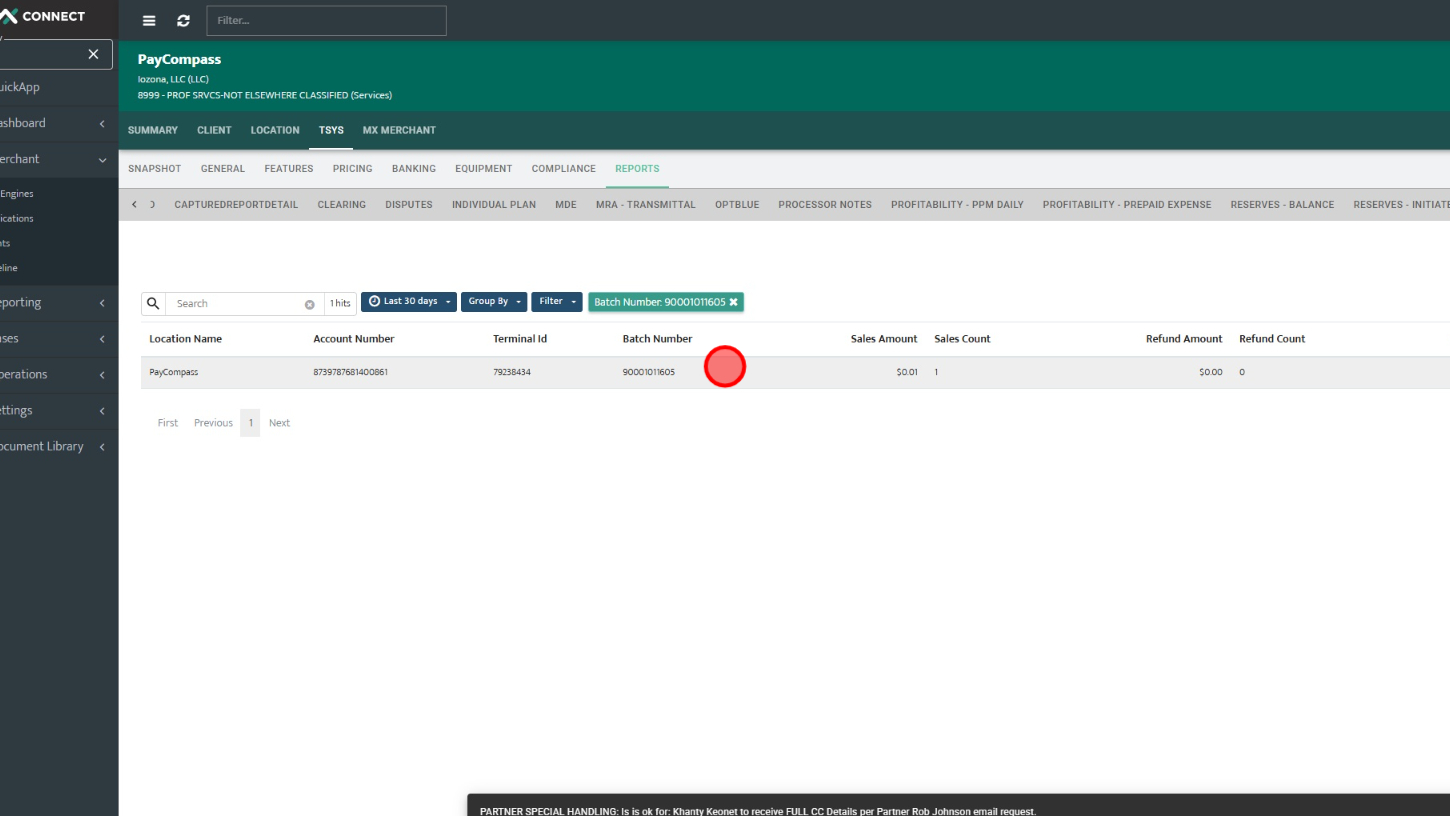
Step 25: This will show the settled batch matching the filter. You can click on the batch to view the transactions in the batch.
PART IV: Pulling Statements in MxConnect
Step 1: Visit https://mxconnect.com/#/dashboard/accounts
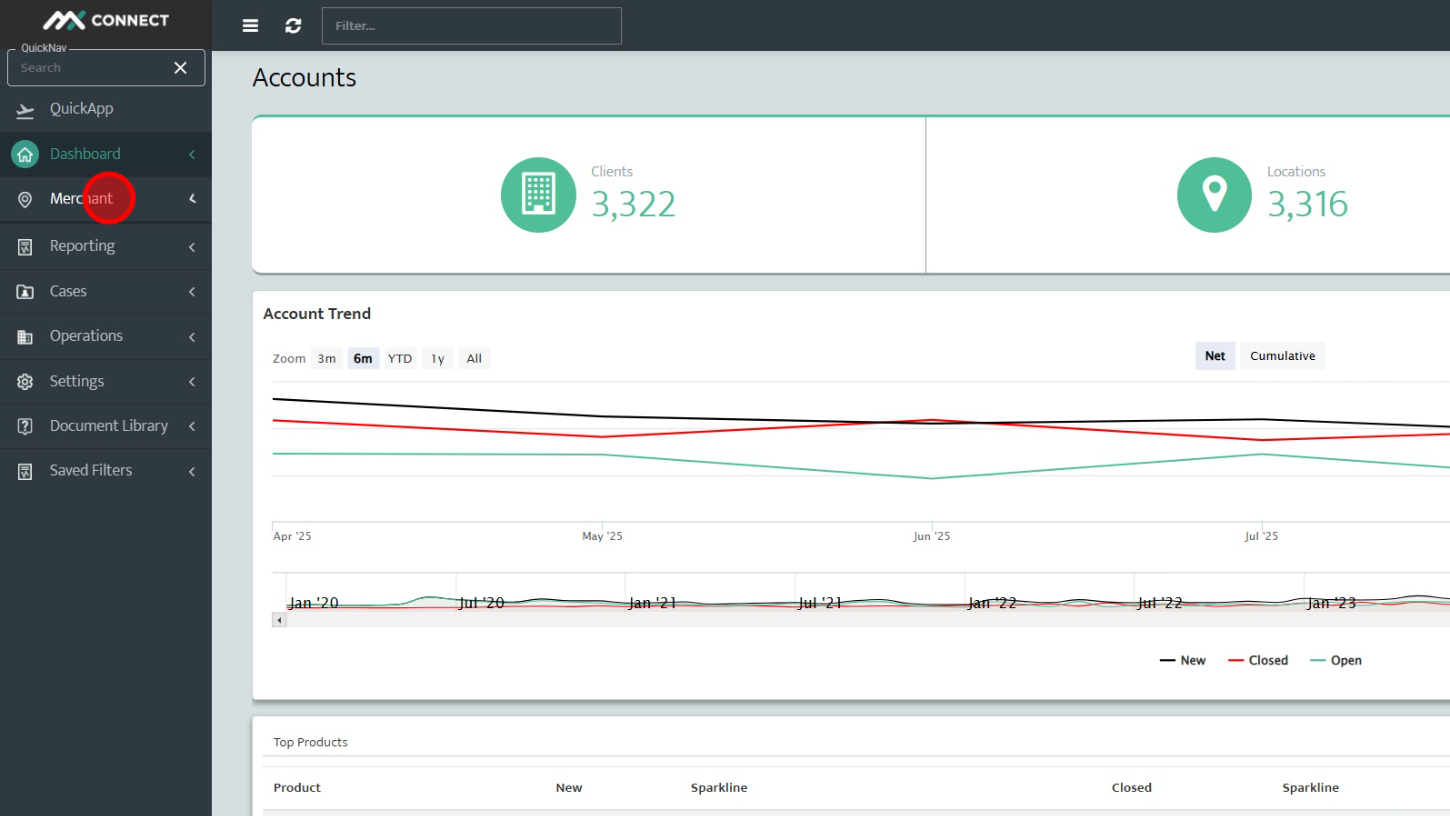
Step 2: Click "Merchant" tab
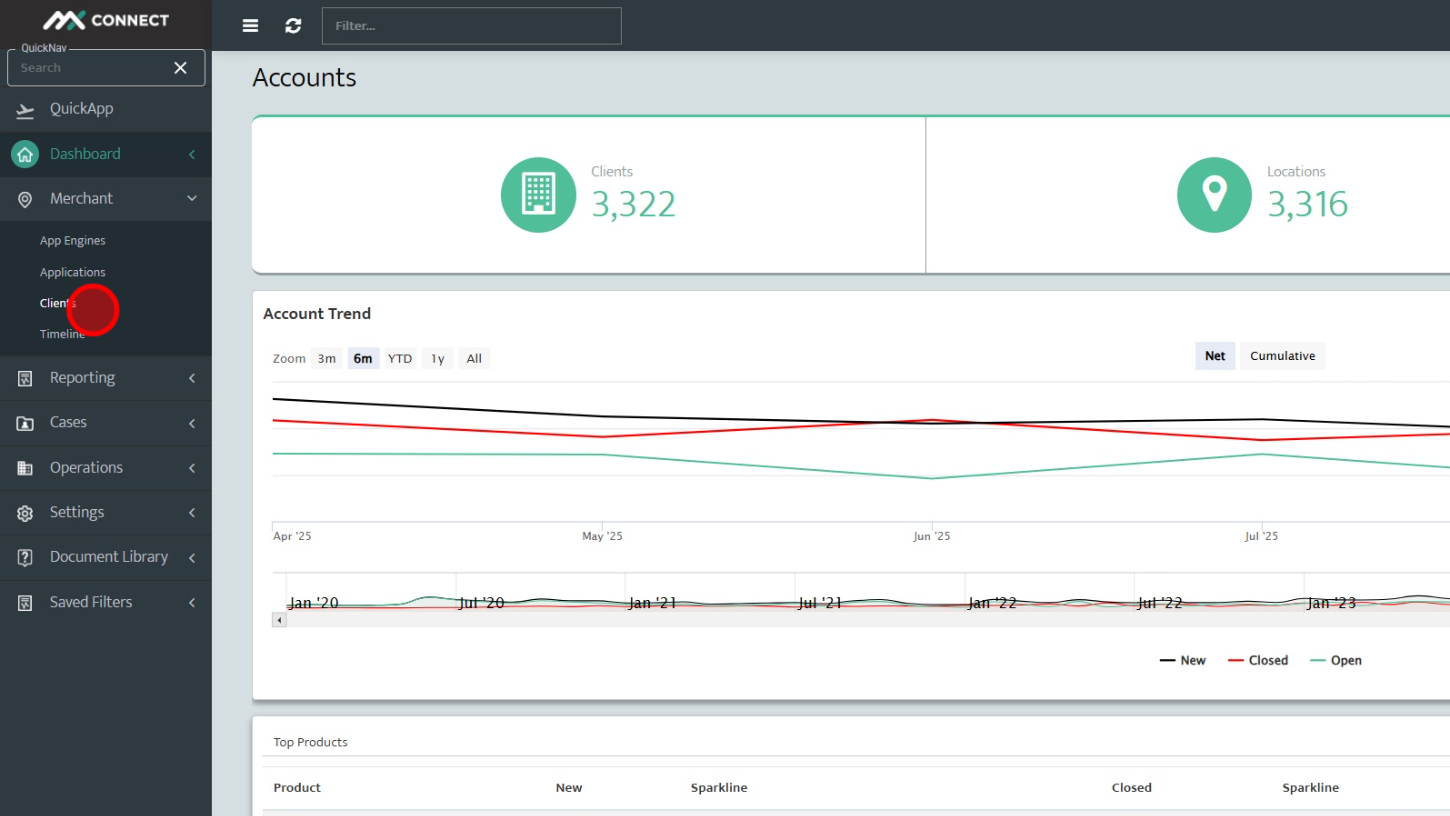
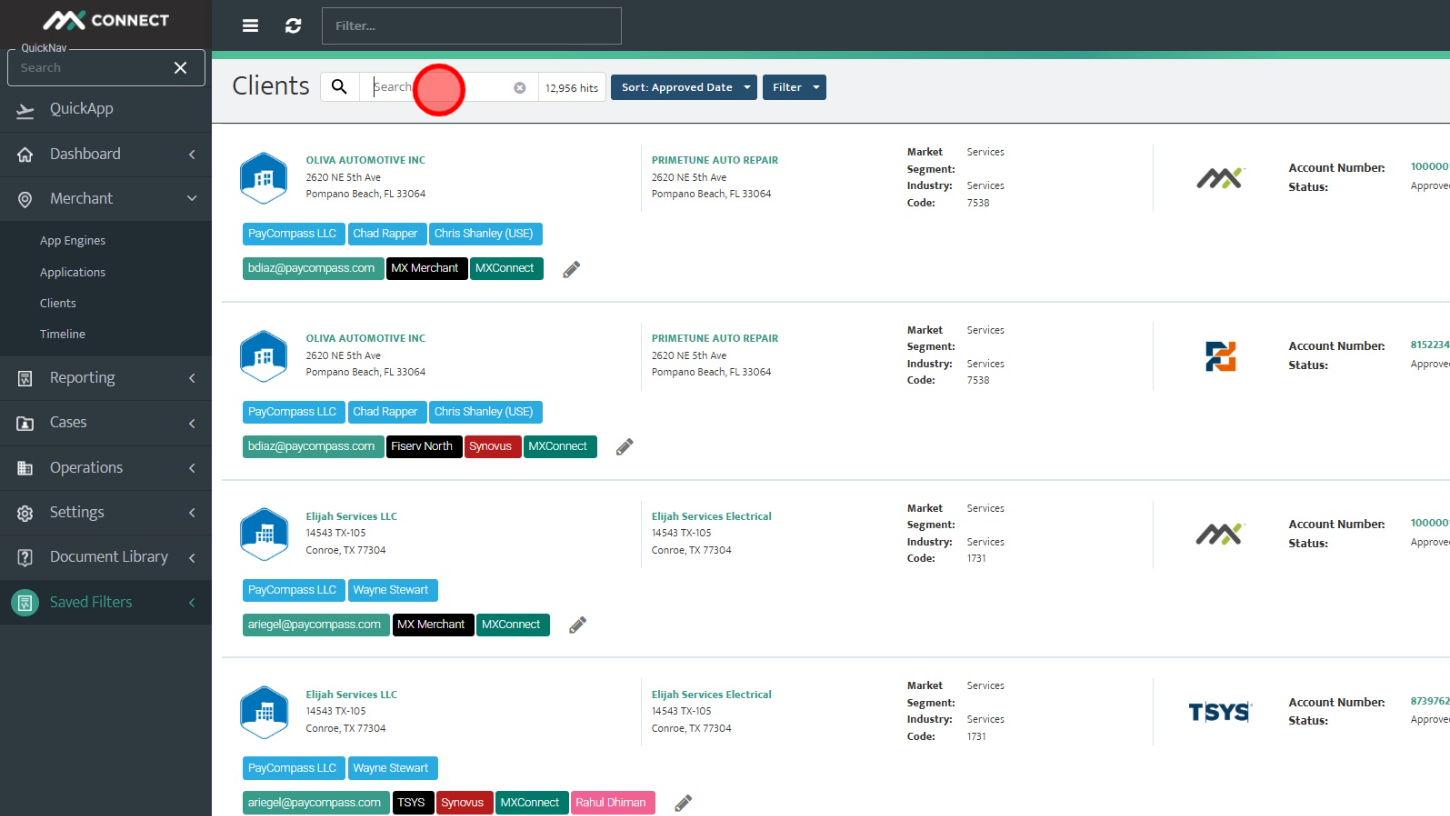
Step 3: Click "Clients" tab
Step 4: Click input field and type in the DBA name or MID
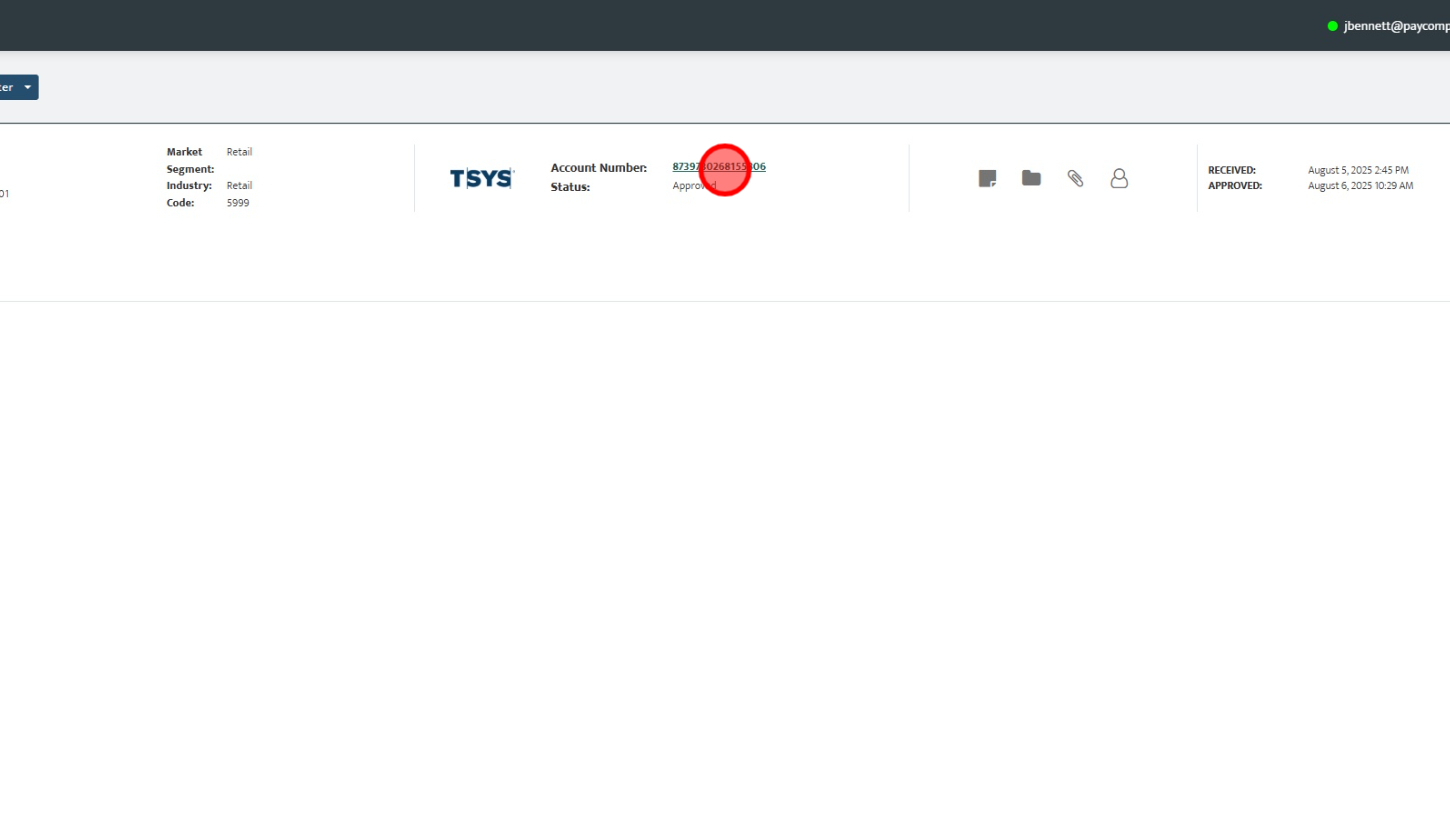
Step 5: Click the TSYS MID
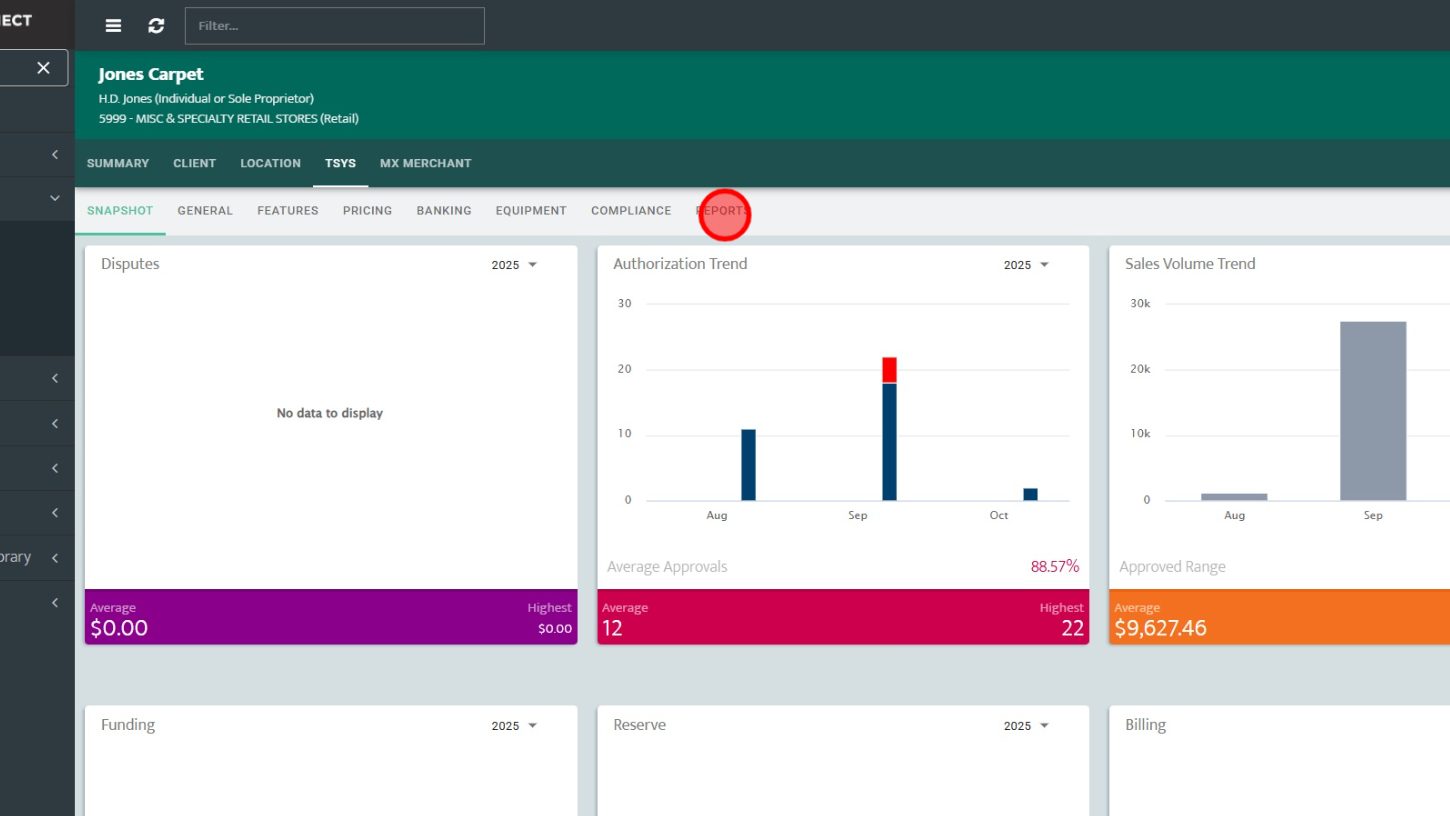
Step 6: Click "Reports" tab
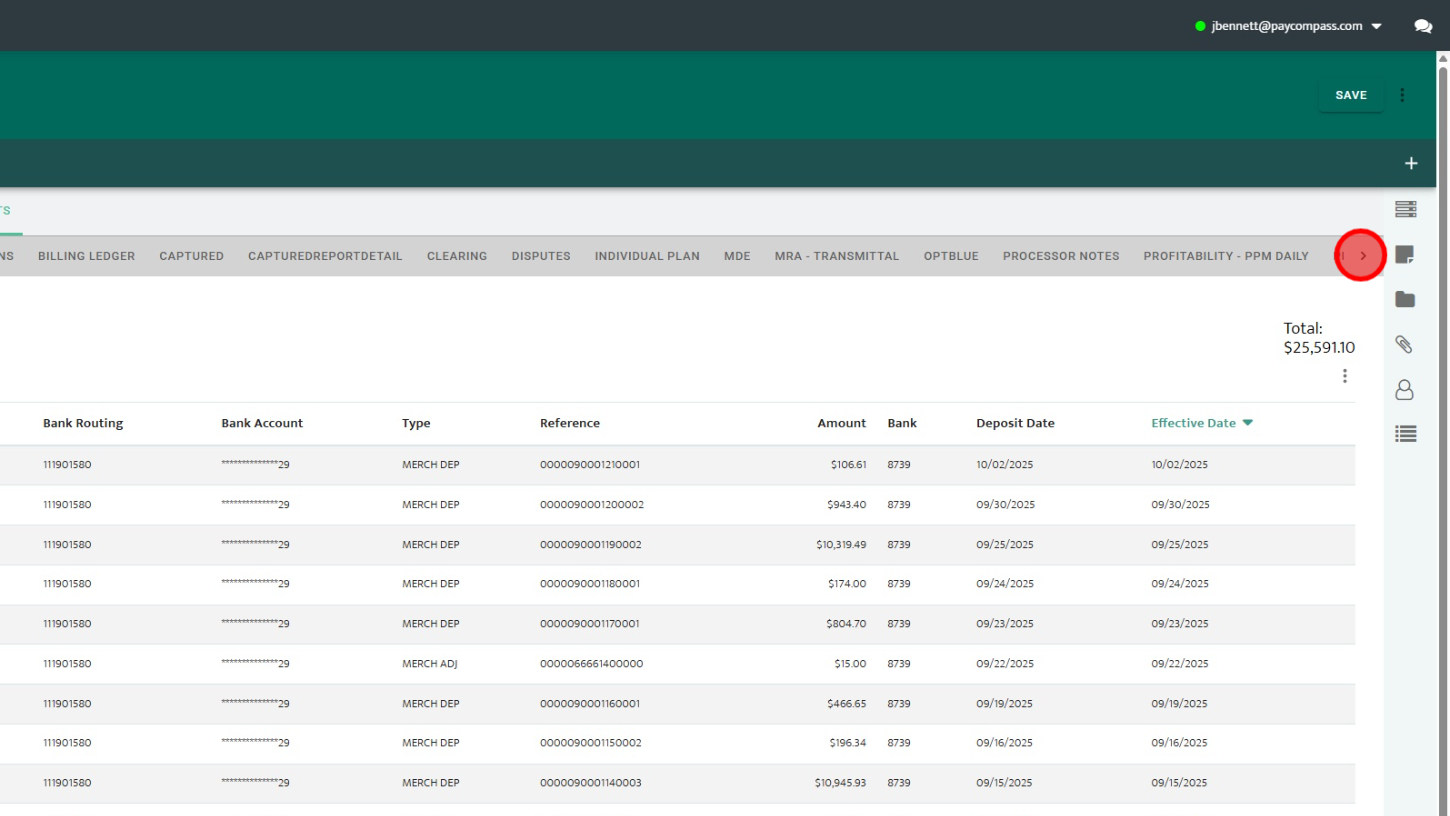
Step 7: Click right arrow
Step 8: Click "STATEMENTS - MXC" tab
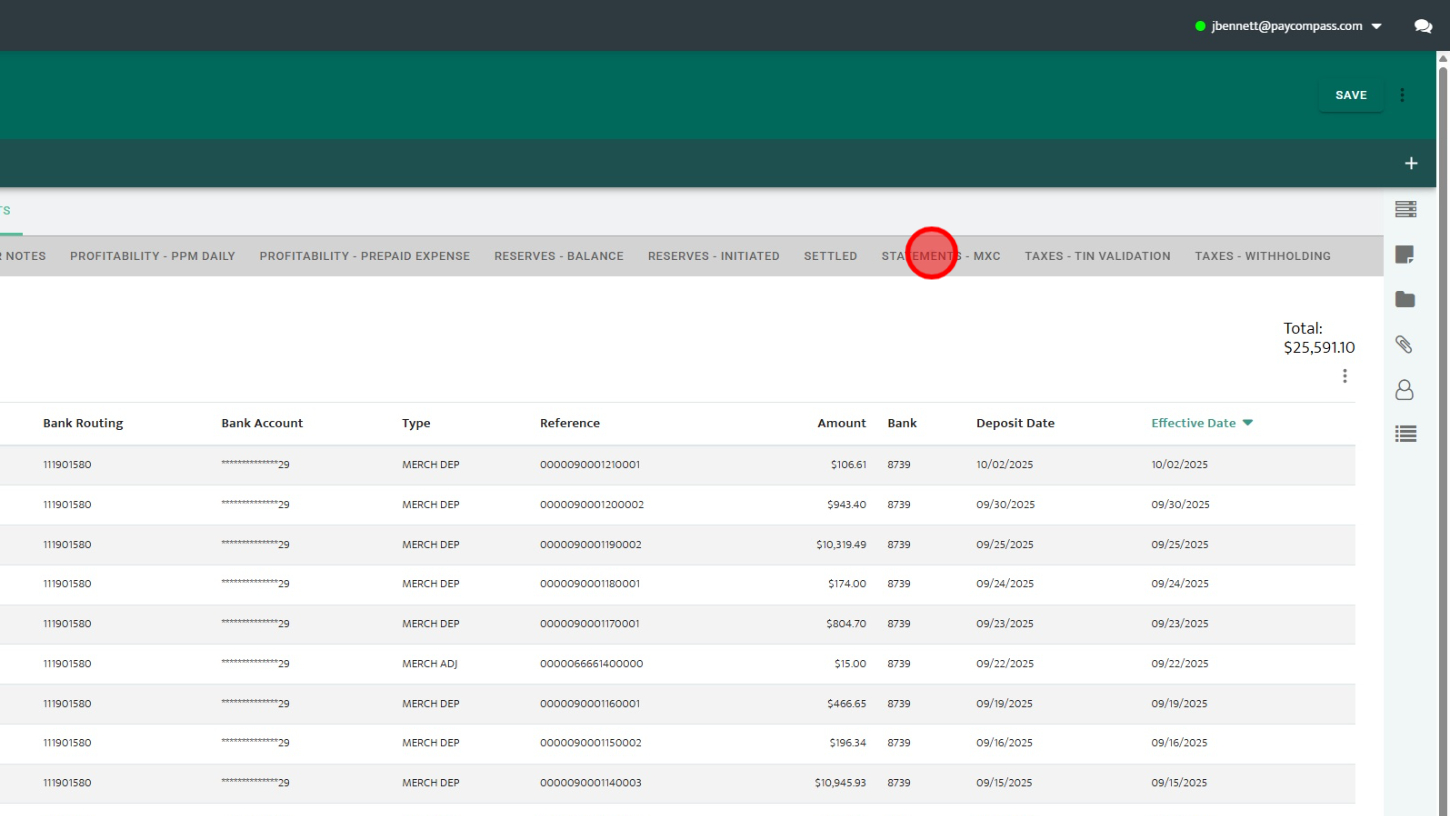
Step 9: Click Statement copy you need
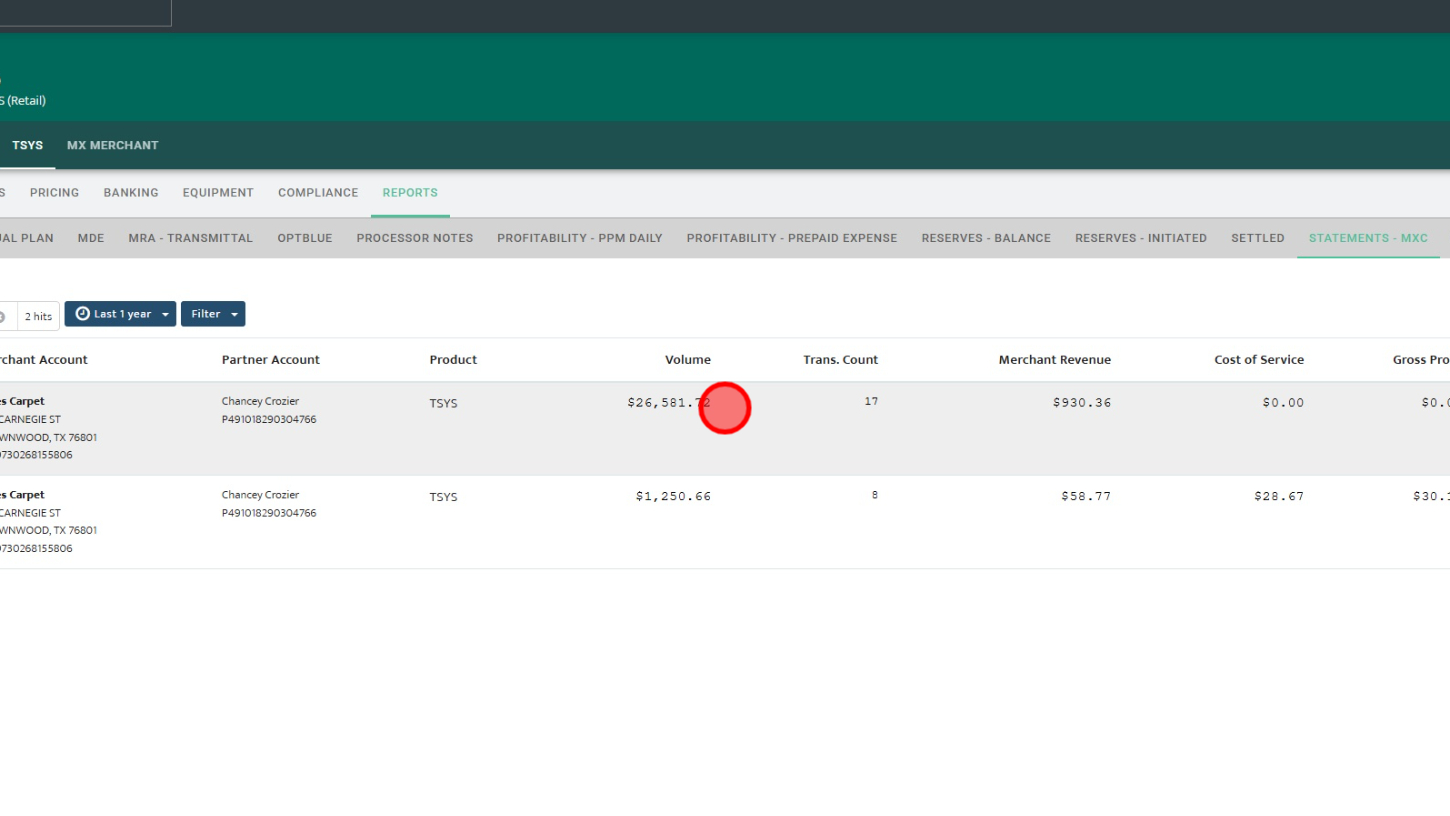
PART V: How To View Volume for a Specified Date Range in MX Connect
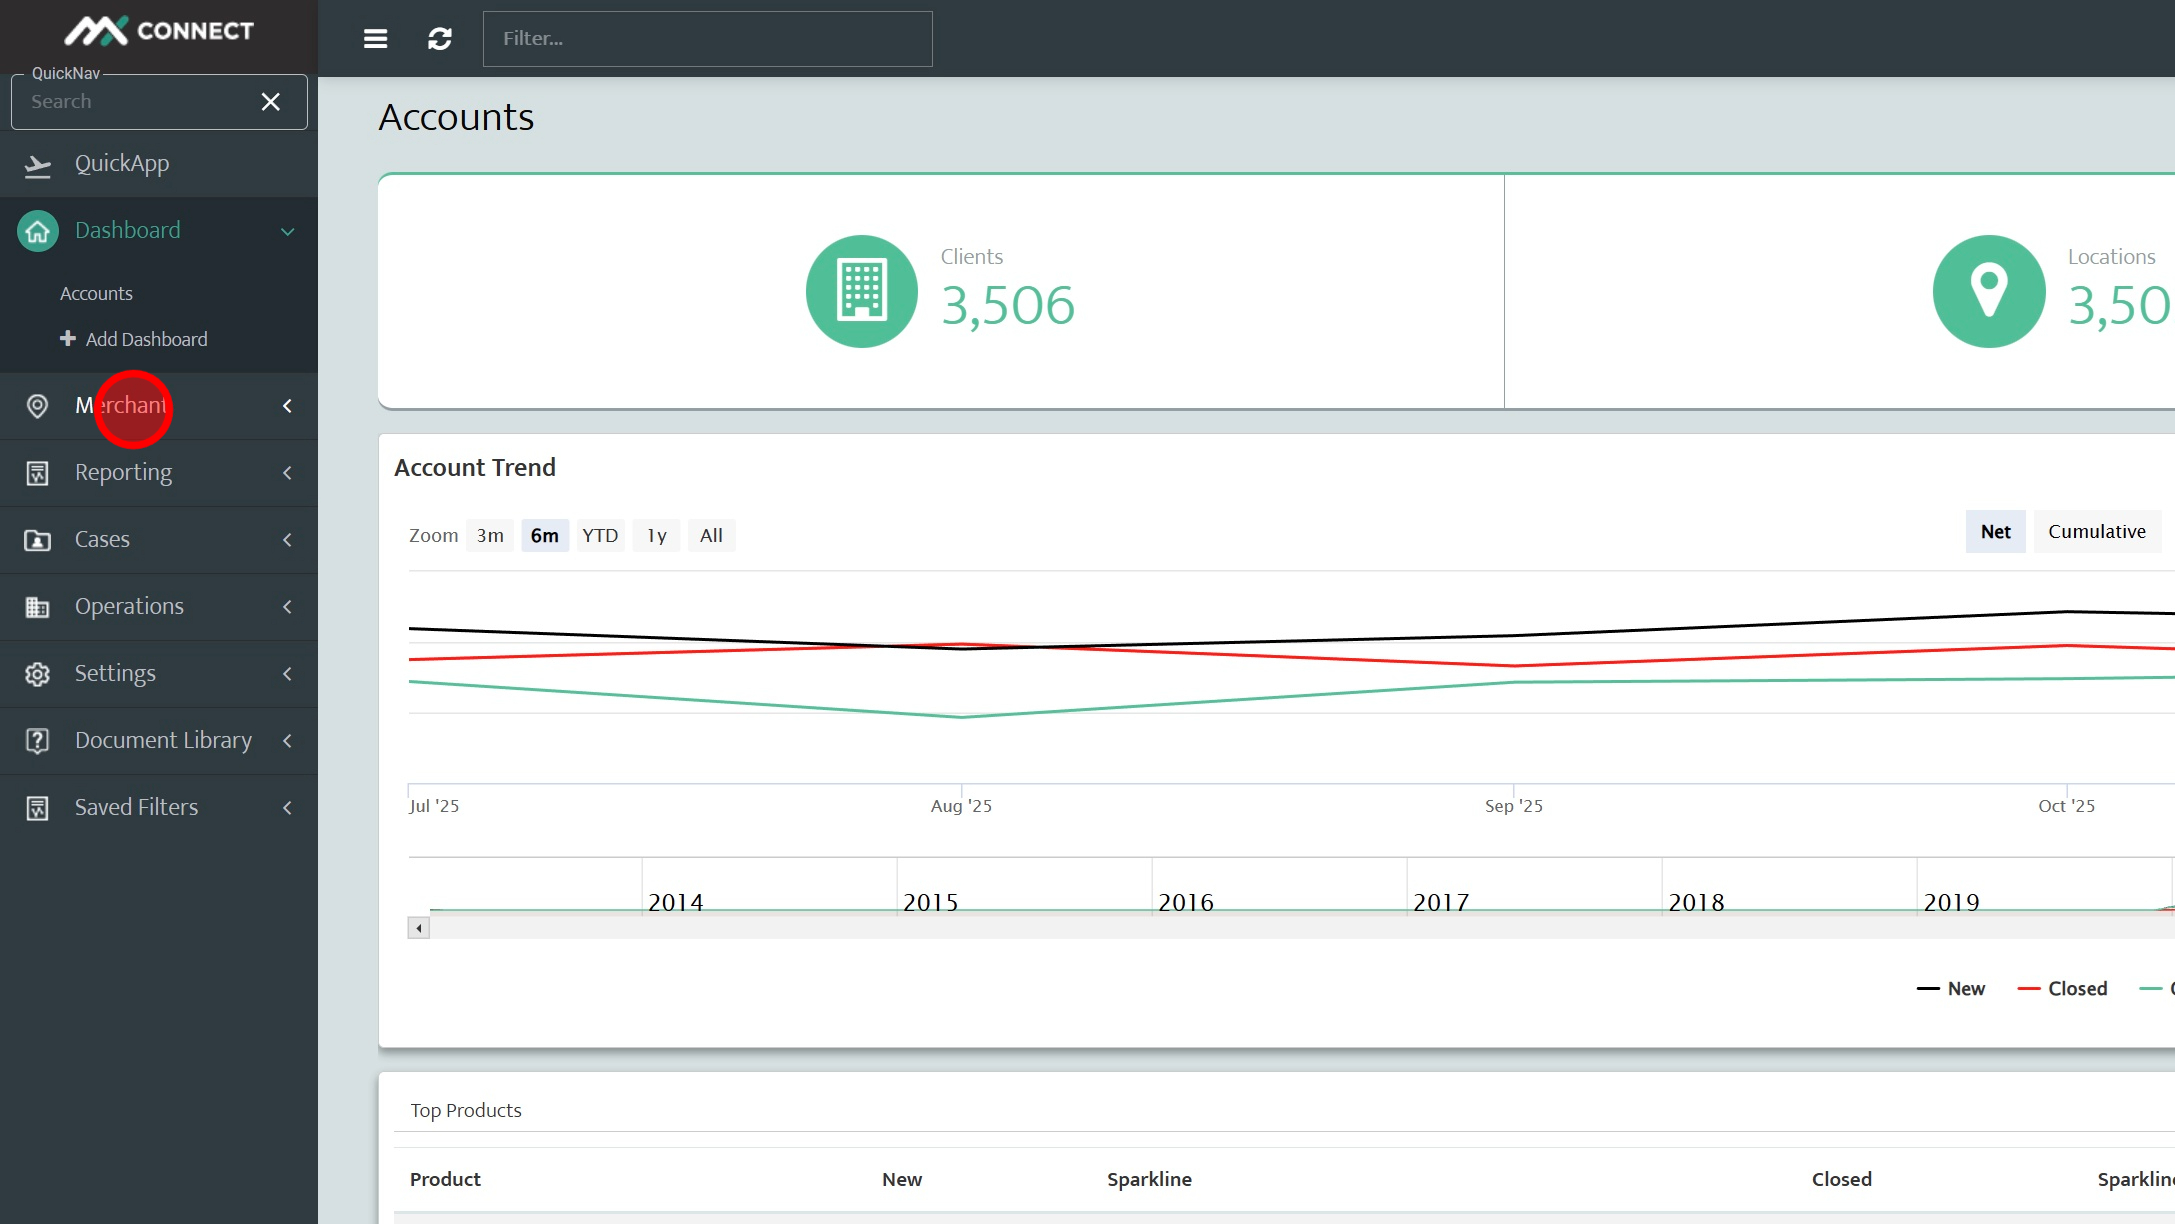
Step 1: Click Merchant
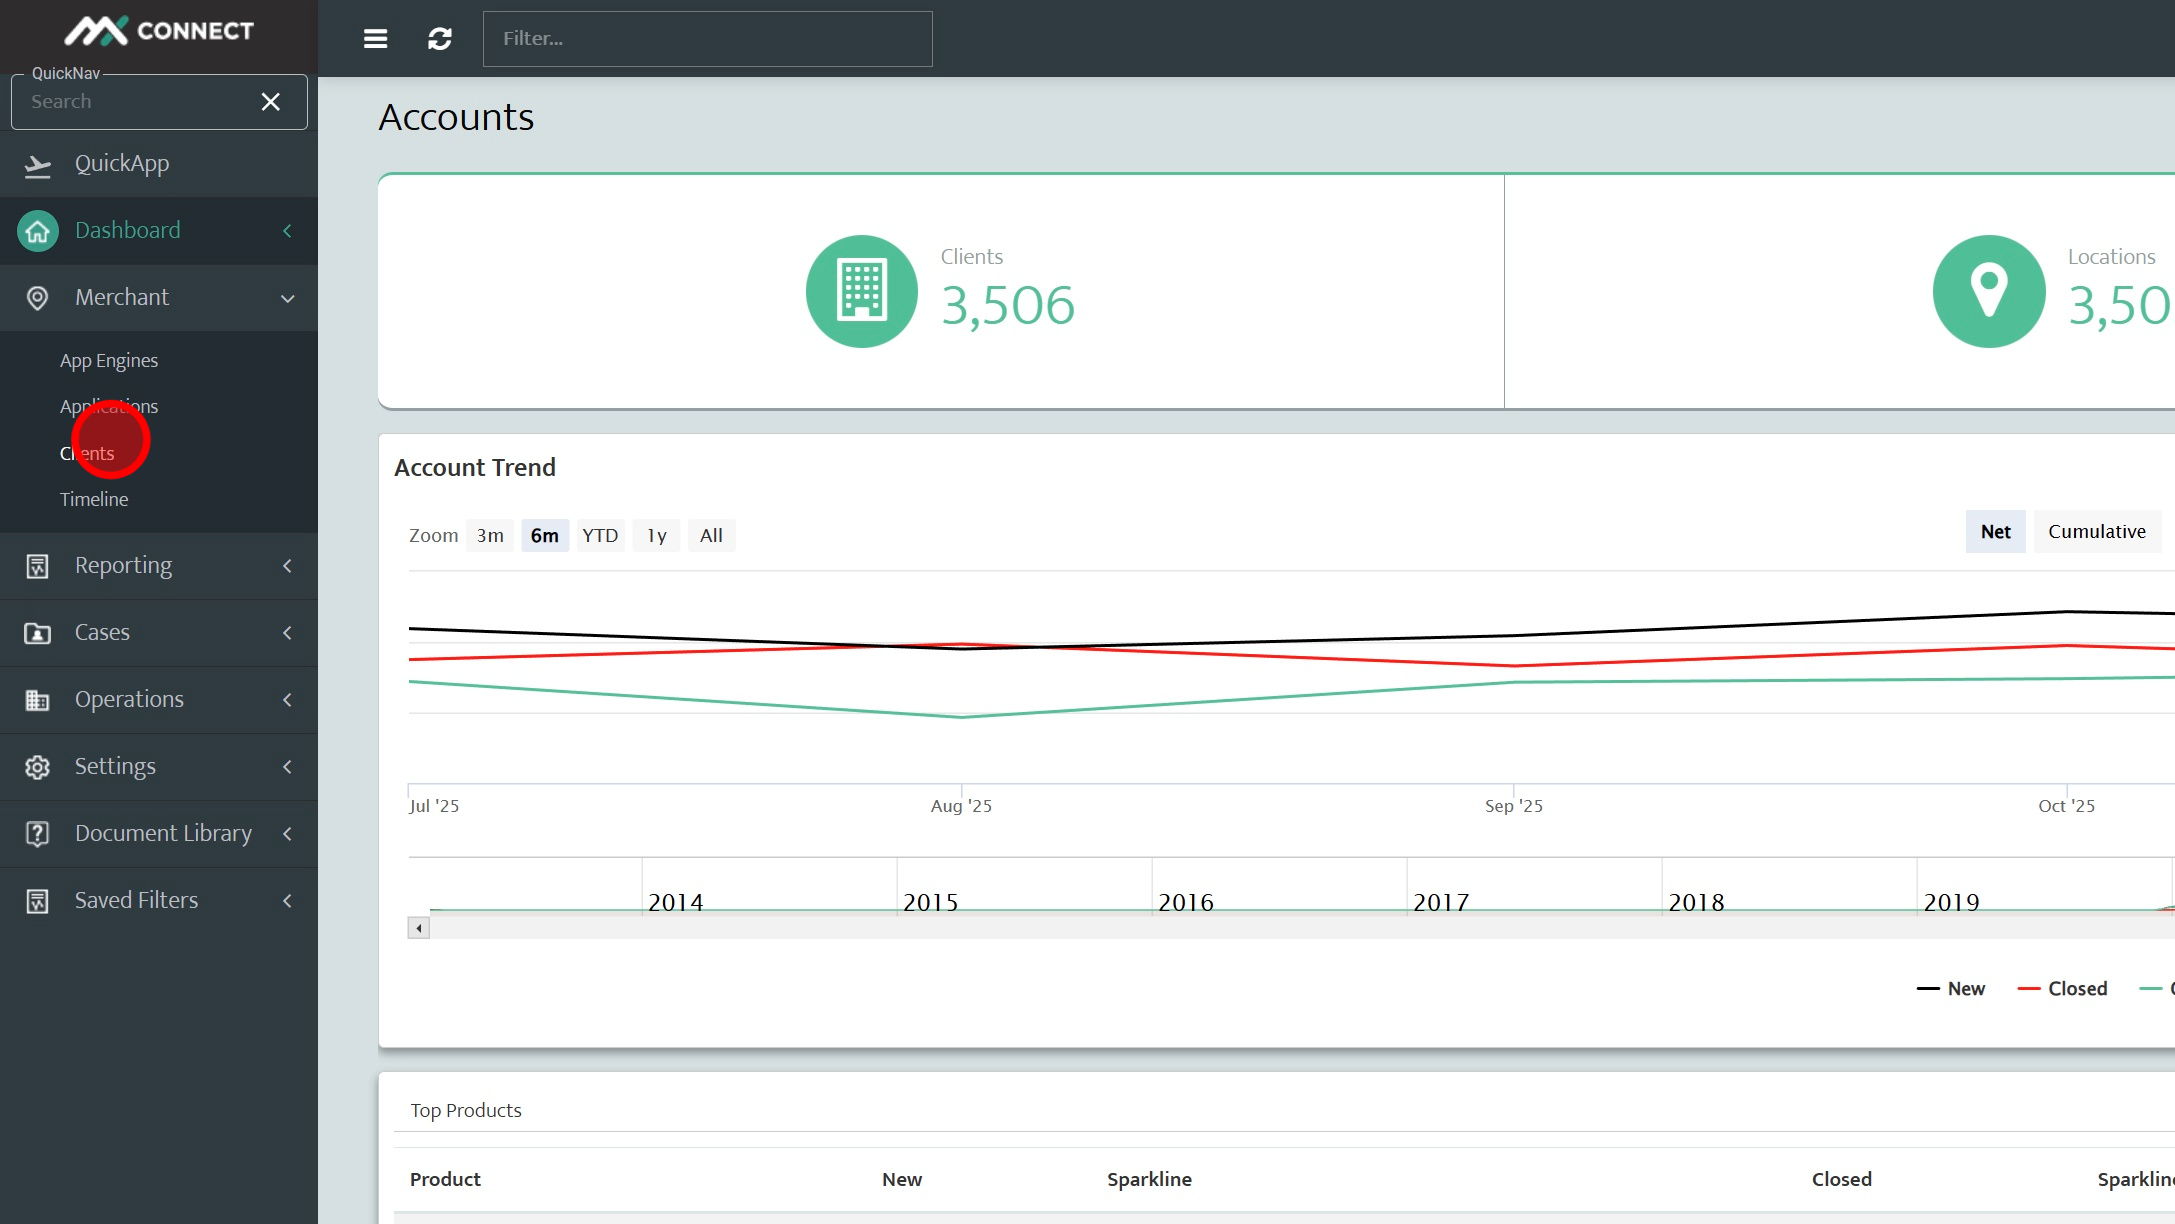
Step 2: Click "Clients"
Step 3: Search for Merchant you would like to view Volume for.
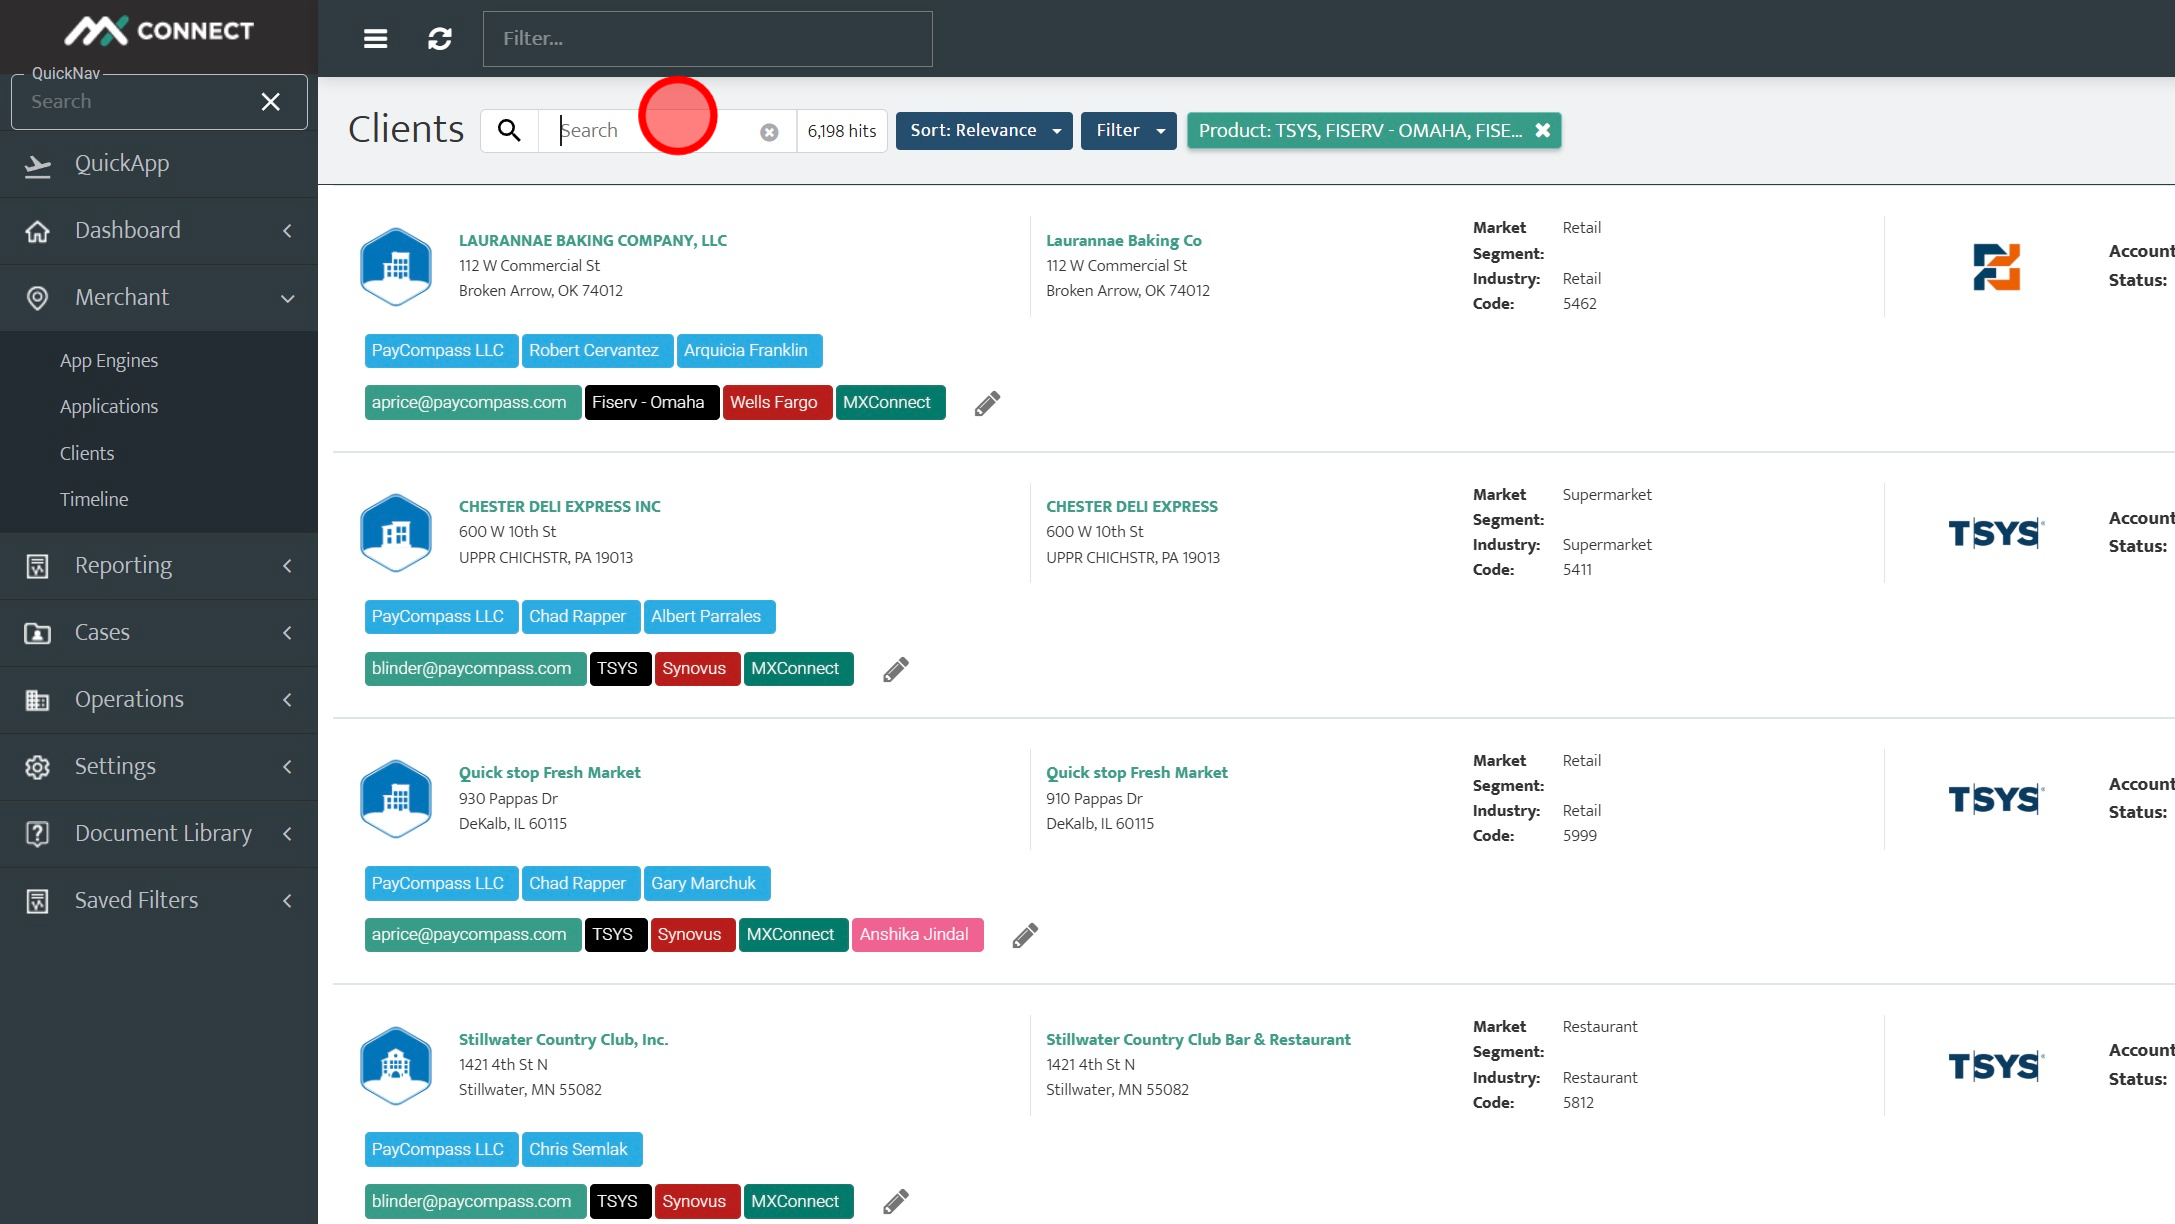
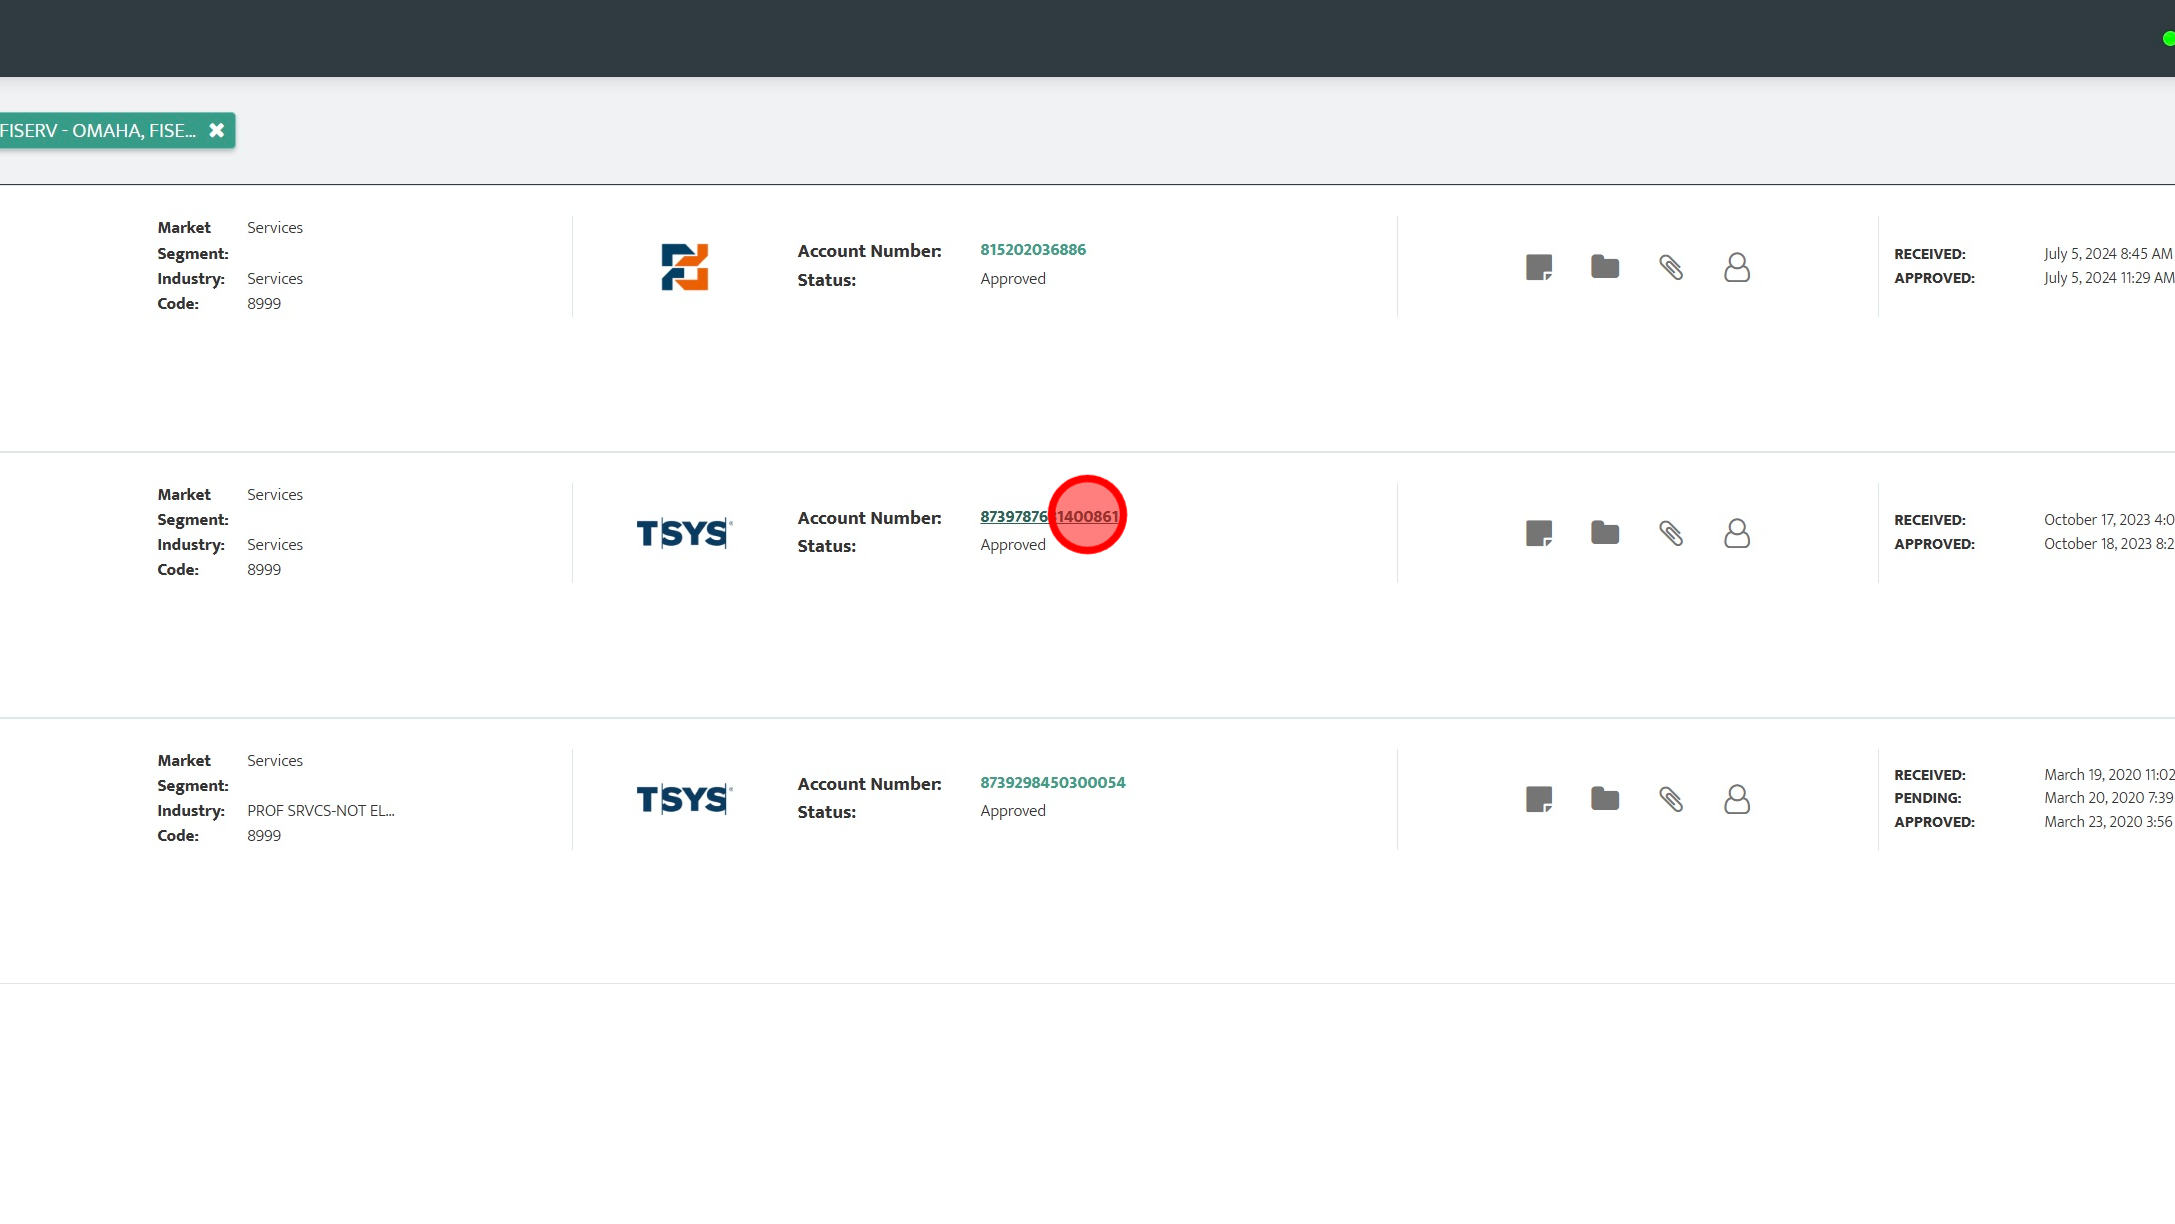
Step 4: Click the TSYS MID for the merchant.
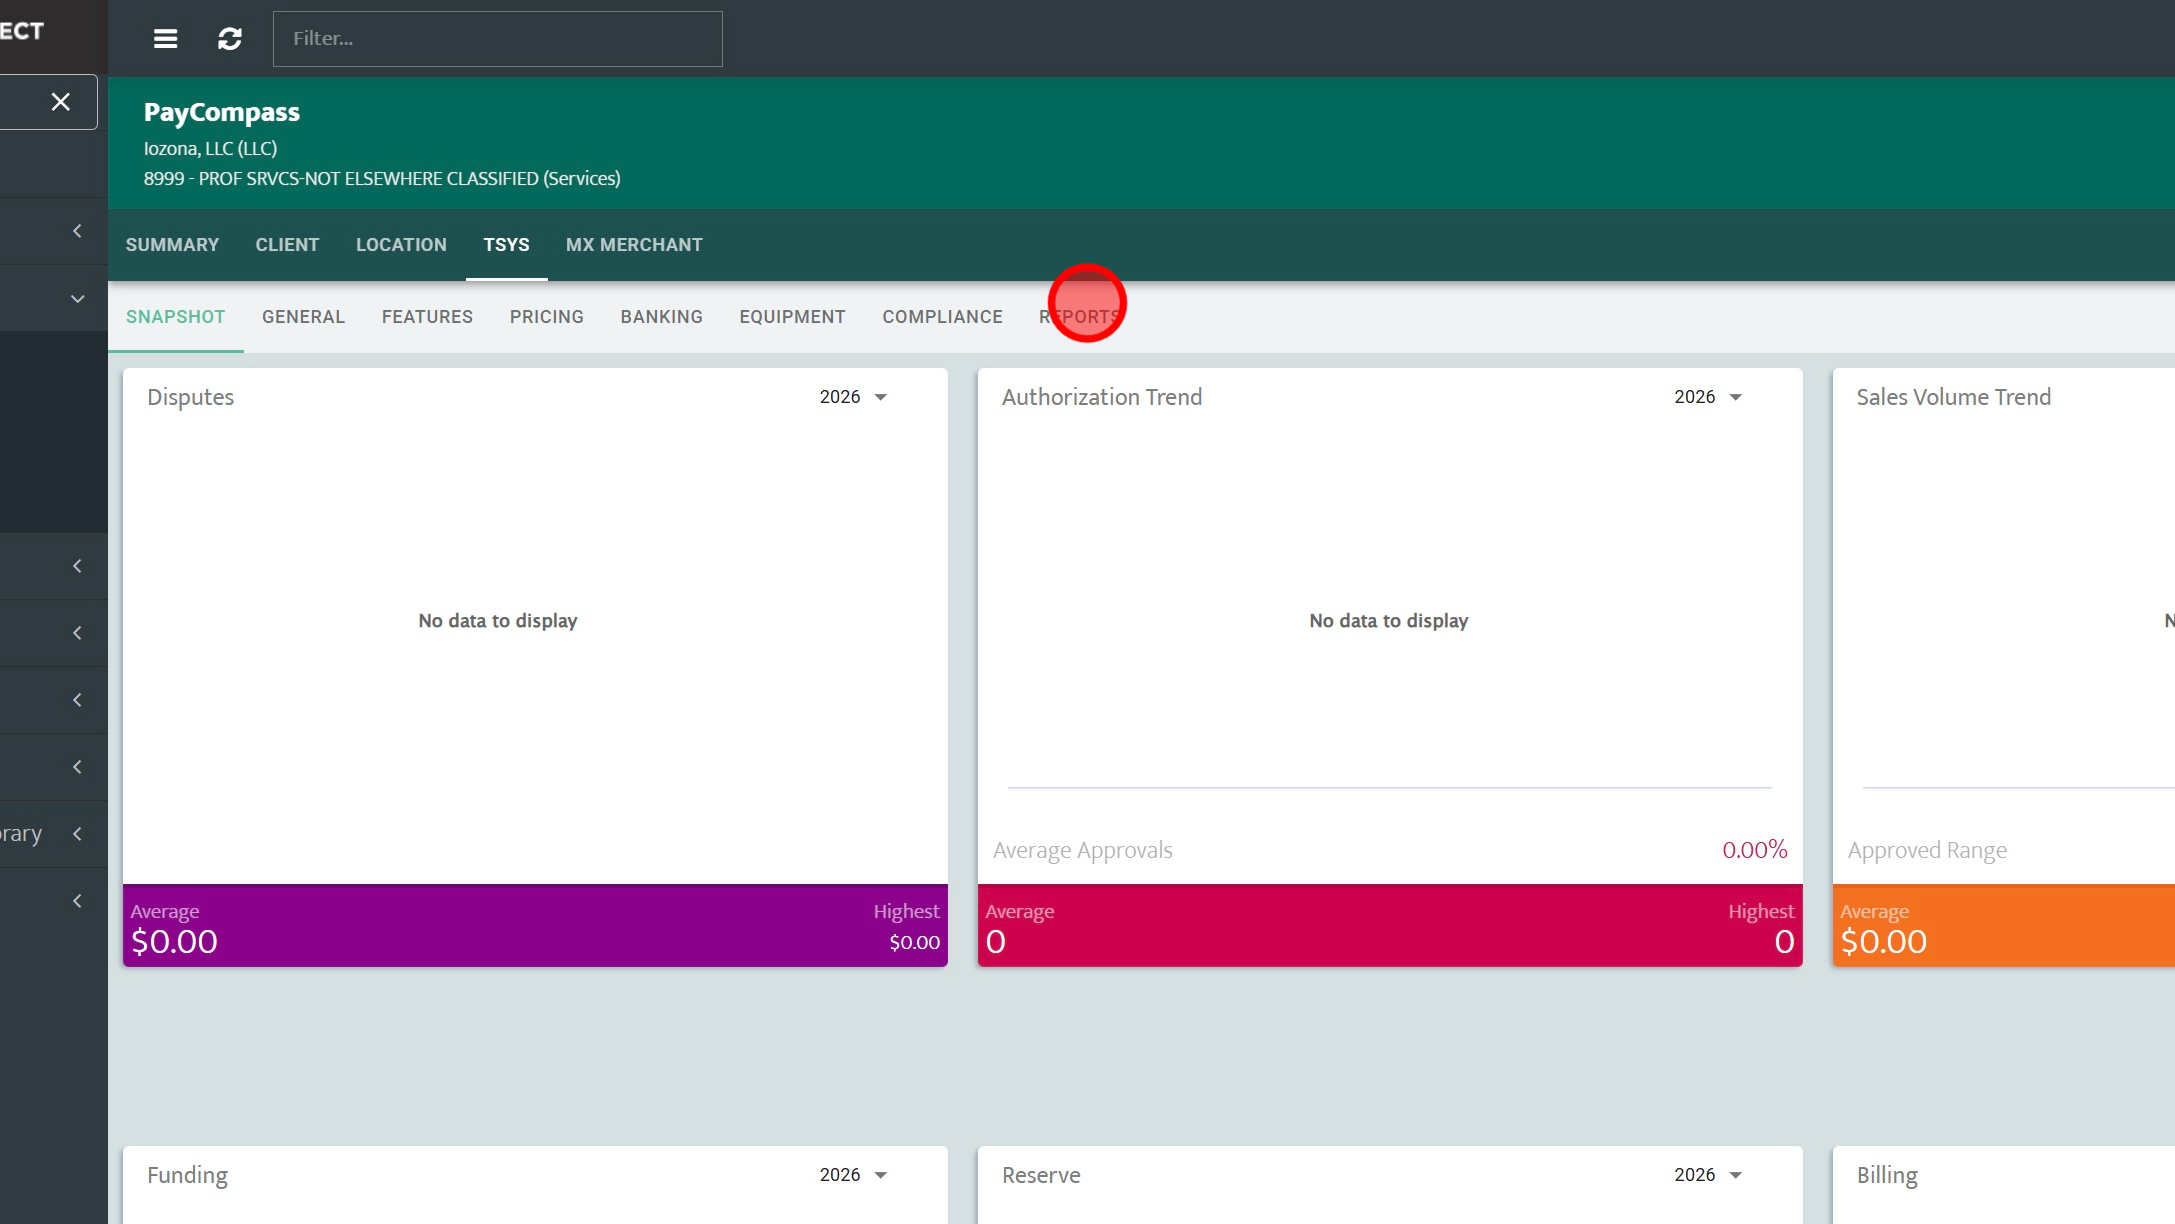
Step 5: Click "Reports"
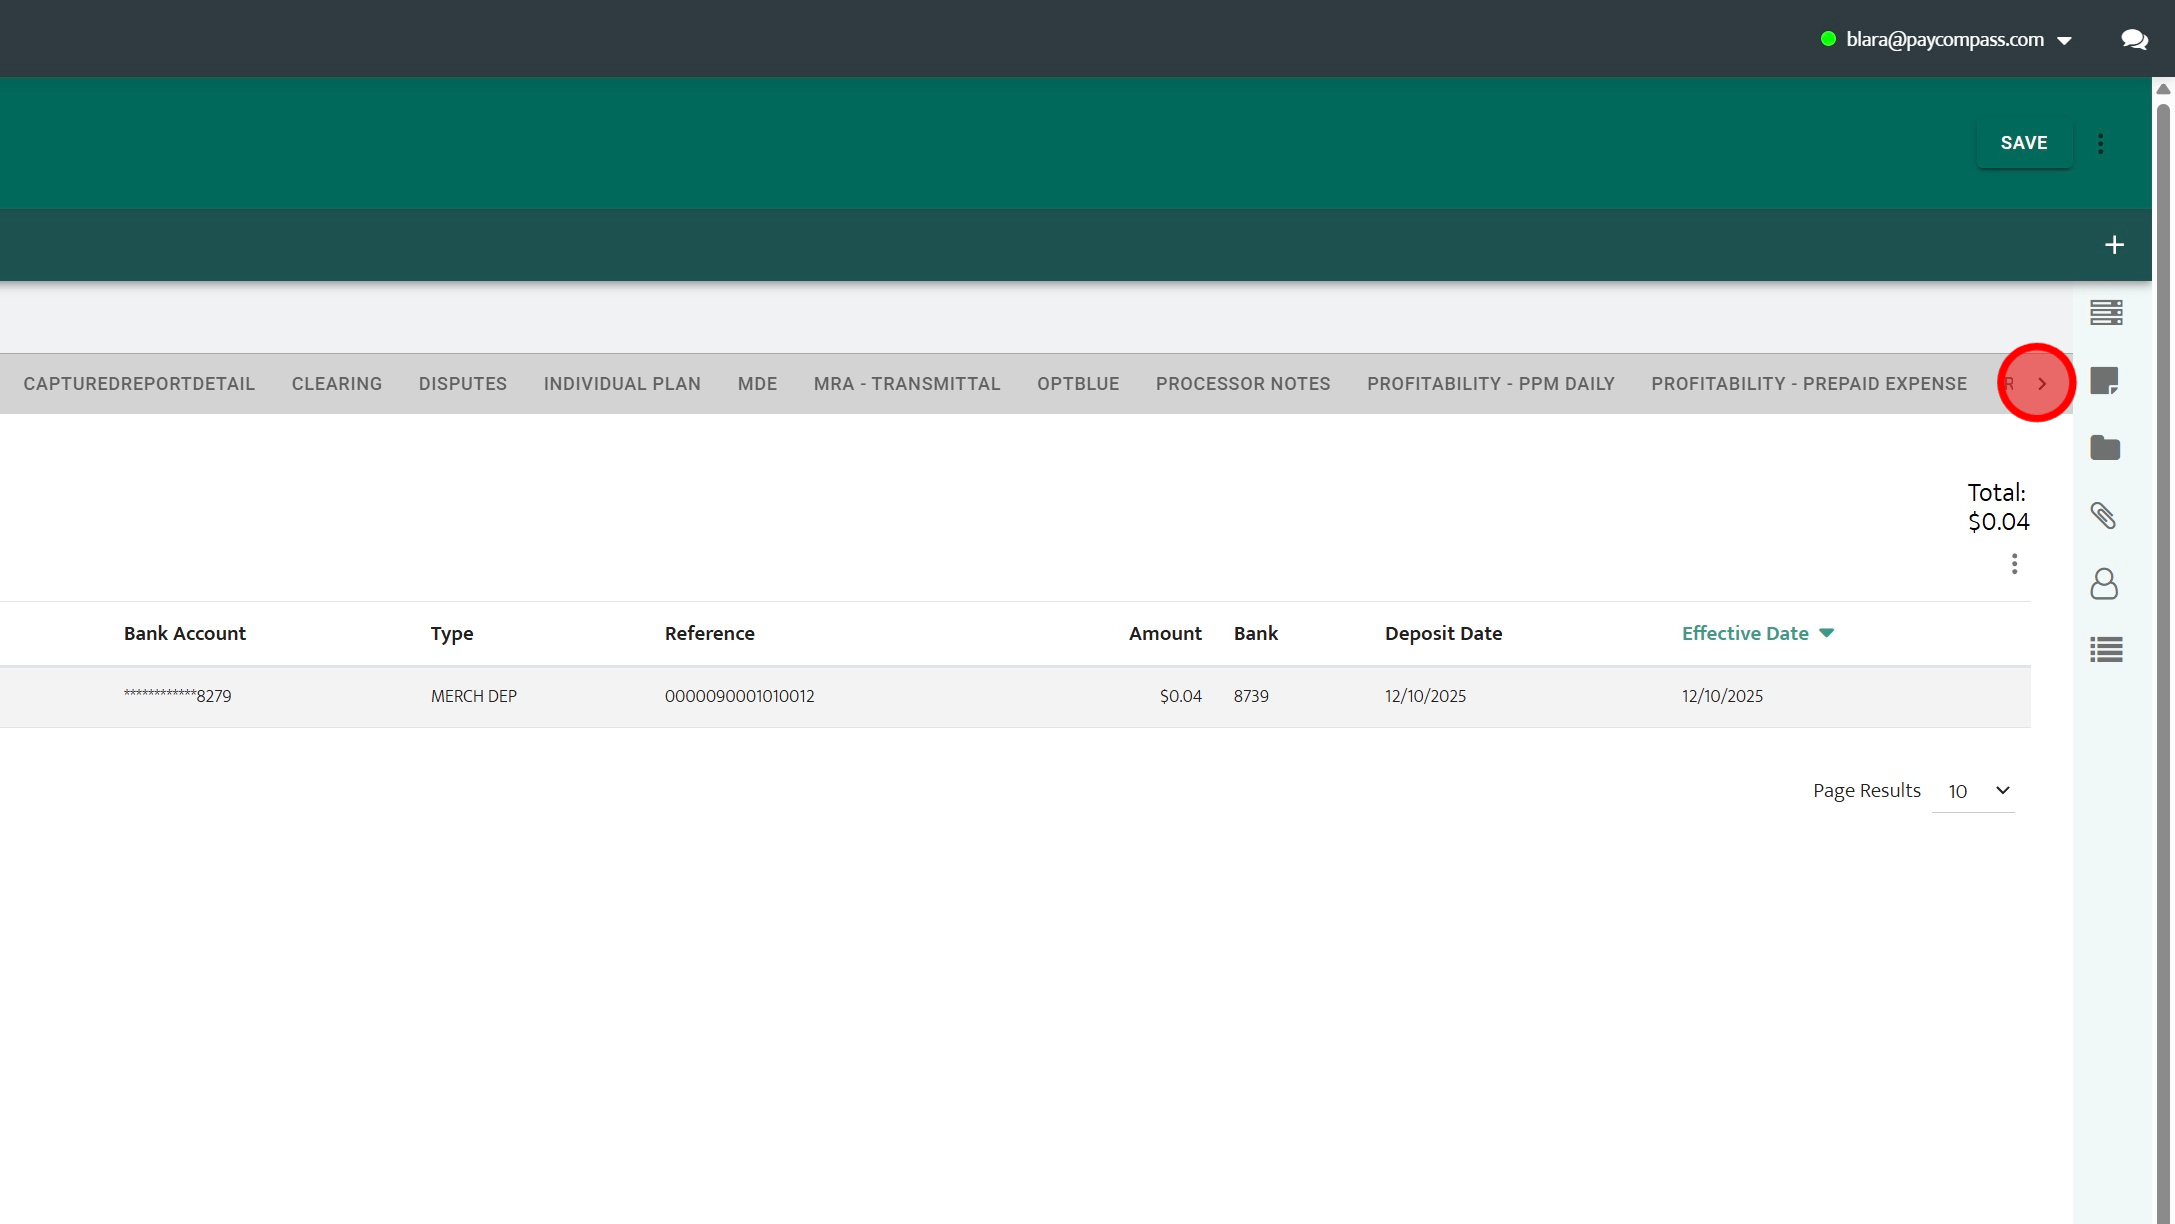
Step 6: Click the right arrow to view more reporting
Step 7: Click "Settled"
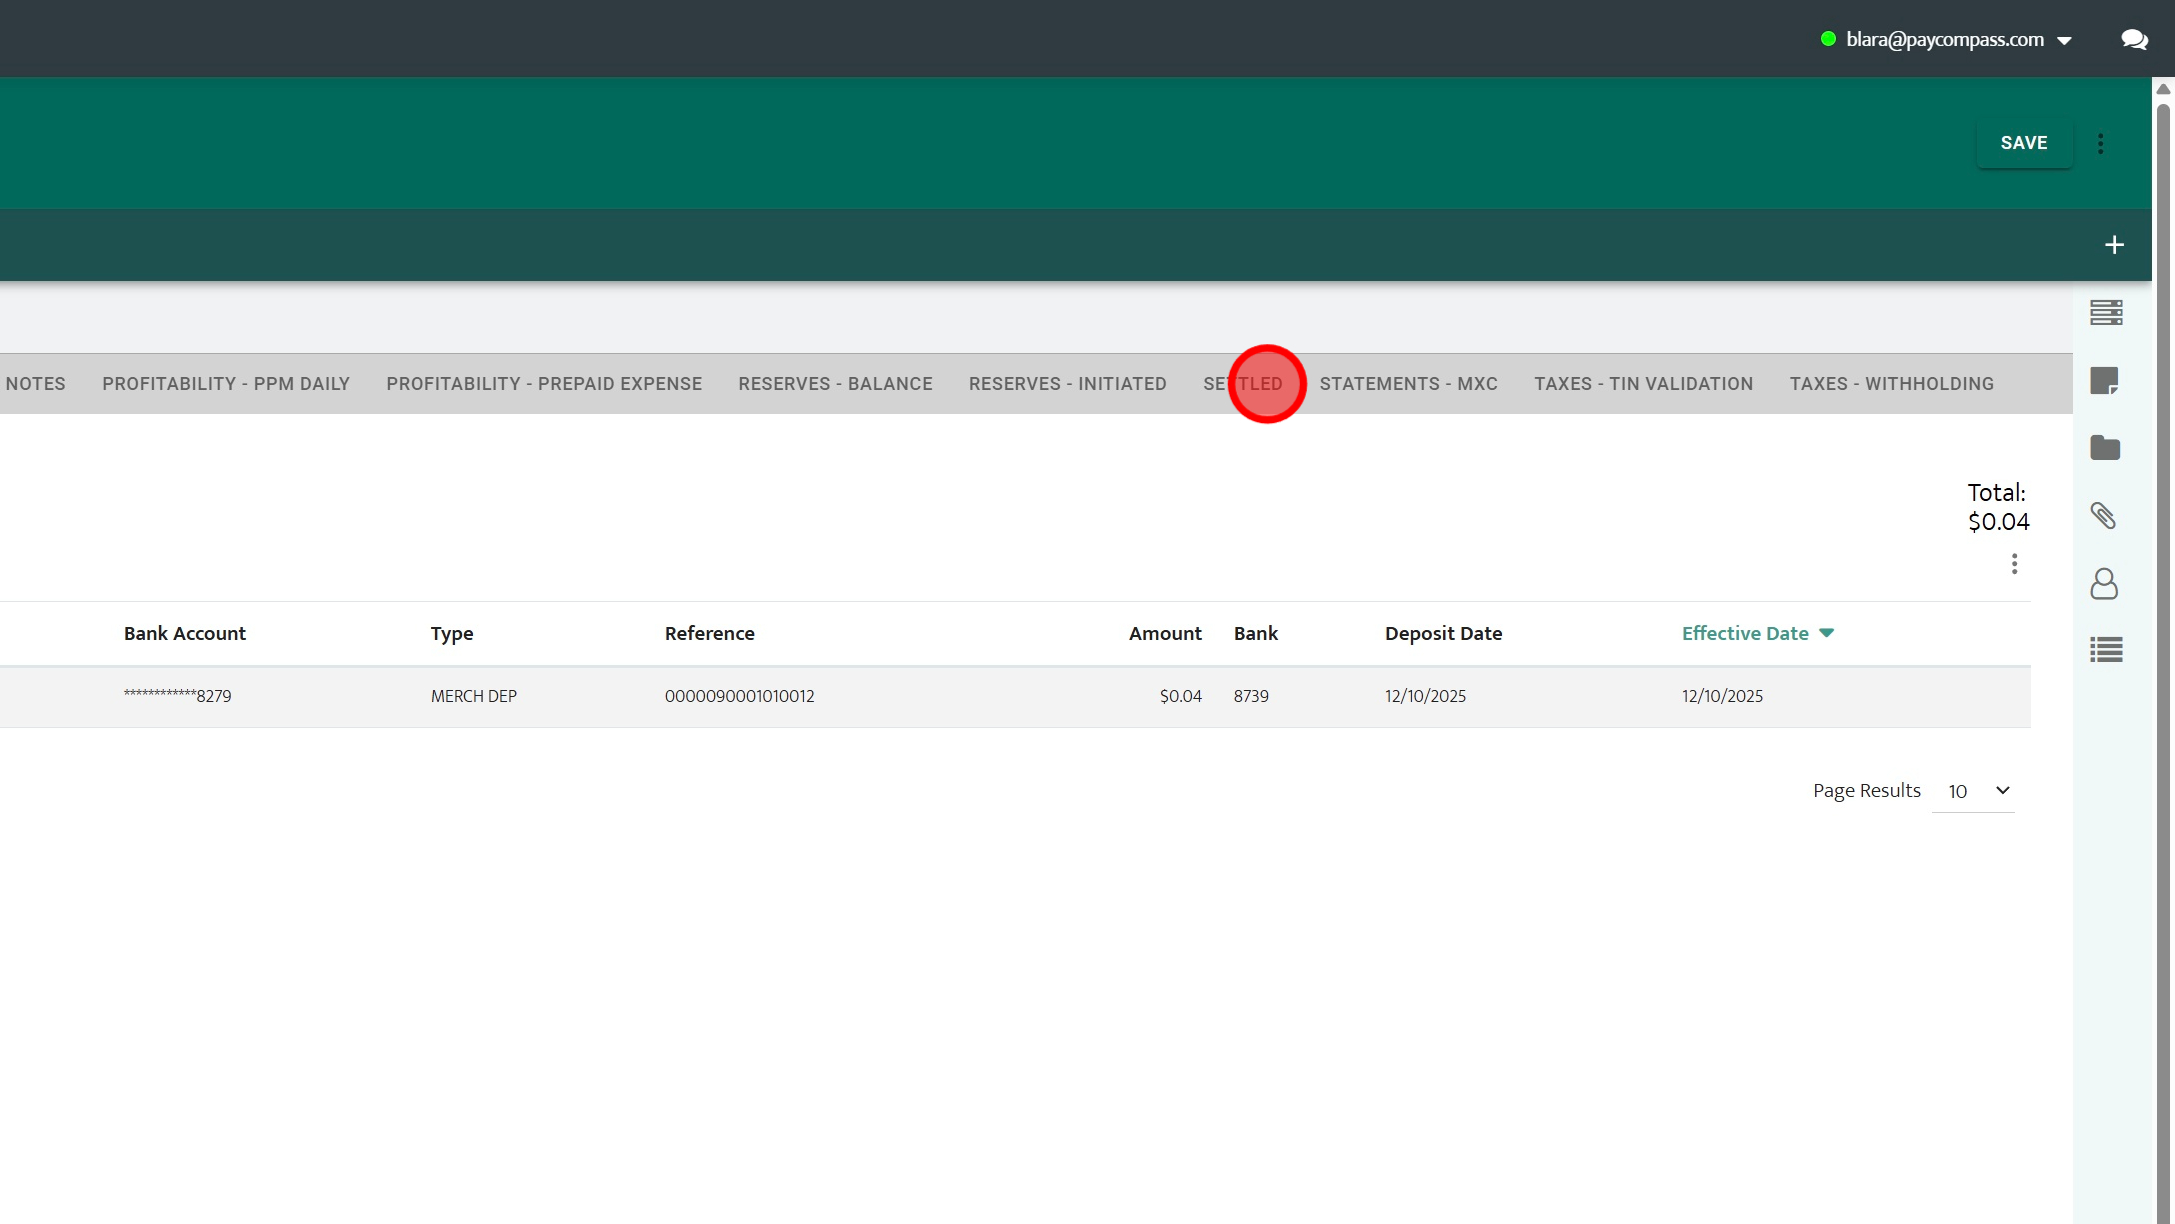
Step 8: Click "Last 30 days"
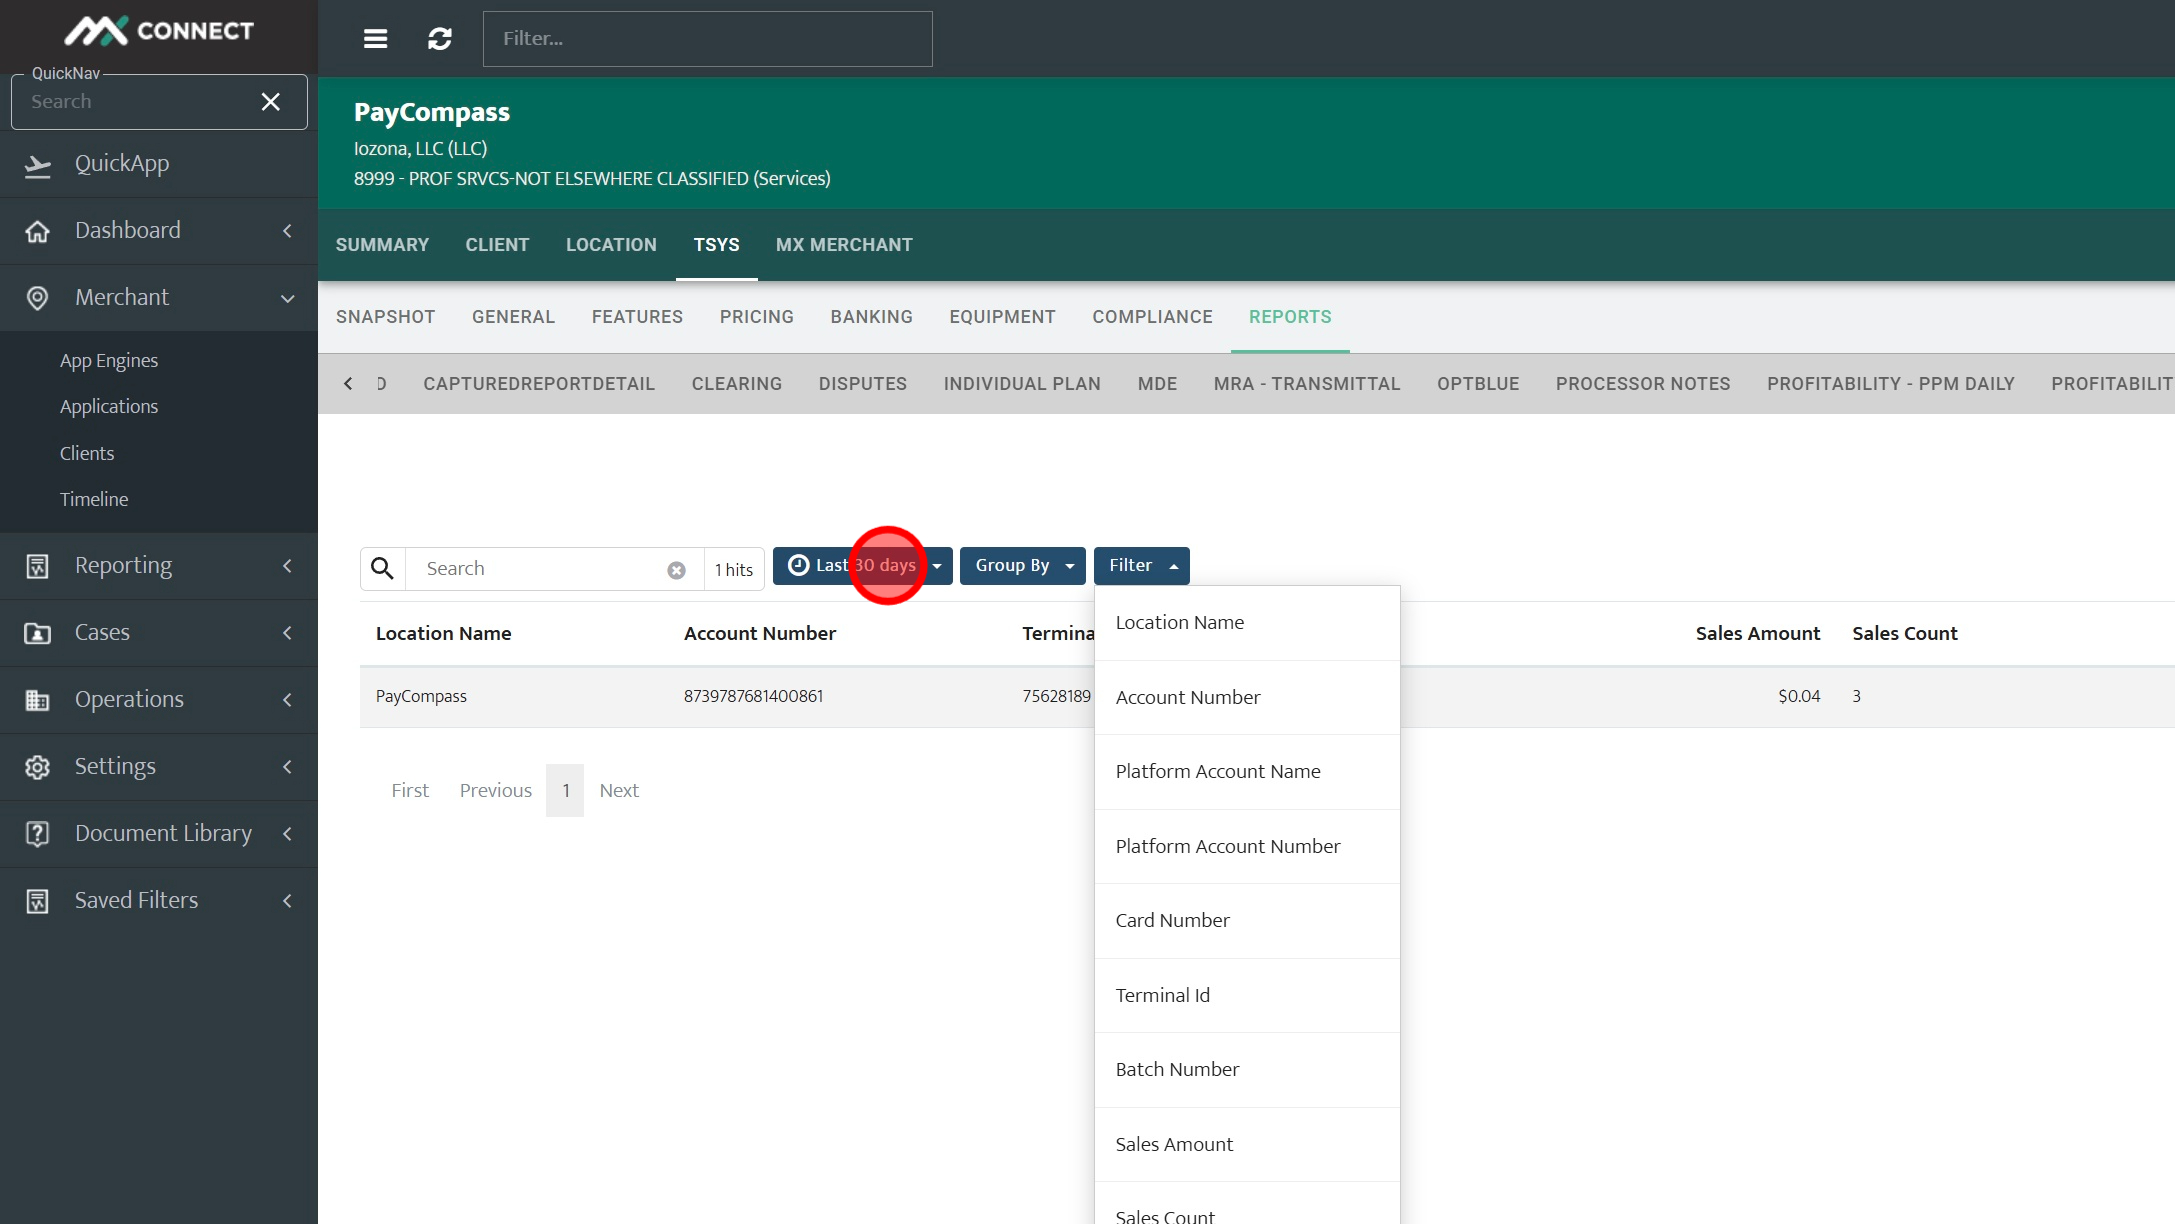
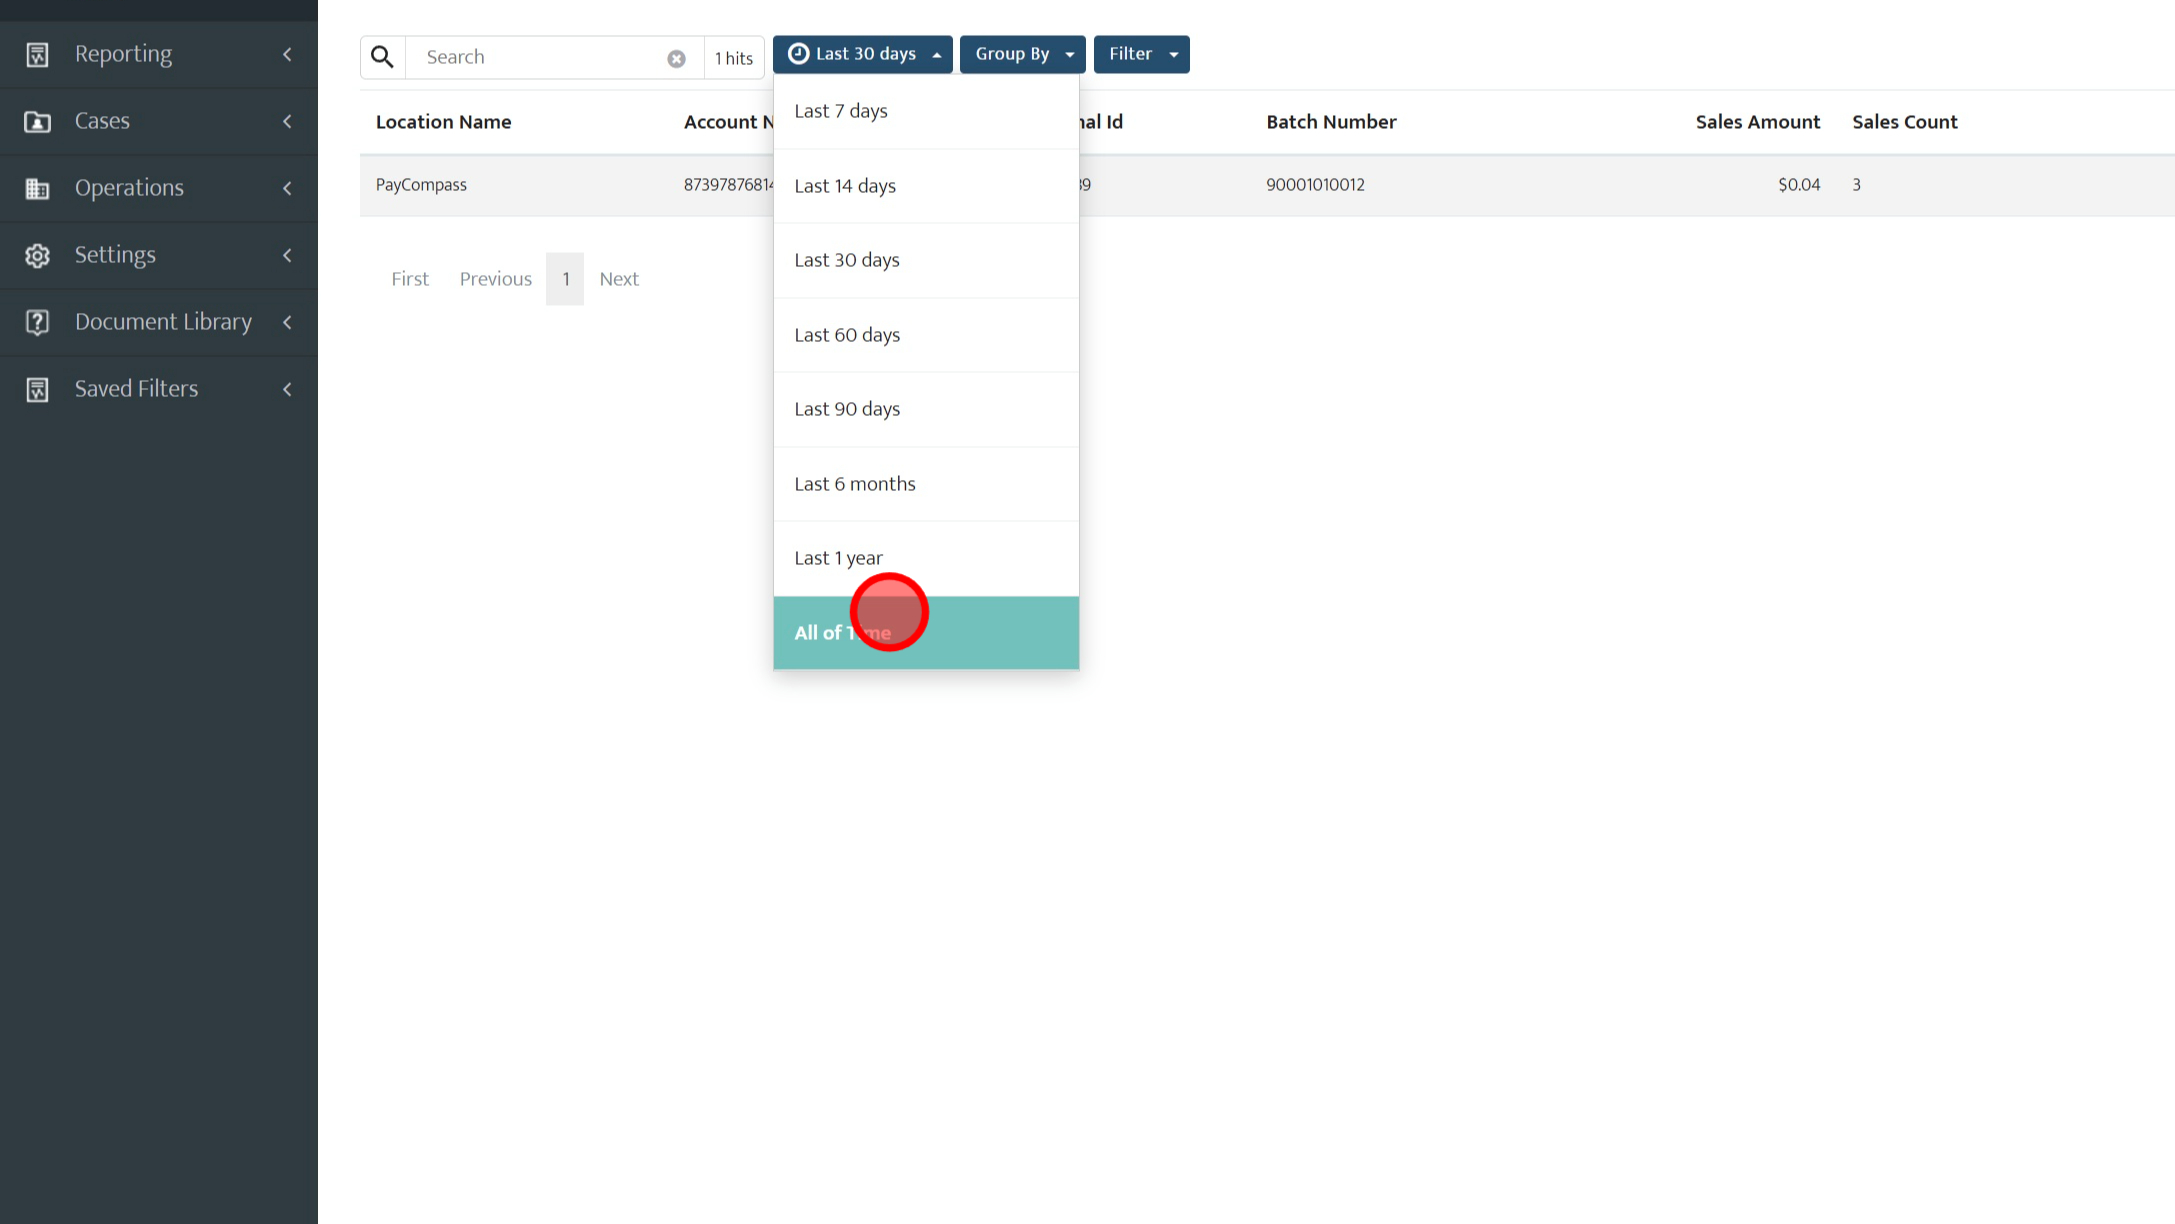
Step 9: Click 'All of Time'. The 30 days will only show reporting from the last 30 days. Changing it to all of time shows the entire lifetime reporting for the account.
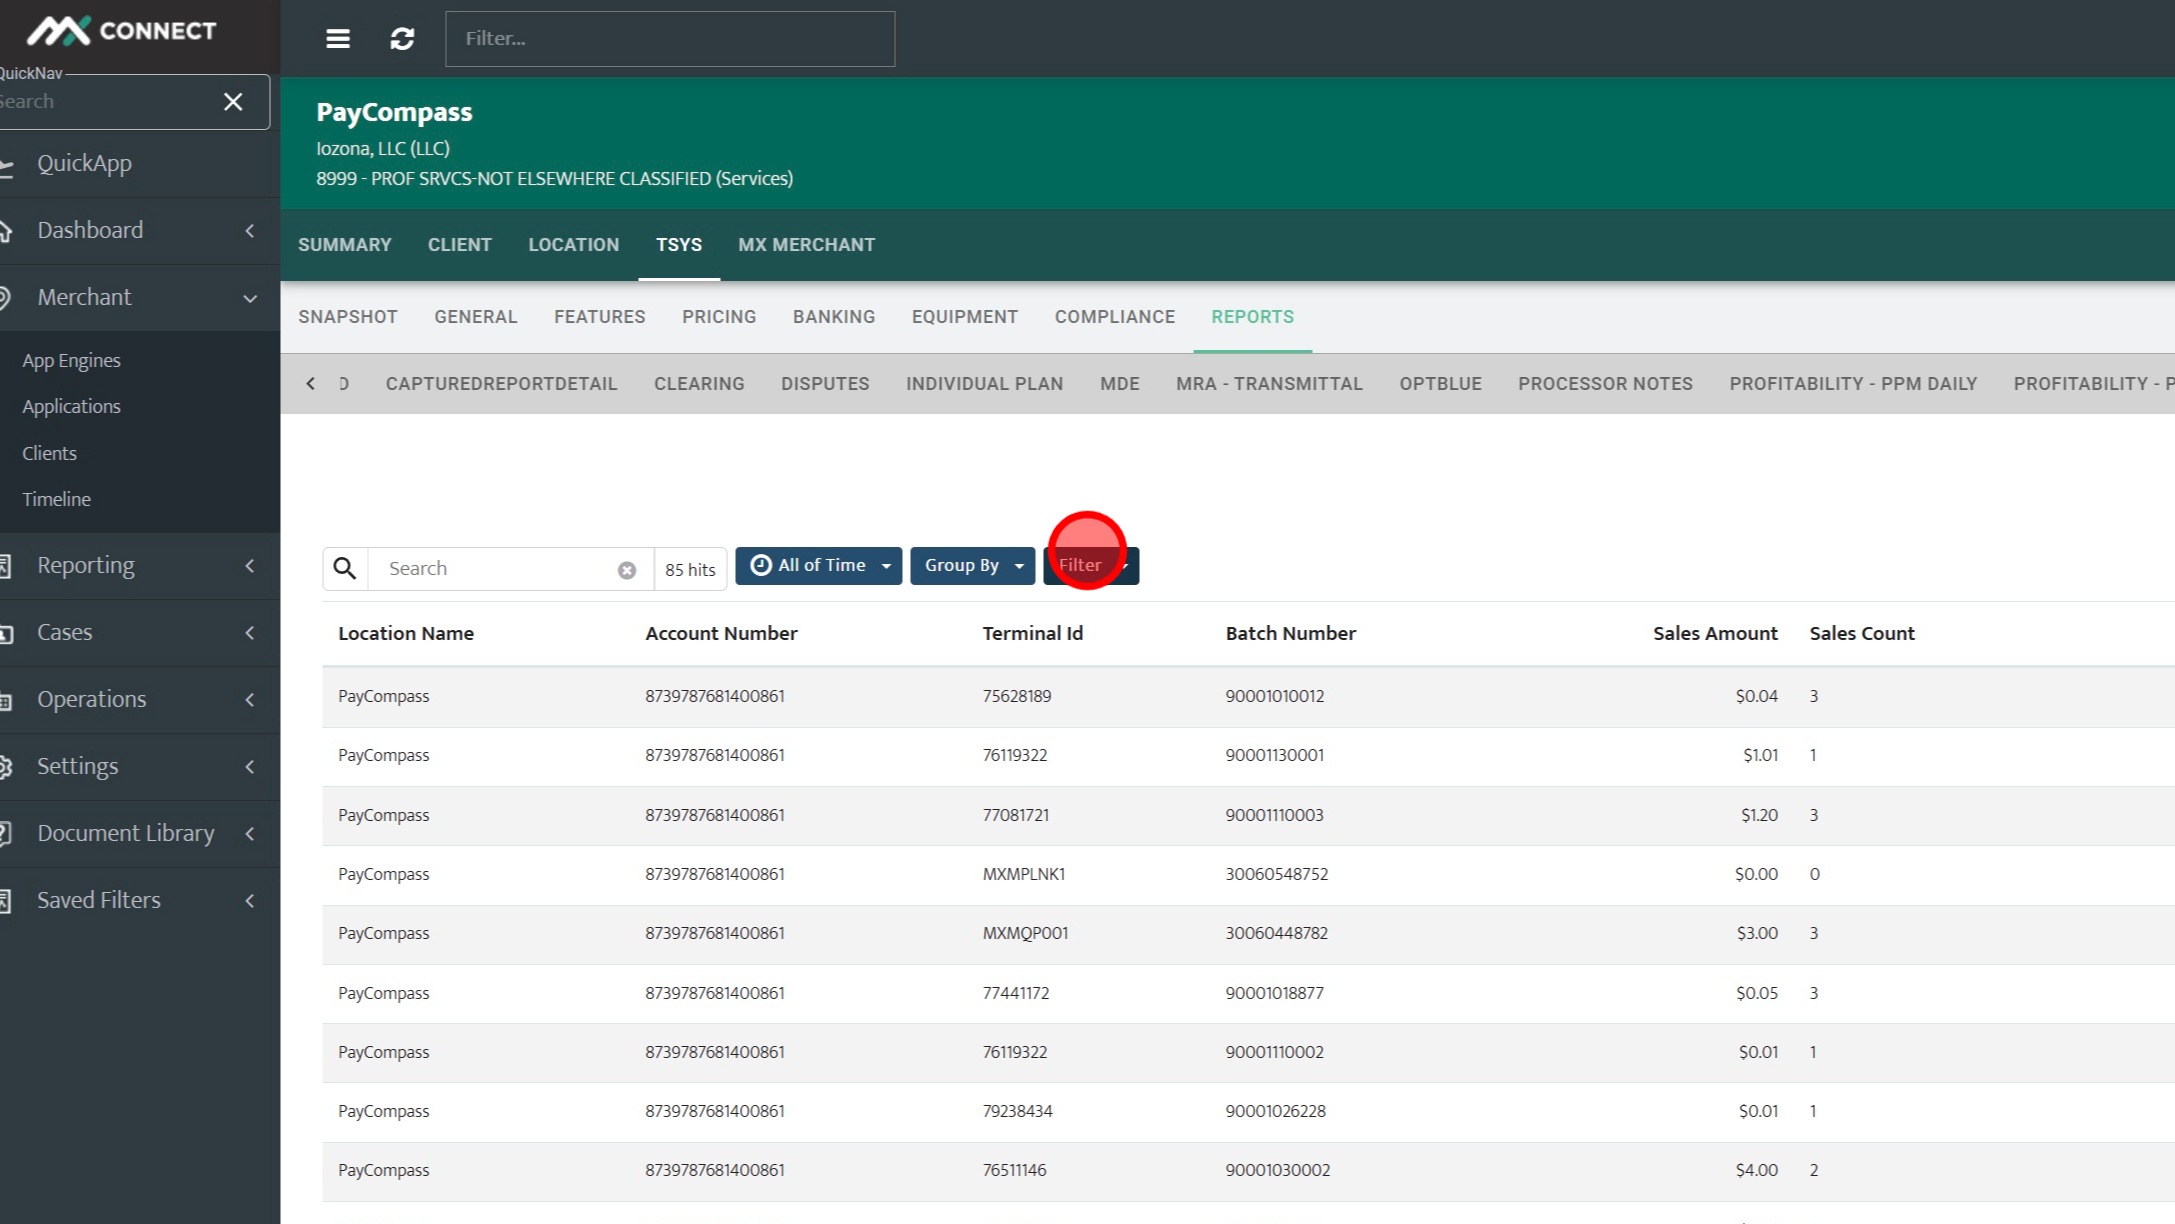
Step 10: Click "Filter" text
Step 11: Click "Date"
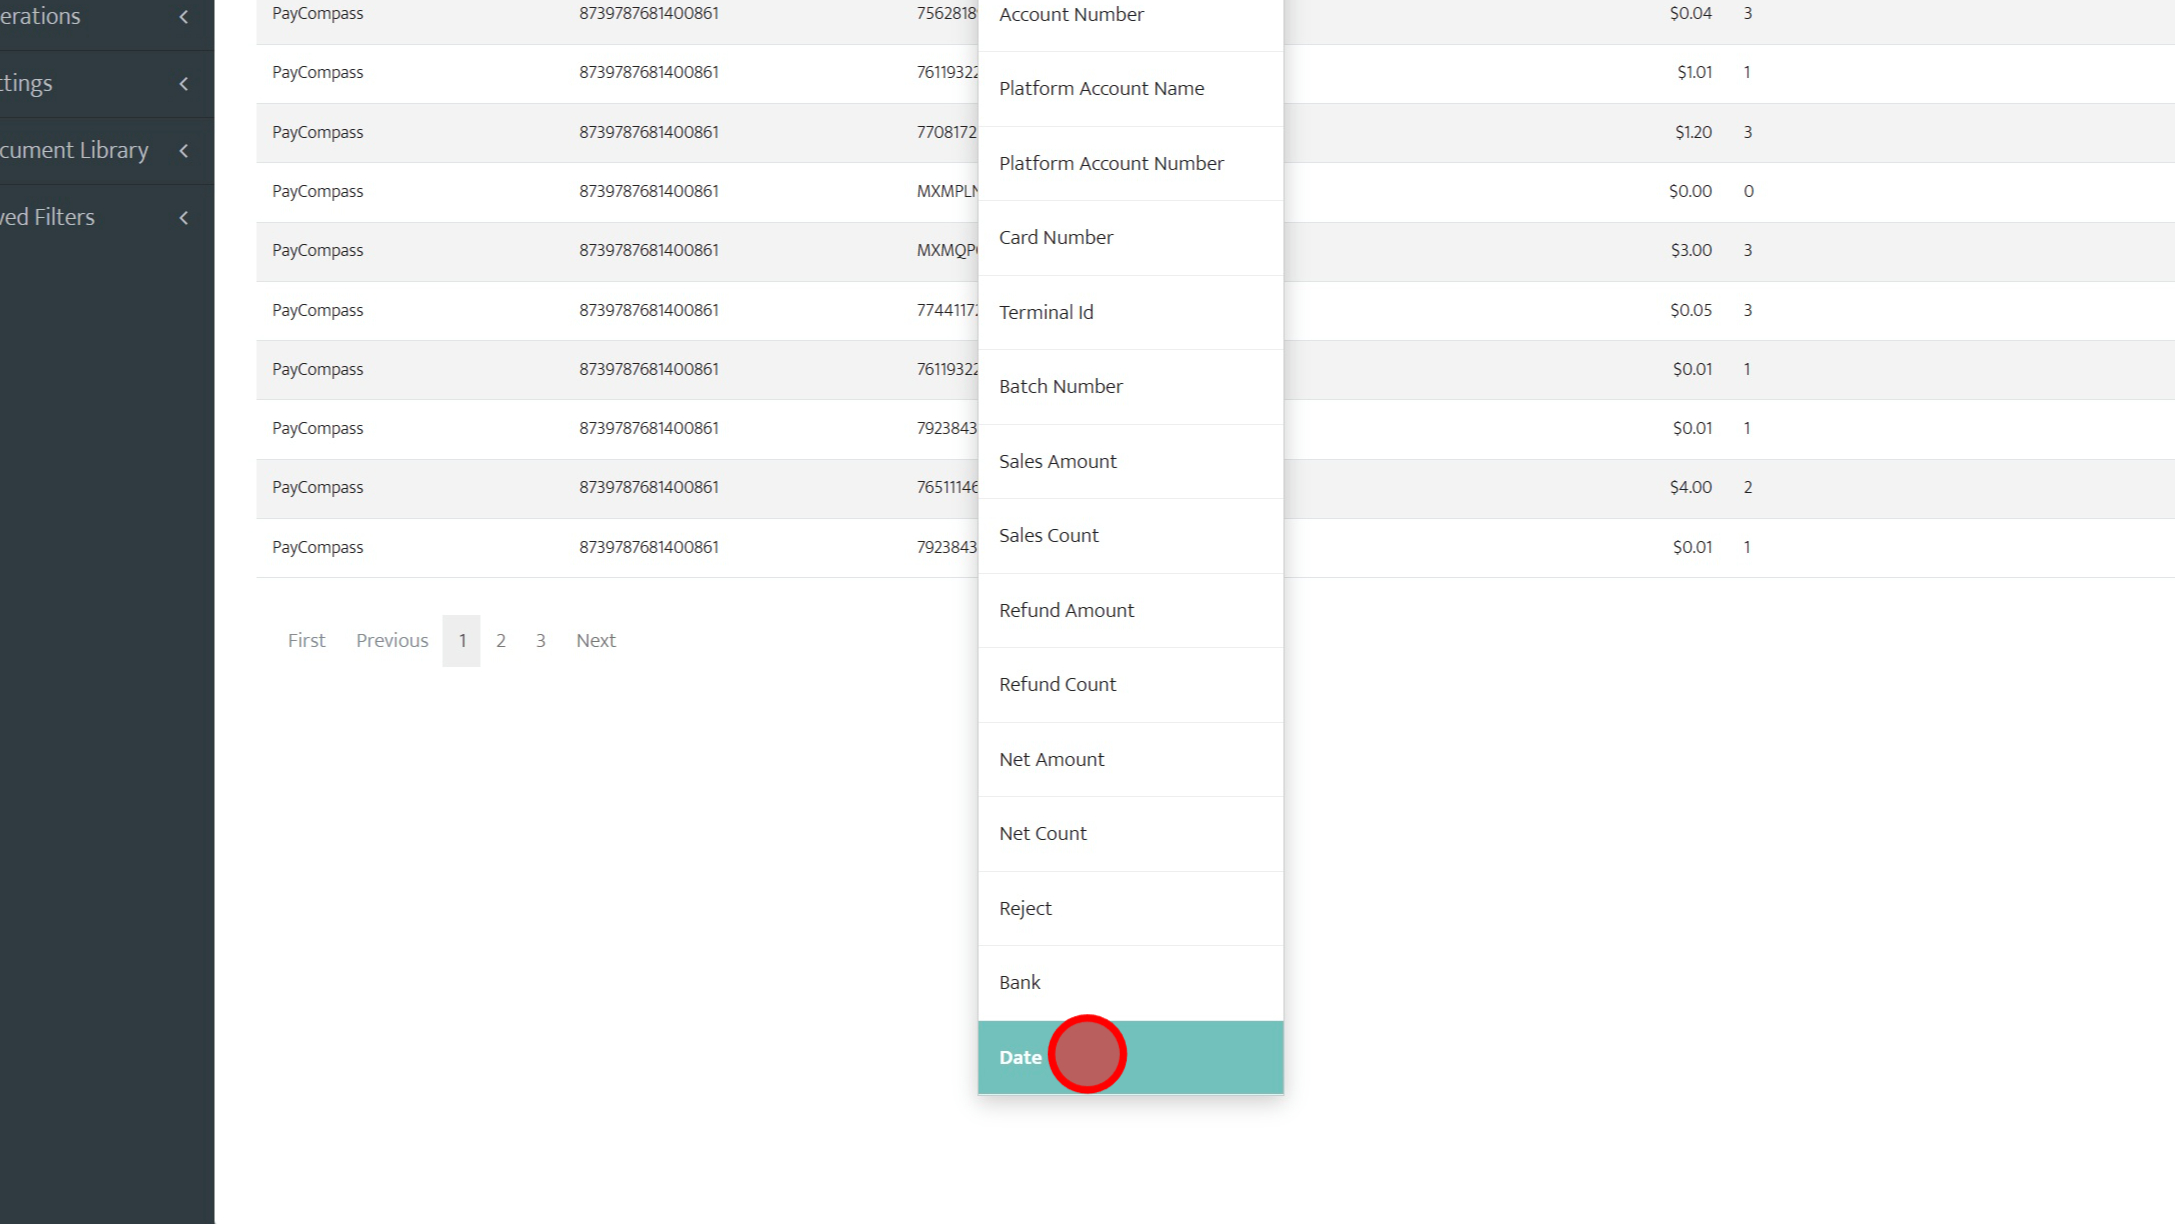
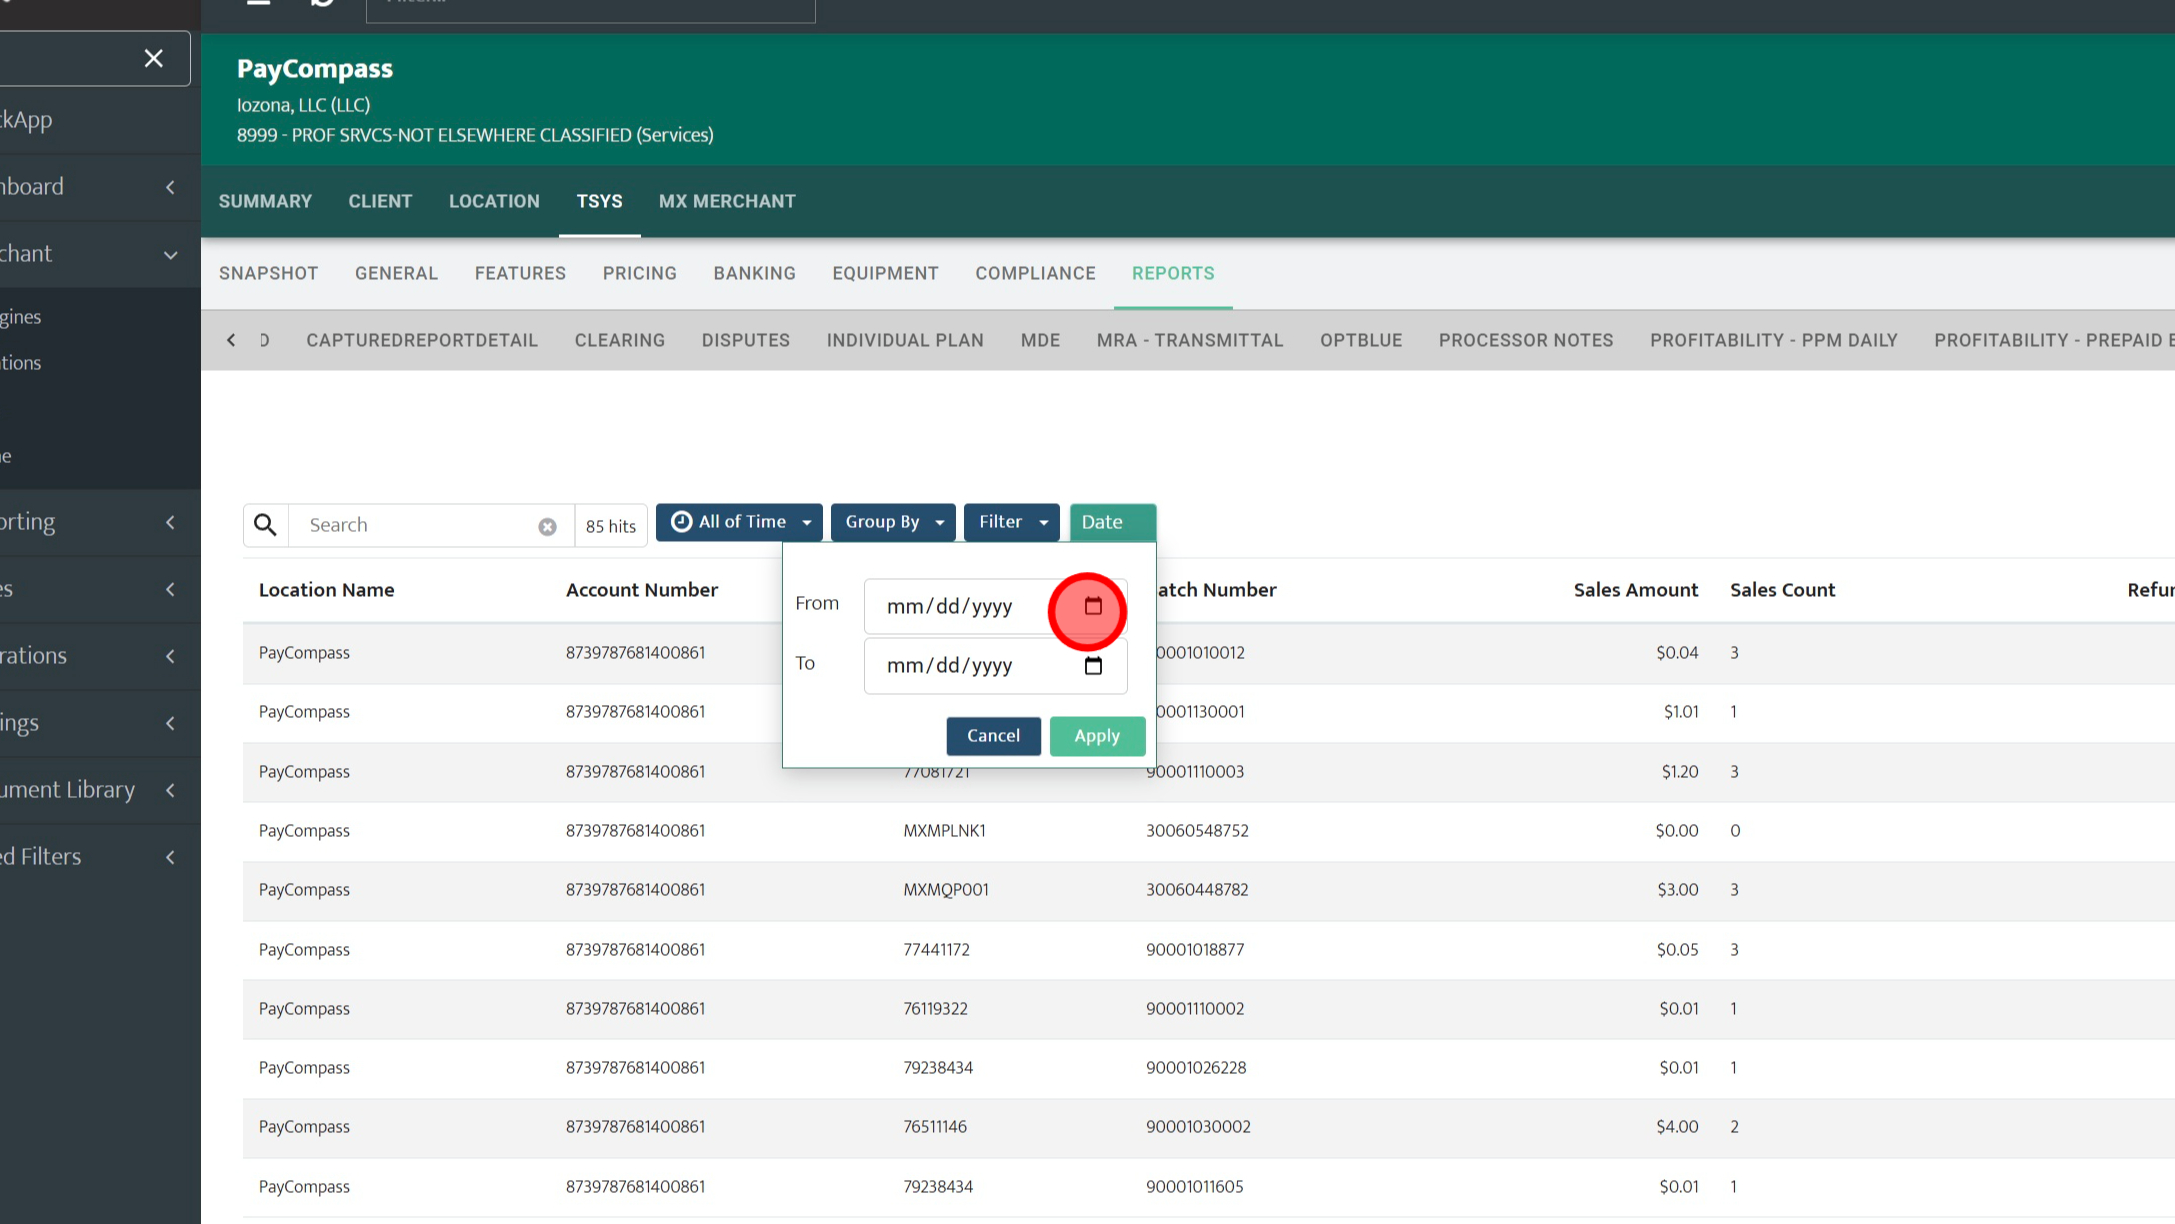
Step 12: Choose the starting date for the range you would like to see. In this example, we want to see reporting for all of December 2025 so the starting date will be 12/01/2025.
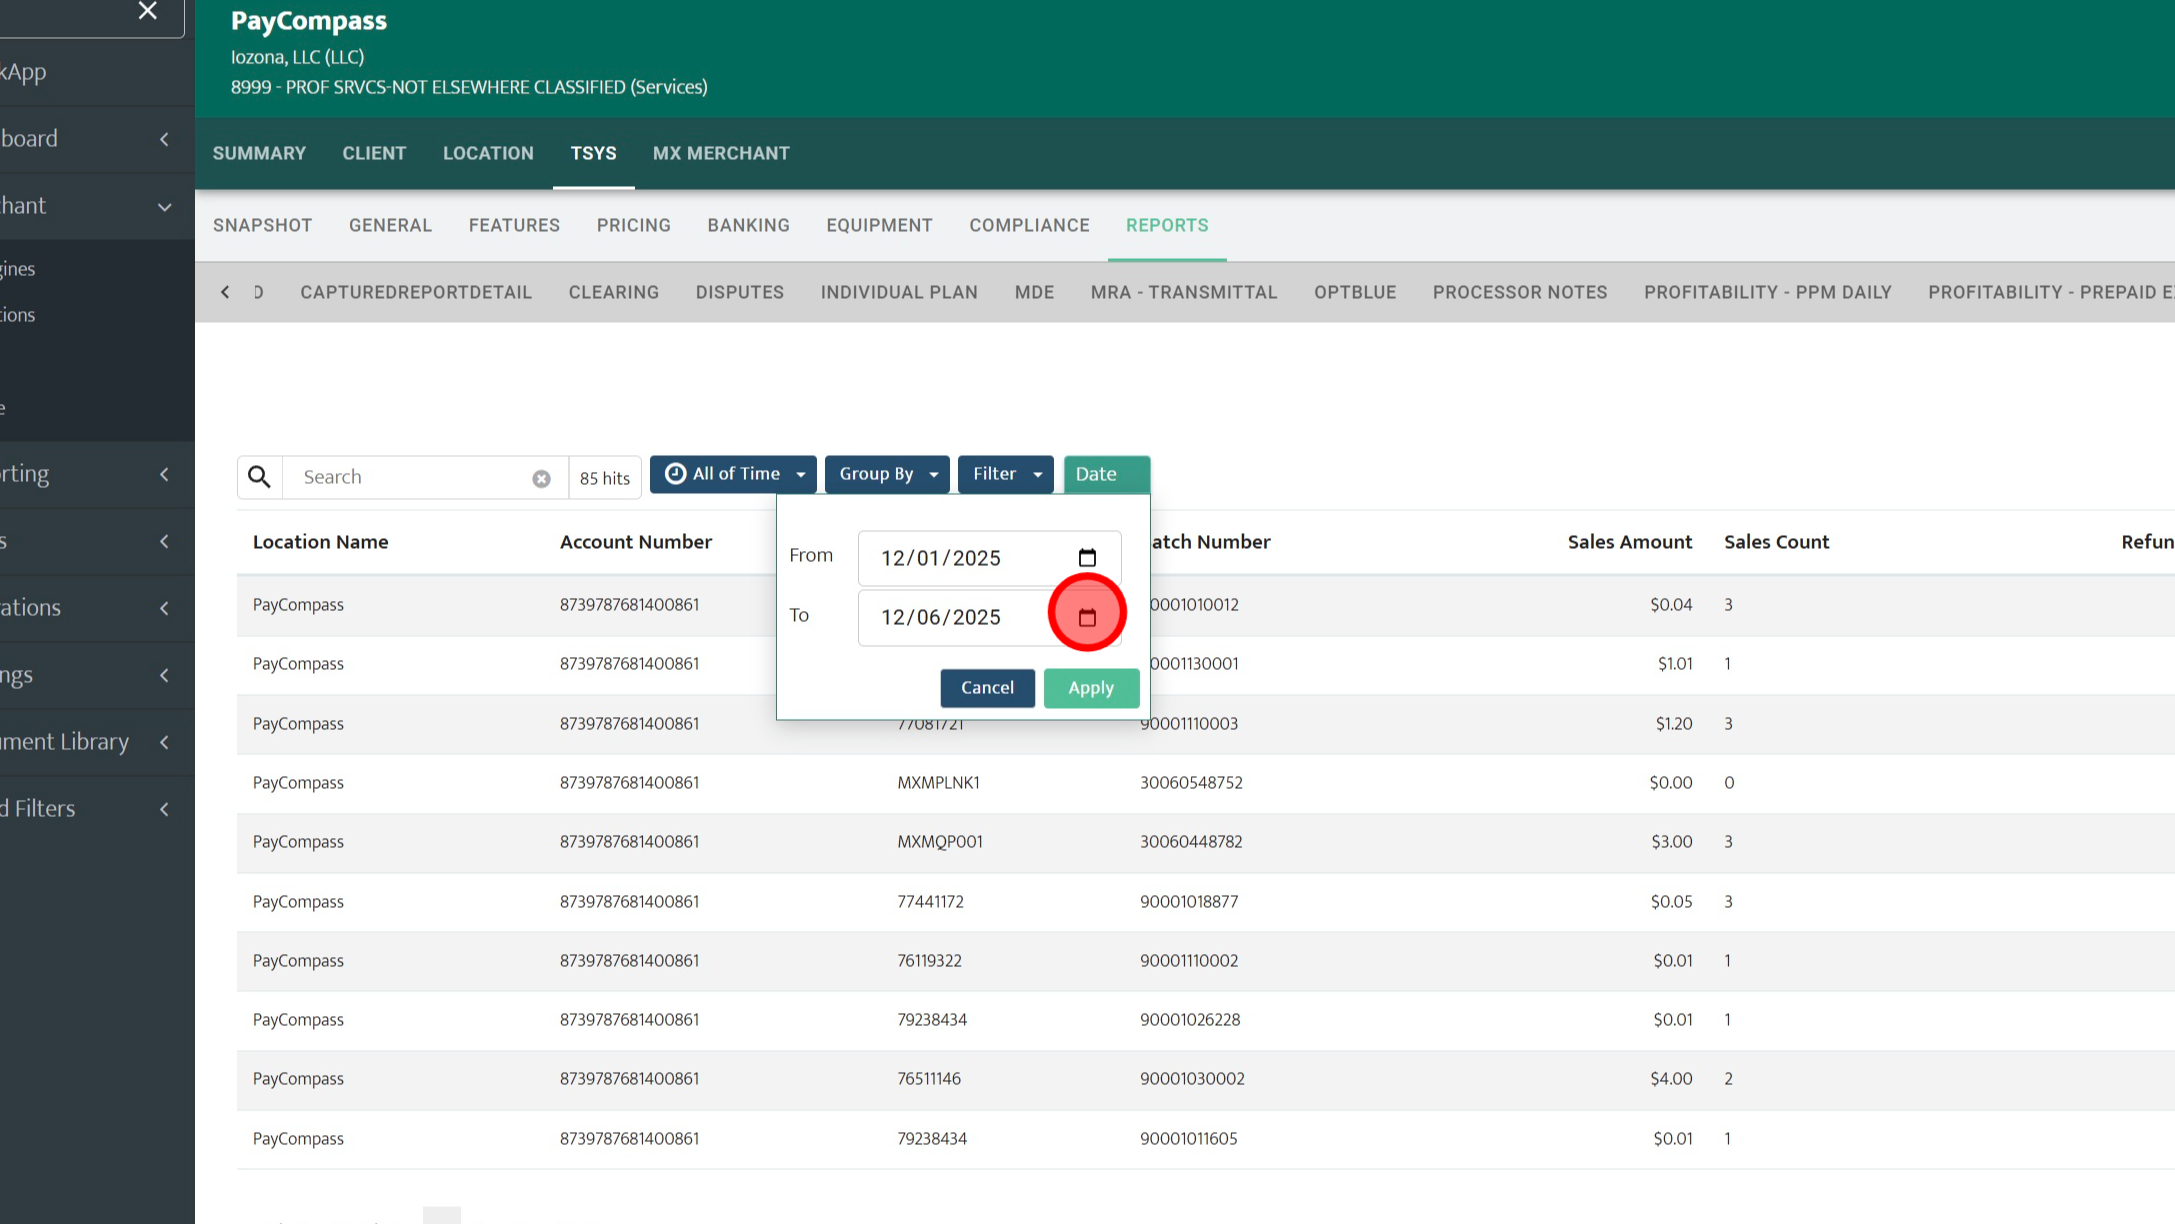
Step 13: Then you will choose the end date for the range you would like to see. In this example, we want to see reporting for all of December 2025 so the starting date will be 12/31/2025.
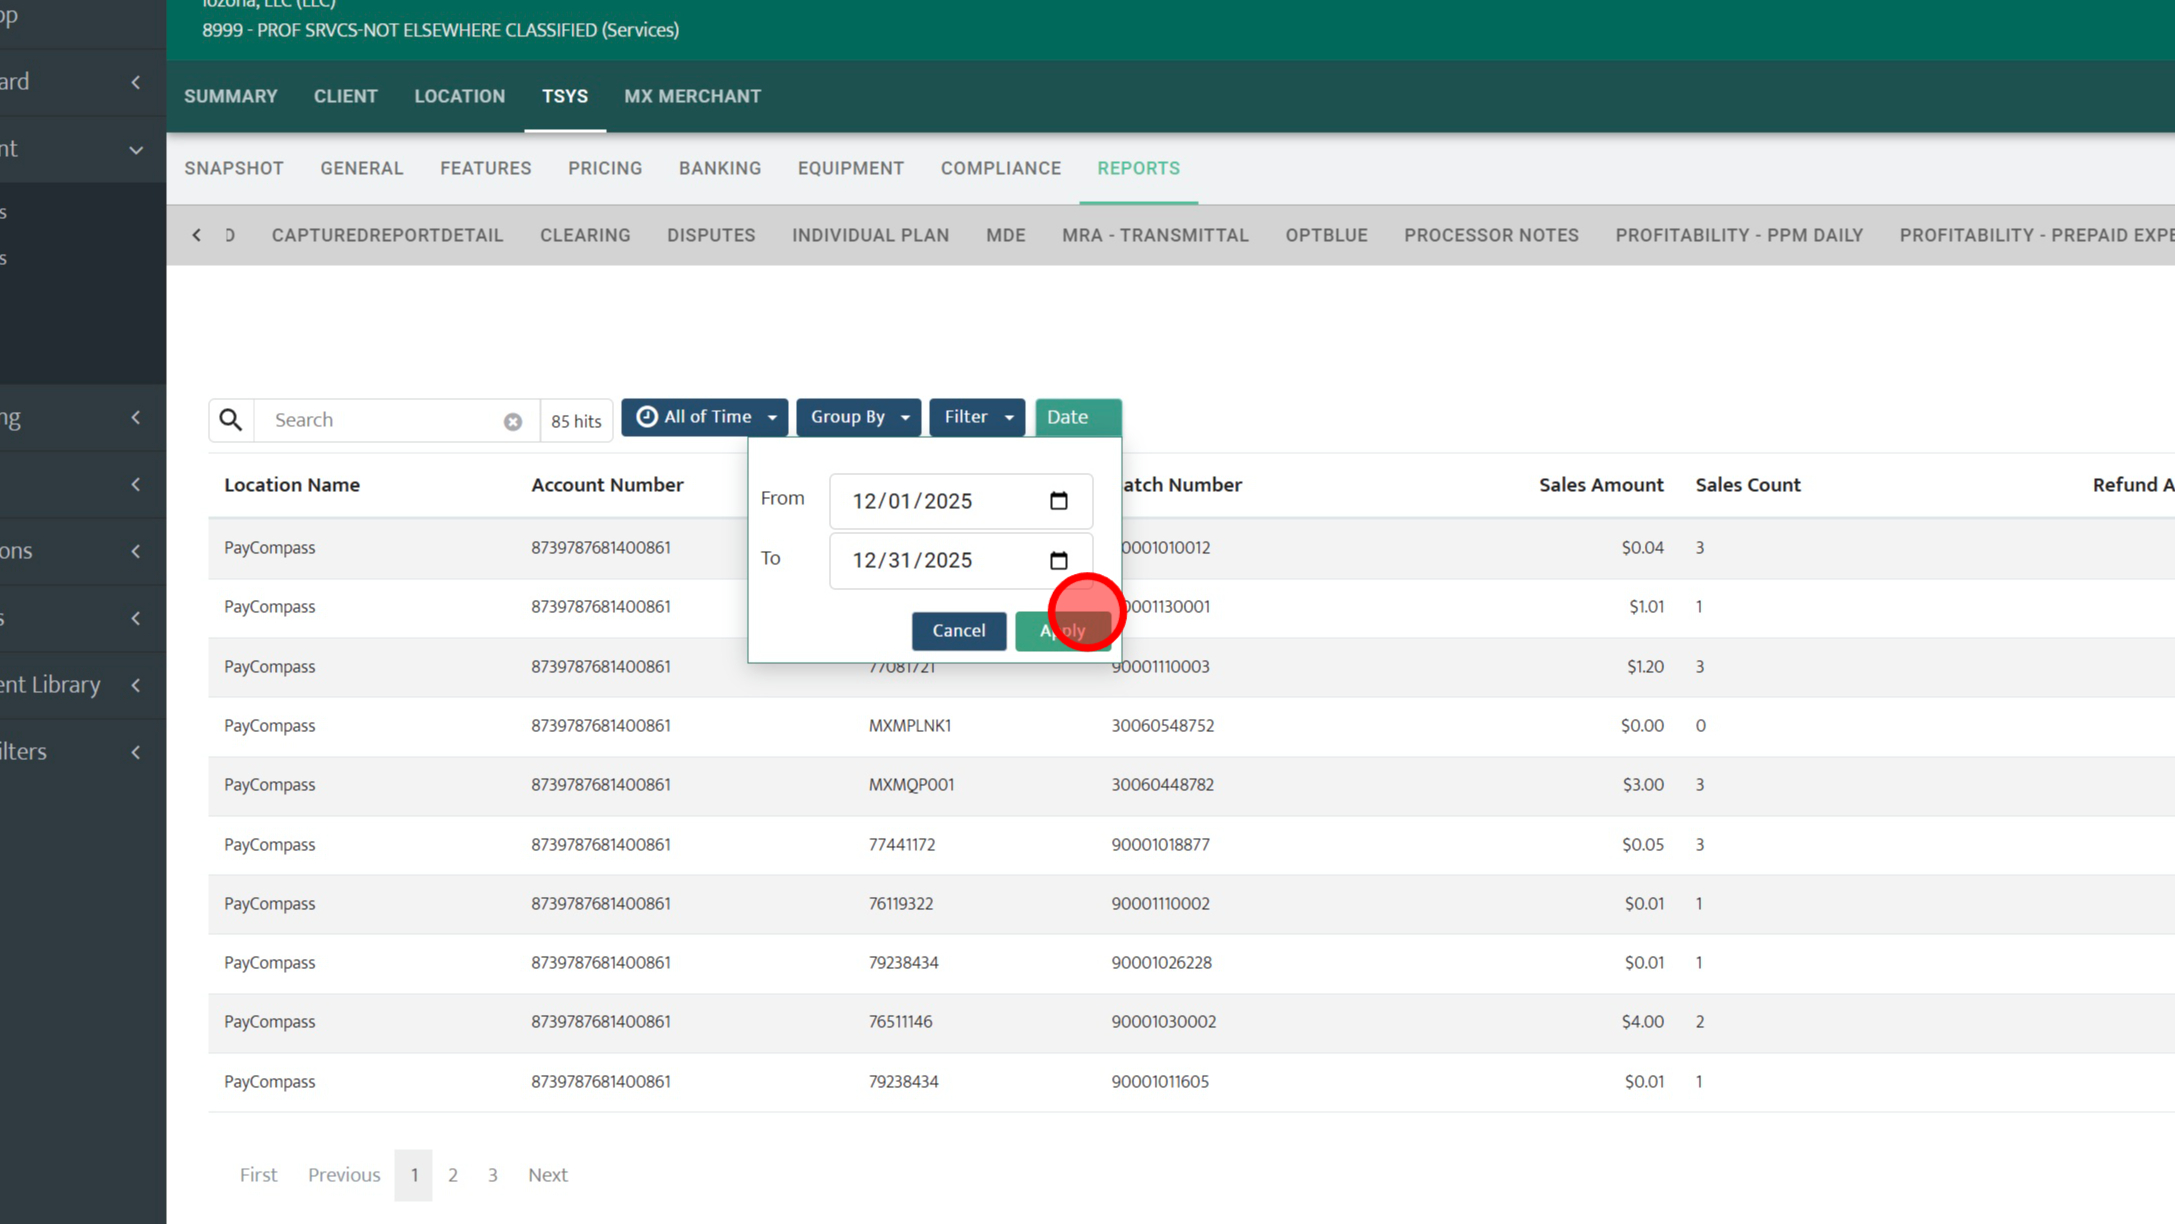
Step 14: Click "Apply"
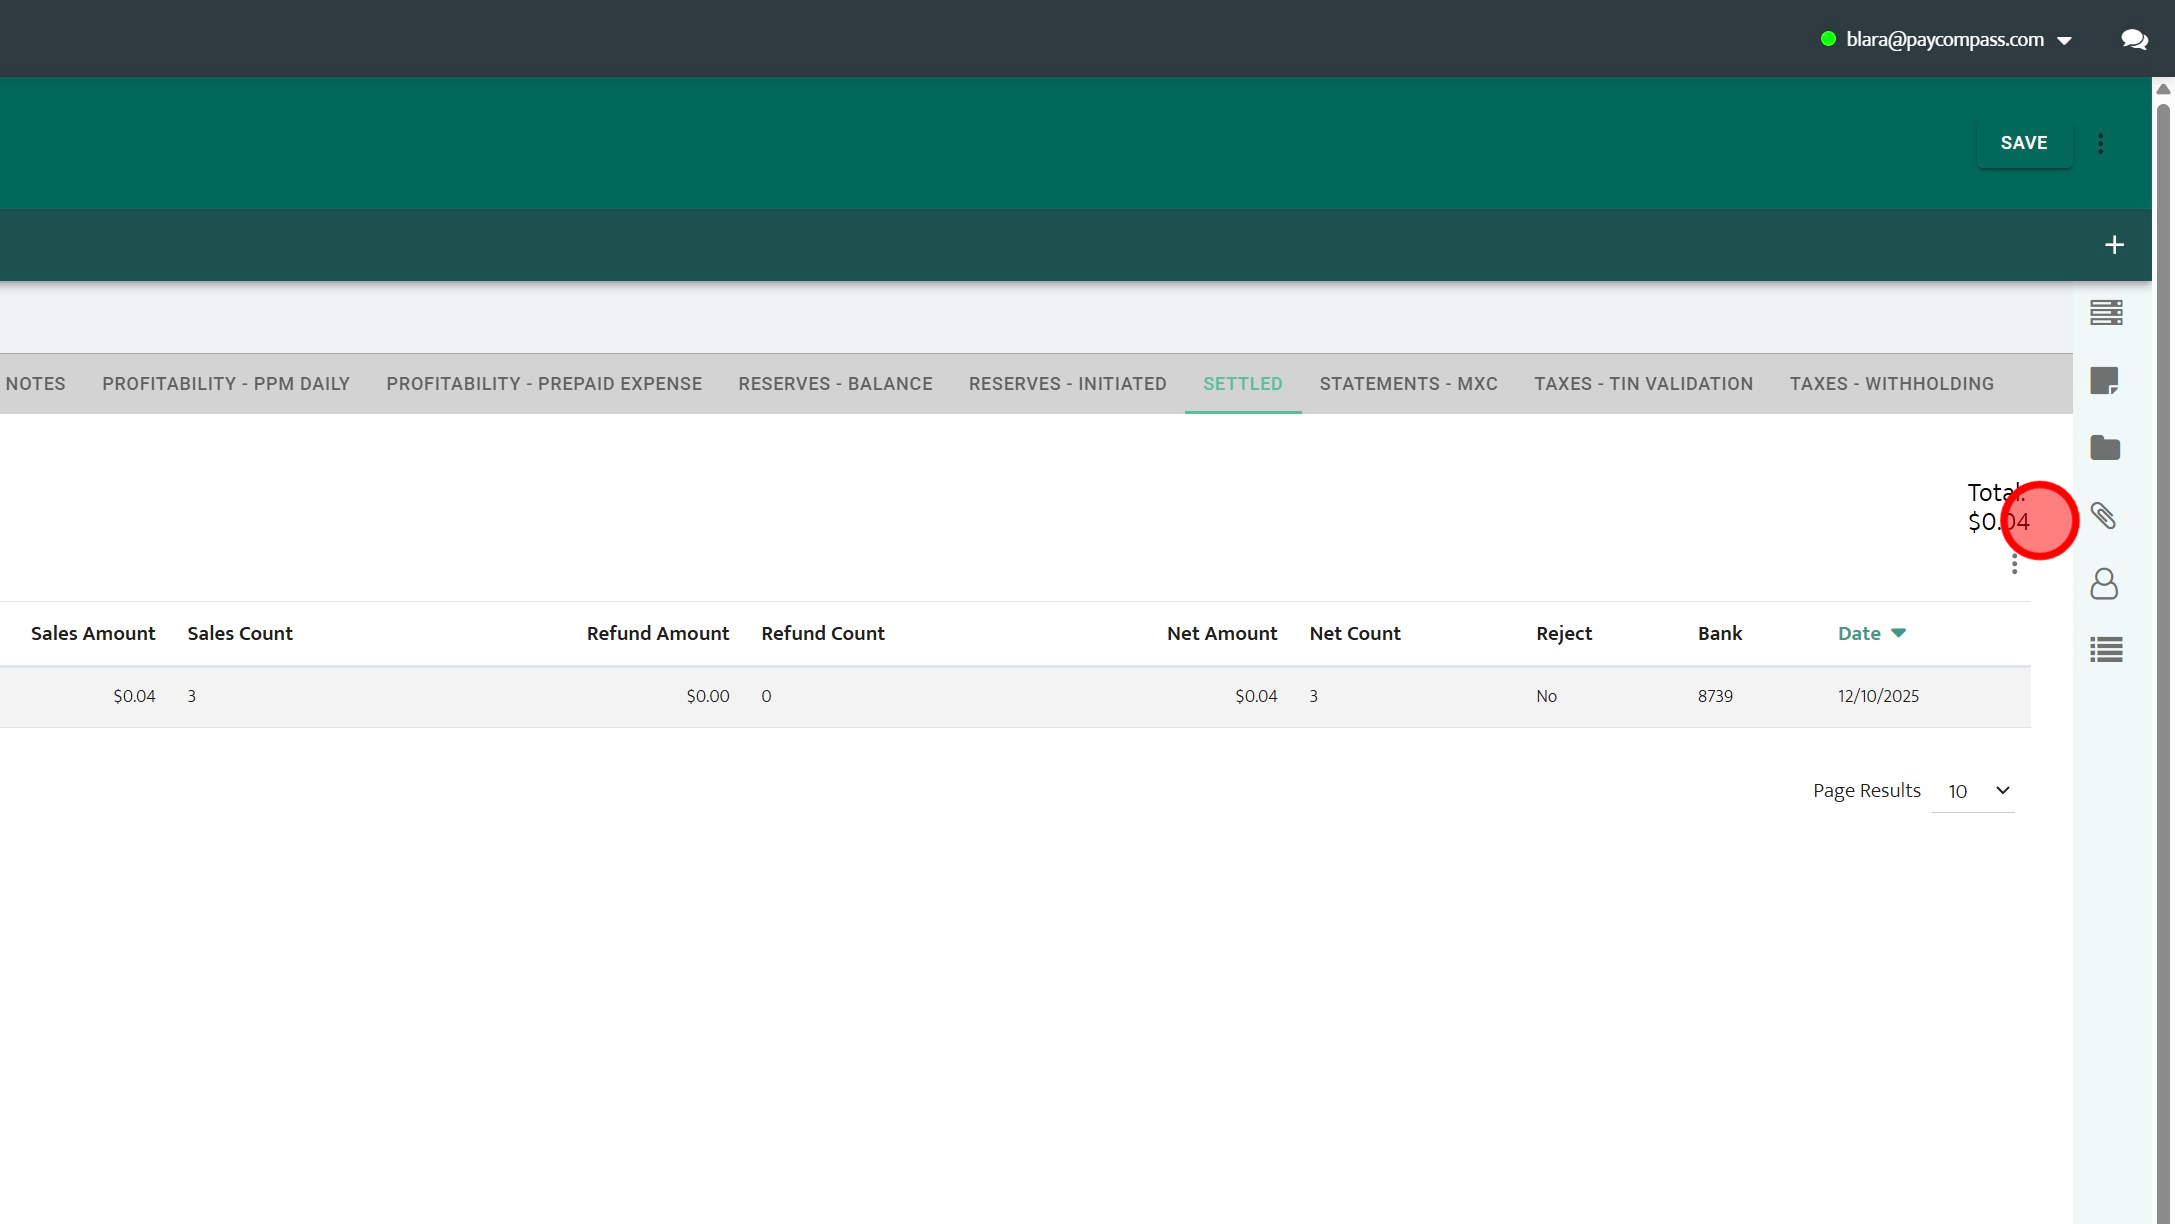
Step 15: Then in the top right you can see a total. That will be the total volume for the merchant for the specified time range.