Part 1
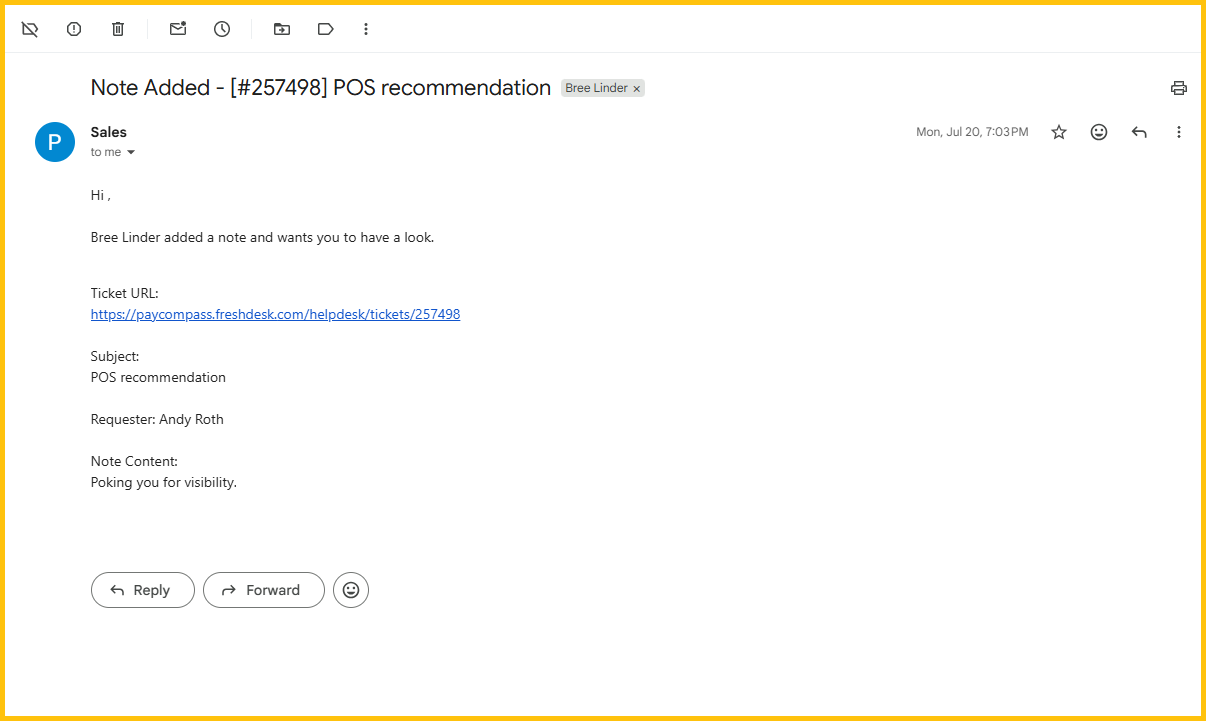
- Options in the top navigation include: Reply, Note (for private notes with team members), Forward, and Close.
- Tags: Adding a tag to a ticket helps to make it searchable, if required.
- Type: This defines the type of ticket that was received. Options in the dropdown menu include: Question, Incident, Configuration, Maintenance, and New Order.
- Status: Statuses include Open, Pending, Resolved, Closed, Waiting on Agent, and Waiting on Third Party
- Priority: Options include Low, Medium, High, and Urgent
- Group: This refers to the department that the ticket has been assigned to. Options include: Compensation, Concierge, Escalation, Finance, Genie, ISV, IT, Logistics, Marketing, Payroll, Potential Merchant, Risk Control, Sales, Support, Support Notifications, and Travel.
- Agent: This refers to the team member that has been assigned the ticket and is currently working on resolving the ticket.
Part 2
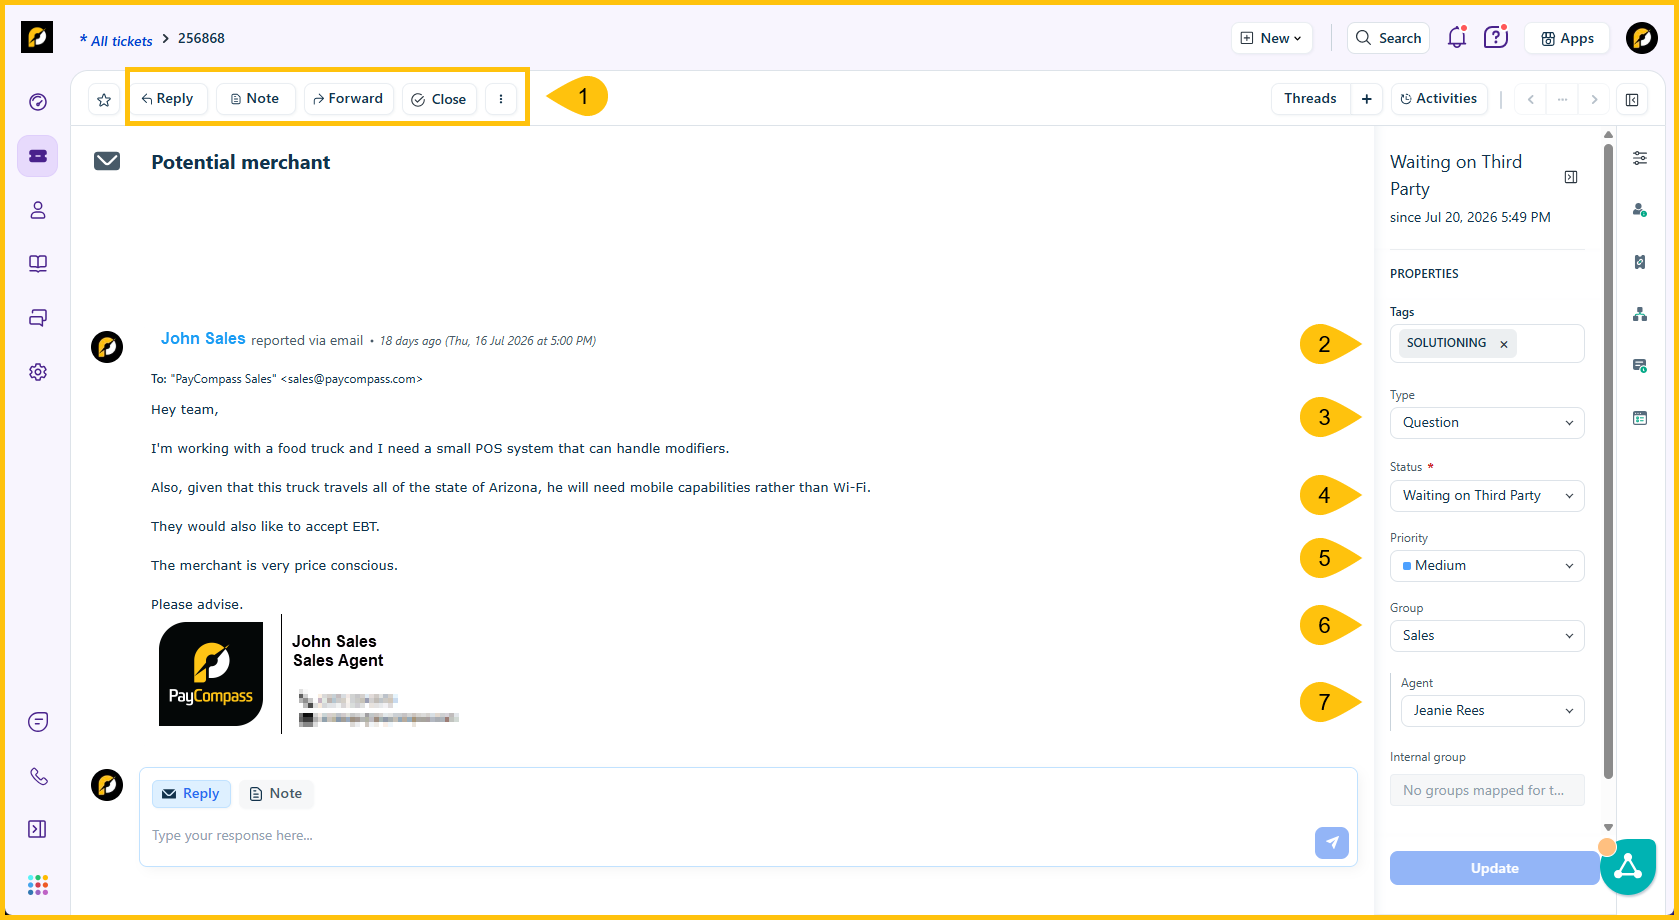
Clicking on the three dot menu provides options outside of the four listed in the top navigation. Options within the menu include:
- Execute scenarios: This allows team members to see recommendations with responses.
- Merge: Used to merge the current ticket with another existing ticket from the same sender
- Convert to Forum Topic: This feature is not being utilized by PayCompass currently.
- Log time: Allows team members to log the time of the ticket
- Edit ticket details
- Spam
- Delete
Part 3: Understanding the Difference Between a Reply and a Note
Use "Reply" when you can provide a complete and accurate response to the sales agent or merchant with confidence. Once the recipient confirms they have received the information and have no additional questions, the ticket can be resolved and closed.
Use "Note" for internal communication with team members when assistance is needed to formulate an accurate response or to address questions that require additional expertise or clarification.
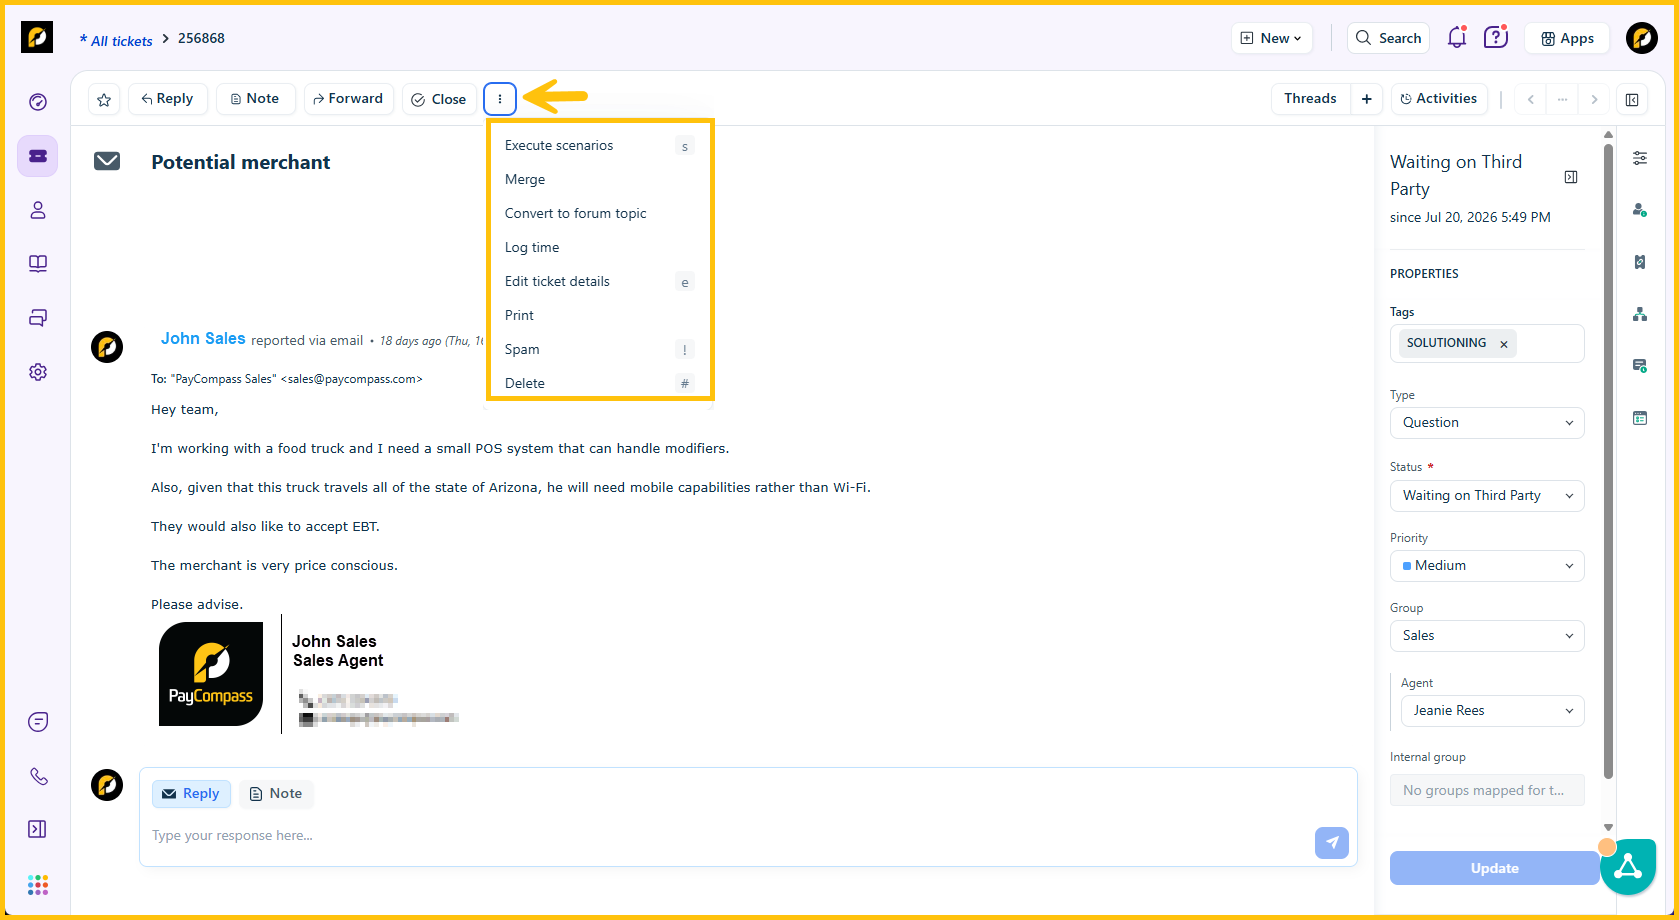
In the example below, the Sales Support Specialist sends a private note to a team member regarding questions related to the sales agent's inquiry.
To create a note, the Specialist selects Note, enters the first few characters of the team member's name, and then selects the appropriate recipient from the populated list before composing the message. Notes can be sent to an individual, multiple team members, or an entire department by entering the corresponding names or department.
Pay close attention to the box and arrow shown to the right of the image, as they confirm that the message is being sent as a private note rather than a response to the sales agent.
After completing the message, the Specialist clicks Add Note in the lower-right corner. This sends an email notification containing a link to the ticket, allowing the recipient to review the request and respond directly within the note thread.
If needed, the recipient can add additional team members to the note after opening the ticket through the email link provided in the notification.
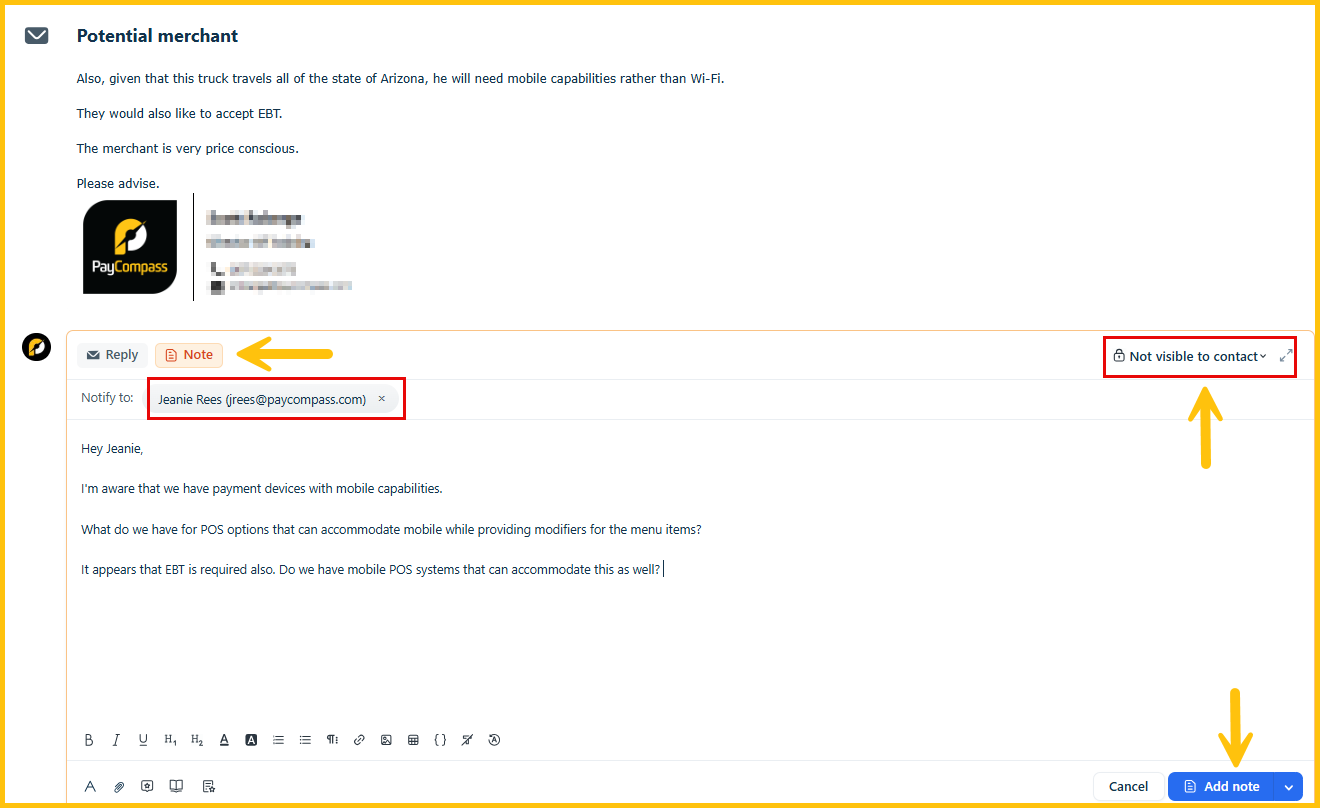
Below is an example of an email notification to a recipient who has been tagged on a ticket. Take note of the link that will take the recipient directly to the ticket within Freshdesk.